Monthly Archive May 26, 2025

Bydante

instructional skills workshop

The Instructional Skills Workshop (ISW) is a comprehensive, interactive program designed to enhance teaching effectiveness by fostering student-centered learning and instructional excellence in educational settings.

1.1 Definition and Overview

The Instructional Skills Workshop (ISW) is a comprehensive, interactive program designed to enhance teaching effectiveness by fostering student-centered learning and instructional excellence in educational settings. It equips educators with practical skills, promotes reflective practice, and encourages collaboration among participants. The workshop emphasizes evidence-based teaching strategies, creating a supportive environment for instructors to refine their teaching methods and improve student outcomes effectively.

1.2 Importance in Educational Development

The Instructional Skills Workshop (ISW) plays a vital role in educational development by enhancing teaching effectiveness and fostering student-centered learning. It equips educators with practical skills to improve instructional delivery, promote active learning, and create inclusive environments. By strengthening teaching capacities, the ISW contributes to better educational outcomes, empowering instructors to inspire and engage students more effectively in diverse settings.

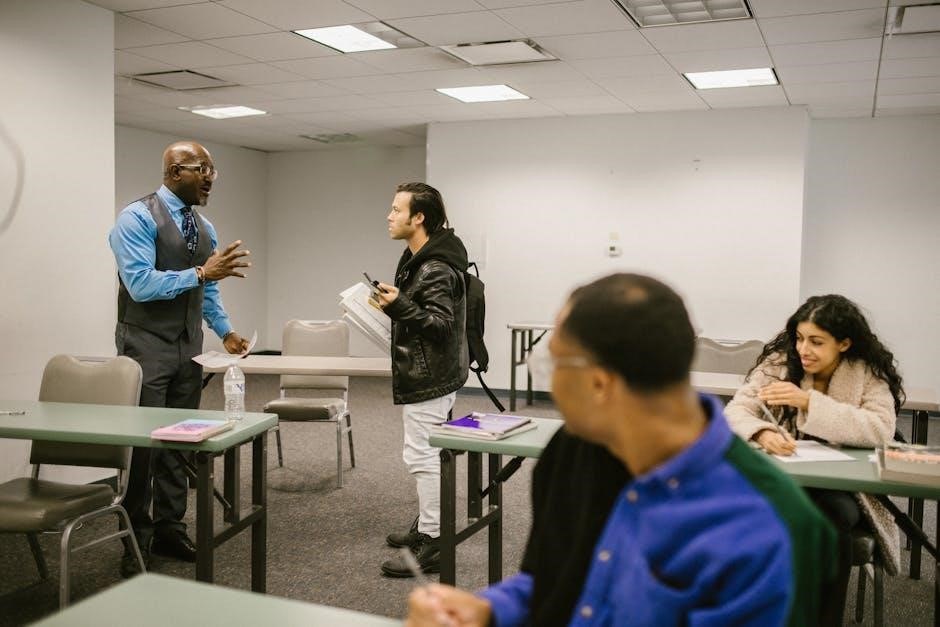
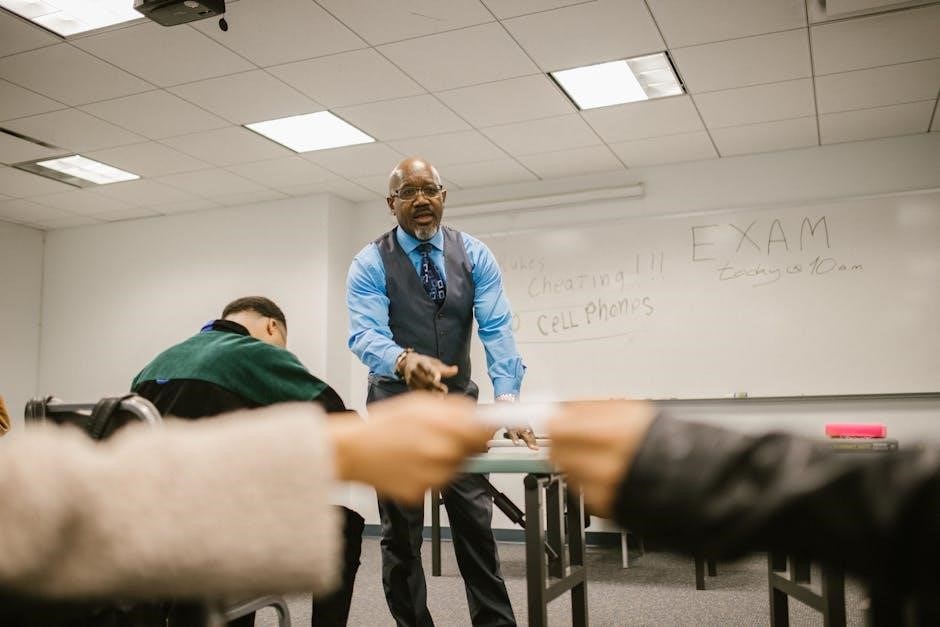
Benefits of Participating in an ISW

Participating in an ISW enhances teaching skills, improves instructional methods, and fosters professional growth, empowering educators to create engaging and effective learning environments for their students.

2.1 Enhanced Teaching Effectiveness

The ISW focuses on practical skills to improve teaching effectiveness, equipping educators with strategies to engage students, design impactful lessons, and use formative assessments. Participants gain confidence in delivering instruction, fostering active learning, and creating inclusive environments, ultimately enhancing student outcomes and educational experiences.

2.2 Improved Student Engagement

The ISW equips educators with strategies to boost student engagement through active learning techniques, formative assessments, and inclusive practices. These methods encourage participation, motivation, and deeper understanding, fostering a dynamic and interactive learning environment that promotes academic success and collaboration among students.

2.3 Building a Community of Educators

The ISW fosters collaboration and peer support, creating a supportive environment where educators share experiences, exchange ideas, and learn from one another. By encouraging reflective practice and shared goals, the workshop helps build a network of professionals committed to continuous improvement and collective growth in education. This sense of community enhances both individual and institutional development.

Essential Instructional Skills Taught in the Workshop

The ISW equips educators with core teaching skills, including lesson planning, active learning techniques, and strategies to promote critical thinking and create inclusive learning environments.

3.1 Lesson Planning and Design

The ISW emphasizes effective lesson planning, teaching participants to set clear objectives, organize content, and align activities with assessments. Educators learn to design structured, engaging lessons that promote active learning and cater to diverse student needs, ensuring a cohesive and purposeful educational experience. Practical strategies and tools are provided to enhance instructional design skills.

3.2 Active Learning Techniques

The ISW introduces educators to active learning techniques, such as group discussions, think-pair-share, and problem-solving activities. These methods encourage student participation, critical thinking, and collaboration. Educators learn to design engaging, interactive lessons that promote deeper understanding and retention of material. Techniques also include hands-on experiments, role-playing, and real-world applications to enhance student engagement and practical learning experiences.

3.3 Promoting Critical Thinking

The ISW emphasizes strategies to foster critical thinking, such as interactive discussions, reflective exercises, and problem-solving tasks. Educators learn to design lessons that encourage students to analyze, evaluate, and synthesize information. Techniques include open-ended questions, case studies, and collaborative projects, helping students develop analytical skills and apply knowledge to real-world scenarios effectively.

Structure of a Typical ISW

A typical ISW is a 3-day intensive program combining hands-on activities, group discussions, and practical teaching sessions. It includes pre-workshop preparation, interactive sessions, and post-workshop support to ensure sustained development.

4.1 Pre-Workshop Preparation

Pre-workshop preparation involves setting clear learning goals, reviewing provided materials, and completing preliminary readings; Participants are encouraged to reflect on their current teaching practices and identify areas for improvement. This phase ensures a focused and productive experience during the workshop, allowing educators to maximize their learning and engagement.

4.2 Hands-On Activities and Sessions

Hands-on activities and sessions are central to the ISW, offering practical opportunities for educators to apply new teaching strategies. These include microteaching exercises, group discussions, and interactive simulations. Participants engage in active learning, receiving immediate feedback and refining their techniques. These dynamic sessions foster collaboration and experimentation, ensuring educators gain confidence and competence in their instructional practices;

4.3 Post-Workshop Support and Resources

Post-workshop support ensures educators continue to grow beyond the initial training. Resources include access to instructional materials, online communities, and follow-up sessions. Participants can review session recordings and engage in peer discussions. Feedback mechanisms and guided reflection tools help sustain improvement. These resources empower educators to apply workshop learnings effectively in their teaching environments, fostering long-term professional development and instructional excellence.

Role of Feedback in the ISW

Feedback is a cornerstone of the ISW, fostering growth and improvement. It provides educators with insights to refine their teaching techniques and enhance student engagement effectively.

5.1 Peer Feedback and Collaboration

Peer feedback in the ISW fosters a collaborative environment where educators share constructive insights, refining their teaching techniques. This mutual exchange enhances teaching effectiveness and student engagement, allowing participants to learn from each other’s experiences, gain diverse perspectives, identify strengths and areas for improvement and implementation, leading to continuous professional development and educational growth.

5.2 Instructor Feedback and Guidance

Instructor feedback in the ISW provides personalized guidance, helping participants refine their teaching strategies. Experienced educators offer constructive insights, fostering improvement in lesson delivery and student engagement. This tailored support enables participants to address specific challenges, adapt techniques, and enhance their instructional effectiveness, ensuring a meaningful and impactful learning experience throughout the workshop.

Teaching Strategies and Techniques

The ISW emphasizes evidence-based teaching strategies, focusing on student-centered methods, active learning, and real-world applications to enhance engagement and deepen understanding in diverse educational settings.

6.1 Student-Centered Teaching Methods

Student-centered teaching methods focus on interactive and collaborative learning, empowering students to take an active role in their education. These approaches encourage critical thinking, problem-solving, and real-world application of knowledge, fostering deeper engagement and personalized learning experiences. ISW emphasizes these techniques to create dynamic and inclusive classrooms that cater to diverse student needs and preferences.

6.2 Incorporating Real-World Applications

Incorporating real-world applications into teaching helps students connect academic concepts to practical scenarios. The ISW emphasizes this approach, providing educators with strategies to make learning relevant and engaging. Techniques such as case studies, problem-solving exercises, and real-life projects enable students to apply knowledge effectively, enhancing their understanding and preparing them for future challenges.

Assessing Student Learning in the Workshop

Assessment in the ISW involves formative and summative methods to evaluate student understanding. Tools like quizzes, group projects, and presentations help measure learning outcomes effectively.

7.1 Formative Assessment Techniques

Formative assessment in ISW involves ongoing evaluations to monitor student progress. Techniques include exit tickets, think-pair-share, and quizzes, allowing instructors to adjust teaching strategies. Jay McTighe emphasizes quick strategies like exit tickets to gauge understanding. These methods provide immediate feedback, helping educators refine lessons and ensure students grasp key concepts effectively.

7.2 Tools for Measuring Learning Outcomes

Tools like quizzes, rubrics, and portfolios are used to measure learning outcomes. Digital quizzes provide immediate feedback, while rubrics ensure consistent assessment of assignments. Portfolios allow students to showcase progress over time, offering a comprehensive view of their development. These tools help educators align assessments with learning objectives and track student success effectively.

Creating an Inclusive Learning Environment

Fostering an inclusive environment involves promoting diversity, equity, and accessibility. Educators ensure all students feel valued and supported, creating a safe space for diverse perspectives and learning needs.

8.1 Promoting Diversity and Inclusion

Promoting diversity and inclusion is a cornerstone of the Instructional Skills Workshop. It fosters a welcoming environment where diverse perspectives thrive, ensuring equitable opportunities for all learners. By embracing cultural responsiveness and Universal Design for Learning, educators create spaces that value individual differences, enhancing engagement and collaboration among students from all backgrounds.

8.2 Addressing Different Learning Needs

The ISW emphasizes strategies to address diverse learning needs, ensuring inclusive instruction. Techniques include Universal Design for Learning, differentiated instruction, and incorporating assistive technologies. Educators learn to adapt content, pace, and delivery to accommodate varying abilities, prior knowledge, and learning styles, fostering an inclusive environment that maximizes accessibility and engagement for all students.

Technology Integration in ISW

Technology integration in ISW enhances teaching methods by incorporating educational tools and digital resources, fostering interactive and dynamic learning experiences, ensuring accessibility and engagement.

9.1 Using Educational Technology Tools

Educational technology tools are integral to ISW, enabling instructors to create engaging, interactive learning environments. Tools like interactive whiteboards, learning management systems, and multimedia resources enhance lesson delivery. These technologies support dynamic presentations, real-time assessments, and personalized learning experiences, fostering student engagement and understanding while promoting effective teaching practices;

9.2 Enhancing Engagement with Digital Resources

Digital resources such as videos, simulations, and interactive modules enhance engagement by making learning interactive and relevant. These tools allow instructors to present complex concepts in an accessible manner, encouraging active participation and deeper understanding. By integrating real-world applications, digital resources cater to diverse learning styles, fostering a more dynamic and inclusive educational experience for all students.

Reflection and Self-Assessment

Reflection and self-assessment are critical processes in instructional development, enabling educators to evaluate their teaching methods and identify areas for improvement, fostering professional growth and enhanced effectiveness.

10.1 Reflective Practice for Educators

Reflective practice involves intentional examination of teaching methods and outcomes, allowing educators to identify areas for improvement and fostering professional growth. It encourages a mindset of continuous learning, where instructors analyze their experiences and adapt strategies to enhance student engagement and understanding, supported by feedback and self-assessment.

10.2 Self-Assessment Techniques

Self-assessment techniques empower educators to evaluate their own teaching practices, fostering professional development and instructional improvement. These methods involve setting goals, reflecting on performance, and using tools like journals or rubrics to identify strengths and areas for growth, enabling educators to refine their skills and align their practices with educational objectives effectively.

Measuring the Effectiveness of ISW

Evaluating ISW effectiveness involves assessing participant learning outcomes, teaching improvements, and long-term impact through feedback, observation, and performance metrics to ensure program success and continuous enhancement.

11.1 Evaluating Workshop Impact

Evaluating the impact of ISW involves assessing participant learning outcomes, teaching improvements, and program effectiveness. Feedback from educators, formative assessments, and tools for measuring learning outcomes are used to determine the workshop’s success. This process ensures continuous improvement and alignment with educational goals, fostering better teaching practices and student engagement.

11.2 Long-Term Benefits for Educators

Participating in an ISW fosters long-term professional growth, enhancing educators’ ability to design effective lessons and engage students. The workshop encourages reflective practice, critical thinking, and continuous improvement, leading to sustained teaching excellence and a deeper commitment to student-centered learning. These skills and mindsets benefit educators throughout their careers, contributing to ongoing educational innovation and success.

The Instructional Skills Workshop (ISW) is a valuable program that enhances teaching effectiveness, promotes student-centered learning, and fosters educational innovation and professional growth for educators.

12.1 Summary of Key Takeaways

The ISW equips educators with essential instructional skills, fostering student-centered teaching, critical thinking, and effective lesson design. It emphasizes feedback, collaboration, and reflection, creating a supportive environment for professional growth and improved teaching practices, ultimately enhancing student learning outcomes and engagement.

12.2 Encouragement for Participation

Participating in an ISW is a transformative experience for educators, offering practical skills and strategies to enhance teaching effectiveness. It fosters a supportive community, encourages reflection, and provides tools to create engaging, student-centered learning environments. Educators leave empowered with new techniques and a renewed passion for teaching, benefiting both their professional growth and student success.

Bydante

eq cheat sheet pdf

An EQ cheat sheet is a handy guide for music producers, offering quick tips on equalization to enhance sound quality. It helps balance frequencies, ensuring clarity and presence in mixes.

1.1 What is an EQ Cheat Sheet?

An EQ cheat sheet is a concise guide designed to help music producers and audio engineers make informed equalization decisions quickly. It typically includes frequency ranges, boosting/cutting recommendations, and tips for various instruments and vocal types. These sheets serve as quick references, enabling creators to balance low, mid, and high frequencies effectively. By providing actionable insights, an EQ cheat sheet simplifies the mixing process, ensuring each element in a track sounds clear and well-defined. It’s an essential tool for both beginners and experienced producers, offering a shortcut to achieving professional-sounding mixes without guesswork. Whether you’re tweaking vocals, guitars, drums, or synths, an EQ cheat sheet is your go-to resource for polished audio.

1.2 Importance of EQ in Music Production

EQ is a cornerstone of music production, crucial for achieving a balanced and professional sound. It allows producers to enhance or attenuate specific frequencies, ensuring each instrument and vocal sits perfectly in the mix. Proper equalization resolves frequency conflicts, prevents muddiness, and adds clarity. By boosting or cutting frequencies, producers can make room for each element, creating a cohesive and polished track. EQ also enhances the emotional impact of music by highlighting key features like the brightness of vocals or the punch of drums. With a well-applied EQ, mixes sound more defined, making it easier for listeners to connect with the music. Thus, mastering EQ techniques is vital for any producer aiming to deliver high-quality audio.

Common EQ Frequencies and Their Uses

Explore key frequency ranges and their roles in shaping sound. Learn how low, mid, and high frequencies contribute to clarity, warmth, and presence in your mixes.

2.1 Low and Mid Frequencies: Boosting and Cutting

Low and mid frequencies are crucial for creating a balanced and engaging mix. Frequencies between 60-100 Hz add warmth and weight to bass elements, while boosting 100-200 Hz can enhance the body of instruments like drums and bass guitars. Cutting frequencies in the 200-300 Hz range can reduce muddiness and boxiness, especially in mixes with multiple low-end sources. The midrange (300 Hz-500 Hz) often requires careful adjustments to avoid clutter, with cuts helping to clarify vocals and instruments. Boosting around 500 Hz can add punch to drums, while cutting excess in this range prevents muddiness. Understanding these frequency ranges is key to achieving a clean and professional mix.

2.2 High Frequencies: Clarity and Presence

High frequencies (5kHz-15kHz) are essential for adding clarity and presence to your mix. Boosting around 5-8kHz can enhance the brightness and definition of instruments like cymbals, hi-hats, and vocals, making them stand out; Frequencies above 10kHz add airiness and a sense of space, particularly for elements like strings and high percussion. However, over-boosting can make the mix sound harsh or fatiguing. Cutting unnecessary high frequencies (e.g., above 15kHz) can reduce sibilance and unwanted brightness. Balancing high frequencies ensures a polished and professional sound, making your mix feel open and detailed without sacrificing warmth. Proper use of high-frequency EQ is crucial for creating a clear and engaging listening experience.

Instrument-Specific EQ Guidelines

This section provides tailored EQ guidelines for various instruments, ensuring each element sits perfectly in the mix. Learn how to optimize vocals, guitars, drums, and more effectively.

3.1 EQing Vocals, Guitars, and Drums

EQing vocals, guitars, and drums requires precision to achieve a balanced mix. For vocals, focus on enhancing clarity by boosting frequencies around 1-3 kHz for presence and cutting muddiness below 200 Hz. Guitars benefit from a high-pass filter above 80 Hz to remove low-end rumble and a boost at 2-4 kHz for definition. Drums need a tight low-end, with the kick drum boosted at 60-80 Hz for punch and the snare drum enhanced at 150-250 Hz for body. High frequencies at 5 kHz can add attack to drums. Always make subtle adjustments to avoid over-processing. Experiment with these ranges to find the perfect balance for your mix, ensuring each instrument stands out clearly. Reference an EQ cheat sheet for detailed frequency guidelines and tips.

3.2 EQing Keyboards, Horns, and Woodwinds

EQing keyboards, horns, and woodwinds involves tailoring their frequencies for clarity and blend. Keyboards often benefit from a boost in the 2-4 kHz range for definition and a cut below 100 Hz to reduce muddiness. Horns can be enhanced by boosting around 3-5 kHz for presence and cutting harsh frequencies above 8 kHz. Woodwinds typically need a smooth midrange, with a gentle boost at 1-2 kHz for warmth and clarity. High frequencies at 5-10 kHz can add brightness without sounding harsh. Always adjust in subtle increments to maintain natural tone. Refer to an EQ cheat sheet for specific frequency ranges and tips to ensure each instrument sits well in the mix, creating a balanced and polished sound. Proper EQ ensures these instruments cut through without clashing.

Advanced EQ Techniques

Advanced EQ techniques involve precise frequency adjustments for problem areas and creating space in mixes. These methods ensure clarity and depth, enhancing overall audio quality effectively.

4.1 Surgical EQ for Problem Frequencies

Surgical EQ involves precisely targeting problematic frequencies to address specific issues in a track. This technique is essential for eliminating unwanted resonances, reducing muddiness, or taming harsh frequencies. Often, narrow notches are used to remove offensive tones without affecting the overall character of the sound. For example, cutting a tight frequency range around 200-250 Hz can alleviate low-end muddiness in basslines or kicks. Similarly, boosting a narrow band around 5 kHz can add clarity to vocals. Surgical EQ requires careful listening and precise adjustments, typically using high-Q filters to isolate and correct problem areas effectively. This method ensures that only the troublesome frequencies are addressed, preserving the integrity of the rest of the audio spectrum. Regular practice with surgical EQ enhances a producer’s ability to identify and fix issues efficiently, leading to cleaner and more polished mixes; Proper application of surgical EQ is a cornerstone of professional music production, allowing for detailed control over the frequency balance in any track. By mastering this technique, producers can achieve a more refined and professional sound in their work. Always use a high-quality EQ plugin with precise controls for the best results in surgical equalization. Regular practice and a well-trained ear are key to becoming proficient in this advanced EQ method. With time and experience, surgical EQ becomes an invaluable tool for addressing even the most challenging frequency issues in music production. This approach ensures that every element in the mix sits well, creating a cohesive and balanced sound.

4.2 Using EQ to Create Space in a Mix

EQ is a powerful tool for creating space in a mix by balancing frequencies and ensuring each instrument occupies its own sonic space. By strategically boosting and cutting specific ranges, producers can prevent frequency overlap and clutter. For example, cutting low-end frequencies on vocals and guitars can reduce muddiness and make room for the bass and drums. Similarly, boosting high-end clarity on drums or percussion can help them stand out without competing with other elements. Narrow notches can be used to carve out space for lead instruments, while broad boosts can enhance the presence of key elements. Regularly referencing a frequency chart or cheat sheet helps identify common problem areas and opportunities to create clarity. This technique ensures a balanced and immersive mix, where every element has its place. By carefully shaping the frequency spectrum, producers can achieve a more professional and polished sound. This method is especially crucial in dense mixes with many layers. Using EQ to create space is a fundamental skill for any music producer aiming for a clean and cohesive mix. It allows for better separation and definition, making the mix more engaging and enjoyable to listen to. With practice, EQ becomes an essential tool for crafting mixes that sound expansive and well-organized. Always remember to use EQ sparingly and with purpose to avoid over-processing. The goal is to enhance the natural balance of the track while ensuring each element has its own space. This approach leads to a more dynamic and professional-sounding mix.

Mastering EQ is essential for polished mixes. Use cheat sheets to guide frequency adjustments and practice regularly to enhance your skills. Always reference charts to ensure clarity and balance in your tracks.

5.1 Summary of Key EQ Principles

EQ is a powerful tool for balancing frequencies, ensuring each instrument occupies its space. Boosting or cutting specific ranges enhances clarity and presence. For vocals, focus on mid-range frequencies to maintain intelligibility, while high frequencies add brightness. Guitars benefit from mid-range adjustments to avoid muddiness. Drums require precise low-end control for punch and high-end clarity for snares. Keyboards and horns can be brightened with high-frequency boosts, while woodwinds may need mid-range cuts to prevent harshness. Always use reference tracks and trust your ears. Regular practice sharpens your EQ skills, helping you achieve professional-sounding mixes. Remember, EQ is about creating balance and space, not over-processing. Experiment and refine your techniques for the best results.

5.2 Practicing and Mastering EQ Techniques

Mastering EQ requires consistent practice and a keen ear for detail. Start by comparing your mixes to reference tracks, identifying areas for improvement. Trust your ears and make adjustments instinctively. Begin with broad strokes, then refine with precise cuts and boosts. Use soloing to isolate frequencies and A/B comparisons to track changes. Practice on different genres to understand how EQ varies across styles. Regularly review EQ cheat sheets to reinforce key principles, but remember, they’re guides, not rules. The more you practice, the more intuitive EQ becomes. Over time, you’ll develop a instincts that elevate your mixes to professional quality.

Bydante

pdf piano jazz

Jazz piano sheet music in PDF format offers high-quality‚ accessible arrangements for all skill levels‚ enabling pianists to explore timeless standards and modern compositions with ease.

1.1 The Importance of Sheet Music in Learning Jazz Piano

Sheet music is vital for mastering jazz piano‚ providing precise notes‚ chord progressions‚ and rhythms. It offers a foundation for learning complex harmonies and improvisation‚ while PDF formats ensure accessibility and clarity. Accurate transcriptions of famous solos and essential voicings help pianists understand styles and techniques‚ making sheet music an indispensable tool for improving skills and exploring the rich world of jazz piano music effectively.

1.2 Benefits of Using PDF Format for Jazz Piano Scores

PDF format offers high-quality‚ print-ready jazz piano scores with clear notation and chord symbols. It ensures consistency across devices‚ allowing seamless sharing and printing. PDFs are easily accessible‚ enabling pianists to download and practice anywhere. This format preserves the integrity of complex arrangements‚ making it a reliable choice for both beginners and advanced musicians seeking precise jazz piano sheet music.

Popular Jazz Standards for Piano

Popular jazz standards like “Fly Me to the Moon” and “Autumn Leaves” are timeless‚ offering pianists a rich library of soulful melodies and complex harmonies to explore and master.

2.1 Timeless Jazz Pieces Available in PDF Format

Timeless jazz pieces like “Fly Me to the Moon” and “Autumn Leaves” are widely available in PDF format‚ offering pianists access to soulful melodies‚ intricate harmonies‚ and iconic compositions. These scores‚ often featuring chord symbols and transcriptions‚ cater to all skill levels‚ from beginners to advanced players‚ ensuring a rich and immersive learning experience for jazz enthusiasts.

2.2 How to Choose the Right Jazz Standard for Your Skill Level

3.1 Chord Voicings and Progressions in Jazz Piano Music

Jazz piano relies heavily on sophisticated chord voicings and progressions‚ which add depth and complexity to melodies; Using extended chords like 7ths‚ 9ths‚ and 11ths‚ pianists create rich harmonic textures. PDF sheet music often includes detailed voicings and substitutions‚ guiding players to explore reharmonization techniques and interpret standards in a modern or traditional style‚ enhancing their improvisational and accompaniment skills effectively.

Jazz Piano Techniques and Concepts

Jazz piano techniques involve improvisation‚ complex chord progressions‚ and rhythmic versatility. PDF sheet music provides detailed voicings‚ transcriptions‚ and exercises‚ helping pianists master these concepts effectively.

Jazz piano relies heavily on intricate chord voicings and progressions‚ which are essential for creating harmonic richness. PDF sheet music provides detailed transcriptions of these voicings‚ such as rootless chords and extended harmonies‚ allowing pianists to study and perform complex arrangements accurately. Resources like Duke Ellington’s compositions and Oscar Peterson’s solos offer masterclasses in these techniques‚ ensuring players can elevate their musical expression.

3.2 Improvisation Tips for Jazz Piano Players

Improvisation is the soul of jazz piano‚ and PDF sheet music offers valuable insights to refine this skill. Start by mastering scales and arpeggios‚ then experiment with motif development and rhythmic variations. Listening to legendary pianists like Oscar Peterson and studying their solos can inspire creativity. Practice over chord progressions and embrace spontaneity to unlock your unique musical voice and deliver authentic performances;

The Evolution of Jazz Piano Music

Jazz piano music evolved from ragtime to modern styles‚ shaped by legendary pianists like Duke Ellington and Oscar Peterson‚ whose works are preserved in PDF sheet music.

4.1 From Ragtime to Modern Jazz: A Historical Perspective

Jazz piano music traces its roots to ragtime‚ with composers like Scott Joplin laying the foundation. The genre evolved through blues‚ swing‚ and bebop‚ influenced by pianists such as Duke Ellington and Oscar Peterson. Modern jazz expanded harmonic and rhythmic complexity. PDF sheet music archives these styles‚ preserving the legacy of jazz piano for future generations to study and perform.

4.2 Influential Jazz Pianists and Their Contributions

Influential jazz pianists like Duke Ellington‚ Oscar Peterson‚ and Bill Evans revolutionized the genre with their unique styles and compositions. Their contributions‚ from complex harmonies to improvisational mastery‚ have shaped jazz piano music. PDF sheet music of their works provides access to their iconic pieces‚ allowing pianists to study and perform their timeless compositions‚ preserving their legacy for future musicians to appreciate and emulate.

Resources for Finding Jazz Piano Sheet Music

Websites like Musicnotes.com and BlueBlackJazz.com offer extensive libraries of jazz piano sheet music in PDF format‚ catering to all skill levels with both free and premium options available.

5.1 Websites Offering Free and Premium Jazz Piano PDFs

Websites like Musicnotes.com and BlueBlackJazz.com provide a wide range of free and premium jazz piano sheet music in PDF format. These platforms offer everything from timeless standards to modern arrangements‚ catering to pianists of all skill levels. Musicnotes.com features a vast library of printable scores‚ while BlueBlackJazz.com specializes in accurate transcriptions of legendary jazz pianists‚ ensuring high-quality options for enthusiasts and professionals alike.

5.2 How to Download and Print High-Quality Jazz Piano Scores

To download and print high-quality jazz piano scores‚ visit reputable websites like Musicnotes.com or BlueBlackJazz.com. Browse their libraries‚ select your desired piece‚ and download the PDF. Ensure your printer settings match the file format for optimal quality. Many sites offer previews to confirm accuracy before printing‚ making it easy to obtain professional-grade sheet music for practice or performance;

Jazz Piano Transcriptions and Solos

Jazz piano transcriptions and solos are available in PDF and MIDI formats‚ offering accurate renditions of famous pianists’ works for study and performance‚ ensuring authenticity and precision.

6.1 Accurate Transcriptions of Famous Jazz Piano Solos

Accurate transcriptions of famous jazz piano solos‚ available in PDF format‚ capture the intricate details of legendary performances by artists like Duke Ellington‚ Oscar Peterson‚ and Fats Waller. These transcriptions provide pianists with a detailed guide to mastering iconic solos‚ offering insights into chord voicings‚ improvisational techniques‚ and stylistic nuances. They serve as invaluable tools for study‚ practice‚ and performance‚ ensuring authenticity and precision in jazz piano education.

6.2 How to Use Transcriptions to Improve Your Playing

Using transcriptions of famous jazz piano solos in PDF format can significantly enhance your playing. Analyze the stylistic nuances‚ chord voicings‚ and improvisational techniques of legendary pianists. Compare transcriptions with original recordings to deepen understanding. Slow down tempos to practice challenging sections‚ and identify patterns for incorporation into your own improvisations. Highlight difficult passages and practice them gradually to master complex phrases effectively.

Jazz Piano Sheet Music for Beginners

Jazz piano sheet music for beginners offers simplified arrangements of classic standards‚ providing foundational techniques and accessible PDF resources to help intermediate pianists build their skills effectively.

7.1 Easy-to-Play Jazz Pieces for Intermediate Pianists

Intermediate pianists can explore simplified arrangements of jazz classics like Autumn Leaves and Fly Me to the Moon‚ available in PDF format. These pieces offer accessible chord progressions and melodies‚ making them ideal for building technique and confidence. High-quality sheet music resources provide clear notation‚ enabling pianists to focus on rhythm and expression while mastering foundational jazz concepts.

7.2 Simplified Arrangements of Jazz Classics

Simplified arrangements of jazz classics‚ such as White Christmas and Body & Soul‚ are available in PDF format‚ offering intermediate pianists accessible chord progressions and melodies. These arrangements maintain the essence of the originals while being tailored for easier execution‚ providing a bridge between foundational techniques and more complex jazz improvisation. High-quality scores ensure clear notation for effective learning and performance.

The Role of Improvisation in Jazz Piano

Improvisation is the heart of jazz piano‚ allowing pianists to create spontaneous‚ unique performances. Using sheet music as a foundation‚ players can explore rootless voicings and chord progressions‚ developing personal styles and interpretations. This creative expression is central to jazz artistry‚ making each performance a distinct musical experience.

8.1 How to Approach Improvisation Using Sheet Music

Approach improvisation by studying chord progressions and voicings in sheet music. Start with simple melodies‚ then experiment with scales and arpeggios over chords. Practice listening to recordings and transcribing solos to internalize jazz language. Use PDF sheet music as a guide to explore harmonic structures and rhythmic patterns‚ gradually incorporating your own ideas and emotions into the music.

8.2 Tips for Creating Your Own Jazz Piano Solos

Start with simple melodies and gradually incorporate chord tones and scales. Experiment with rhythmic variations and phrasing. Listen to and transcribe solos from legendary pianists to internalize jazz language. Practice improvising over chord progressions from PDF sheet music‚ focusing on telling a story through your playing. Embrace spontaneity and let your emotions guide your creativity at the keyboard.

Legendary Jazz Pianists and Their Music

Duke Ellington‚ Oscar Peterson‚ and other jazz greats have left an indelible mark on the genre‚ with their compositions and solos widely available in PDF sheet music.

9.1 Duke Ellington‚ Oscar Peterson‚ and Other Jazz Greats

Duke Ellington‚ Oscar Peterson‚ and other legendary pianists have shaped jazz history. Their iconic compositions‚ solos‚ and transcriptions are widely available in PDF format‚ offering insights into their unique styles. From Ellington’s orchestral masterpieces to Peterson’s virtuosic solos‚ these artists’ works remain timeless. Their music continues to inspire pianists‚ with detailed sheet music preserving their legacy for future generations to study and perform.

9.2 Analyzing the Style of Famous Jazz Pianists

Analyzing the styles of legendary jazz pianists like Duke Ellington and Oscar Peterson reveals their unique approaches to harmony‚ rhythm‚ and improvisation. Ellington’s orchestral piano arrangements and Peterson’s virtuosic solos demonstrate mastery of chord voicings and melodic phrasing. Their sheet music provides insight into techniques like stride piano‚ bebop‚ and modal playing‚ allowing pianists to study and emulate their iconic performances‚ enriching their own jazz journey and appreciation of the genre.

Tools and Software for Jazz Piano Players

Discover essential tools and software for jazz piano players‚ such as Transcribe! and Synthesia‚ to enhance learning and practice with interactive jazz piano scores.

10.1 Using Technology to Enhance Your Jazz Piano Practice

Technology offers powerful tools to elevate your jazz piano practice; Software like Musicnotes and Transcribe! provide interactive scores and tempo adjustment‚ enabling deeper exploration of complex pieces. Apps like Synthedia transform sheet music into MIDI files for hands-free learning. These resources enhance efficiency‚ allowing you to focus on technique and improvisation‚ while accessing a vast library of jazz standards and original compositions.

10.2 Apps and Software for Learning Jazz Piano Scores

Apps like Musicnotes and Transcribe! offer interactive tools for learning jazz piano scores. Musicnotes provides downloadable PDFs and MIDI files‚ while Transcribe! allows slowing down recordings for detailed study. Software such as Synthedia converts sheet music to MIDI‚ aiding in practice. These tools enhance learning by offering adjustable tempos‚ looped sections‚ and access to a vast library of jazz standards and original compositions.

Jazz Piano Sheet Music for Duet and Ensemble

Jazz piano sheet music for duet and ensemble offers collaborative learning and performance opportunities‚ with arrangements available for pianists of all skill levels in PDF format.

11.1 Playing Jazz with Others: Duet and Ensemble Scores

Playing jazz with others enhances musical collaboration and creativity. Duet and ensemble scores in PDF format offer accessible arrangements for pianists to explore together‚ from swing to Latin jazz. These scores cater to various skill levels‚ providing opportunities for intermediate and advanced players to refine their teamwork and improvisational skills in a dynamic group setting.

11.2 Collaborative Learning Through Jazz Piano Music

Collaborative learning through jazz piano music fosters creativity and skill development. Sharing and playing duet or ensemble scores in PDF format allows pianists to explore complex harmonies and rhythms together. This approach enhances musical understanding‚ as players learn from one another and refine their techniques in a supportive‚ interactive environment‚ making jazz education more engaging and effective for all involved.

The popularity of digital jazz piano sheet music is growing rapidly‚ offering convenience and accessibility for musicians‚ while future trends may enhance learning through interactive technology.

12.1 The Growing Popularity of Digital Jazz Piano Sheet Music

Digital jazz piano sheet music is gaining immense popularity due to its convenience and accessibility. Platforms like Musicnotes.com offer vast libraries of printable PDF arrangements‚ catering to all skill levels. The ease of downloading and printing high-quality scores has revolutionized how musicians access and practice jazz. This trend is enhancing the way pianists learn‚ perform‚ and enjoy jazz music globally.

12.2 The Future of Jazz Piano Music in the Digital Age

The digital age is transforming jazz piano music‚ with advancements in technology offering unparalleled access to sheet music and learning tools. Interactive software‚ apps‚ and high-quality PDF downloads are revolutionizing practice and performance. As more musicians embrace digital platforms‚ the future promises greater accessibility‚ innovation‚ and collaboration‚ ensuring jazz piano music thrives for generations to come.

Bydante

from the ground up book pdf

“From the Ground Up” is a comprehensive guide covering aviation, programming, environmental resilience, and spiritual growth. Available in PDF, it offers practical insights and tools for learners.

Overview of the Book’s Significance

“From the Ground Up” is a versatile resource that bridges multiple disciplines, offering insights into aviation, programming, environmental resilience, and spiritual growth. Its significance lies in its ability to provide foundational knowledge and practical applications, making it invaluable for both students and professionals. The book’s comprehensive approach ensures readers gain a holistic understanding of complex topics, while its availability in PDF format enhances accessibility for modern learners. By addressing diverse interests, it serves as a bridge between theory and real-world implementation, fostering personal and professional development across various fields.

Key Themes and Topics Covered

The book delves into aviation fundamentals, including flight theory and aircraft systems, while also exploring programming basics like assembly language. Environmental topics such as urban resilience and environmental racism are addressed, alongside gardening tips tied to spiritual growth. It serves as a workbook for pilot training and offers practical advice for grant writing and sustainable city development. The diverse themes make it a valuable resource for learners seeking a multi-disciplinary approach to education and personal development, ensuring a broad spectrum of knowledge is accessible in one comprehensive guide.

Why the Book is Relevant Today

With its comprehensive approach, “From the Ground Up” remains highly relevant, addressing contemporary issues like environmental resilience and sustainable development. Its focus on aviation training aligns with modern pilot demands, while programming insights cater to tech learners. The book’s emphasis on community-led sustainability and spiritual growth resonates with today’s societal values, offering practical solutions for global challenges. Its availability in PDF ensures accessibility, making it a versatile resource for diverse audiences seeking knowledge and inspiration across multiple fields, ensuring its continued importance in today’s fast-evolving world.

Aviation and Flight Training

From the Ground Up provides foundational knowledge for pilots, covering essential topics like aircraft systems, weather, and navigation. Its practical insights and PDF accessibility make it a vital resource.

Theory of Flight and Aerodynamics

From the Ground Up delves into the fundamentals of flight and aerodynamics, explaining principles like lift, thrust, and drag. It provides a detailed understanding of how aircraft operate, making complex concepts accessible. The book covers aerodynamic forces, wing design, and airflow dynamics, essential for pilots and aviation enthusiasts. Practical examples and illustrations enhance comprehension. Available in PDF, it serves as a valuable resource for both students and professionals, offering insights into the science behind flight and its practical applications in aviation.

Aircraft Systems and Operations

From the Ground Up provides an in-depth exploration of aircraft systems and operations, covering essential components like fuel systems, avionics, and electrical systems. It explains how these systems integrate to ensure safe and efficient flight operations. The book also discusses aerodromes, airspace classifications, and air traffic procedures, offering practical insights for pilots. Available in PDF, it serves as a valuable resource for aviation students and professionals, detailing the operational aspects of aircraft and their environments. This section is crucial for understanding the technical and procedural facets of modern aviation.

Historical Context of Aviation Development

From the Ground Up delves into the historical context of aviation, tracing its evolution from early flight experiments to modern advancements. The book highlights key milestones, such as the development of the first airplanes and the role of pioneers in shaping the industry. It also explores the growth of air forces, including the Royal Australian Air Force, and their impact on global aviation. Available in PDF, the book provides a detailed timeline of aviation’s progress, connecting historical achievements to contemporary practices. This section is essential for understanding the foundational developments that have shaped modern flight.

Programming and Computer Science

From the Ground Up explores assembly language basics, computer architecture, and practical software development, offering foundational programming knowledge essential for learners in an accessible PDF format.

Assembly Language Basics

The book provides a clear introduction to assembly language, explaining its role in computer programming. It covers essential concepts such as instruction sets, memory management, and debugging techniques. Designed for beginners, it breaks down complex topics into understandable parts, offering practical examples to reinforce learning. The PDF version ensures easy access to these foundational programming principles, making it a valuable resource for students and hobbyists alike. By focusing on the basics, the book builds a strong foundation for further study in computer science and software development.

Computer Architecture Fundamentals

The book delves into the core concepts of computer architecture, exploring how hardware components interact to enable efficient computing. It discusses the central processing unit (CPU), memory hierarchies, and input/output systems. Readers gain insights into how data flows through the system and how architectural design impacts performance. The PDF version of the book provides detailed diagrams and explanations, making complex topics accessible. By understanding these fundamentals, learners can better appreciate how software interacts with hardware, laying a solid foundation for advanced studies in computer science and programming.

Practical Applications in Software Development

The book emphasizes real-world applications of programming concepts, providing readers with hands-on examples to reinforce learning. It covers topics like assembly language programming, data manipulation, and system design. Practical exercises help developers solve everyday problems, from optimizing code to integrating hardware interactions. The PDF version includes case studies and projects that illustrate how theoretical concepts translate into functional software solutions. This approach ensures that learners can apply their knowledge effectively in professional environments, making it a valuable resource for both beginners and experienced programmers seeking to enhance their skills.

Urban Resilience and Environmental Issues

The book explores local efforts to build resilient cities and addresses environmental racism, highlighting community-led initiatives for sustainability. It provides insights into creating eco-friendly urban solutions, available in PDF.

Local Efforts to Build Resilient Cities

The book emphasizes the importance of grassroots initiatives in creating resilient urban environments. It highlights how local communities can adapt to challenges like climate change and resource scarcity. By focusing on sustainable practices and collaborative efforts, the text provides actionable strategies for cities to thrive. Published by Island Press in February 2022, it offers a detailed roadmap for urban transformation. The PDF version of the book is widely available, making it accessible for policymakers, activists, and educators to implement these resilient practices effectively. This section underscores the power of community-driven solutions in achieving long-term sustainability and environmental harmony.

Environmental Racism and Its Impact

The book delves into the pressing issue of environmental racism, exploring how marginalized communities disproportionately bear the burden of pollution and resource deprivation. It examines systemic injustices that lead to environmental degradation in these areas, highlighting the need for equitable solutions. By addressing the root causes of environmental disparities, the text advocates for policies and practices that promote justice and sustainability. Available in PDF, the book provides a critical perspective on this issue, urging collective action to protect vulnerable populations and foster a healthier planet for all. This section is essential for understanding the intersection of race, environment, and social justice.

Community-Led Initiatives for Sustainability

The book emphasizes the power of grassroots movements in driving sustainable change. It showcases how local communities are pioneering innovative solutions to environmental challenges, fostering resilience through collective action. From urban gardens to renewable energy projects, these initiatives demonstrate the potential for bottom-up approaches to create lasting impact. The PDF version highlights successful case studies, offering practical insights and inspiration for readers to engage in their own communities. By empowering individuals and groups, the book underscores the importance of community-driven efforts in achieving a sustainable future.

Gardening and Spiritual Growth

“From the Ground Up” inspires gardening as a path to spiritual growth, offering practical tips that nurture both the soil and the soul through mindful cultivation and reflection.

Practical Gardening Tips from the Book

“From the Ground Up” offers essential gardening advice, emphasizing soil preparation, composting, and seasonal planting strategies. It encourages mindfulness and reflection, blending physical labor with spiritual growth. The book provides step-by-step guidance on cultivating plants, ensuring sustainability, and creating serene outdoor spaces. Readers learn to appreciate the therapeutic benefits of gardening while fostering a deeper connection with nature. These practical tips, combined with inspirational insights, make the book a valuable resource for gardeners seeking both personal and environmental enrichment.

Spiritual Inspiration and Personal Growth

“From the Ground Up” serves as a source of spiritual inspiration, encouraging readers to find meaning and peace through gardening and personal reflection. The book highlights how nurturing plants can parallel personal growth, fostering mindfulness and gratitude. It explores the therapeutic benefits of connecting with nature, offering insights into how gardening can heal and inspire. By blending practical advice with spiritual wisdom, the book helps readers cultivate both their gardens and their inner selves, promoting harmony and balance in daily life. This unique approach makes it a cherished companion for those seeking both personal and spiritual enrichment.

Education and Training

“From the Ground Up” supports structured learning, offering aviation fundamentals and practical exercises. It is widely used by students and instructors in pilot training programs worldwide.

Role of the Book in Pilot Training Programs

“From the Ground Up” is a cornerstone in aviation education, offering detailed insights into flight theory, aircraft systems, and operational procedures; Its structured approach aligns perfectly with pilot training curricula, making it a preferred resource for both instructors and students. The book’s comprehensive coverage of aviation fundamentals ensures a solid foundation for aspiring pilots. Practical exercises and real-world examples enhance learning, while its accessibility in PDF format allows trainees to study efficiently. Widely adopted in programs worldwide, it remains an indispensable tool for achieving flight proficiency and preparing for licensing exams.

Workbook Companion for Private Pilot License

The “From the Ground Up” workbook is a tailored companion for private pilot license candidates, complementing the main book with focused exercises and study aids. Designed to reinforce key concepts, it provides structured activities to test knowledge and understanding. Perfect for self-study or classroom use, the workbook aligns with the curriculum of many flight training programs. Available in PDF format, it offers flexibility and convenience for learners. By practicing real-world scenarios and theoretical problems, aspiring pilots can build confidence and competence, ensuring they are well-prepared for both the written exams and practical flight tests.

PDF and Digital Availability

The book is available as a free PDF download, along with text and online reading options. The 30th edition offers easy access and eco-friendly convenience.

How to Access the Book in PDF Format

To access From the Ground Up in PDF, visit the official publisher’s website or platforms like GitHub. The 30th edition is available for free download as a PDF file, along with text and online reading options. Users can also explore online archives or educational repositories for direct links. Ensure compatibility with your device and note any required permissions or registrations. This convenient format allows readers to study, print, or annotate sections easily, making it ideal for both personal and professional use. The digital version supports eco-friendly learning and provides instant access to the book’s valuable content.

Benefits of the Digital Version

The digital version of From the Ground Up offers numerous advantages. It is easily accessible online, eliminating the need for physical storage. Readers can highlight, annotate, and search specific sections effortlessly. The PDF format ensures compatibility across devices, allowing for seamless reading on computers, tablets, and smartphones. Additionally, the digital version is environmentally friendly, reducing paper usage. It also enables quick updates, ensuring users have the most current information. This format is particularly beneficial for students and professionals who need convenient, portable access to the book’s comprehensive resources and practical guides.

From the Ground Up is a multifaceted resource that bridges theory and practice across various fields. Its availability in PDF format ensures accessibility for a wide audience. Whether for aviation training, programming fundamentals, environmental advocacy, or spiritual growth through gardening, the book provides insights and tools for diverse interests. It serves as both a practical guide and an inspirational text, making it a valuable addition to any learner’s library. The digital version enhances its utility, offering easy access and updates. This book is a testament to the power of knowledge and its ability to foster personal and professional growth.

Bydante

sesh evo manual

Product Overview

The Skullcandy Sesh Evo is a true wireless earbud designed for everyday use‚ offering a balance of sound quality‚ comfort‚ and affordability at $59․99․

The Skullcandy Sesh Evo is a true wireless earbud designed for everyday use‚ offering a balance of sound quality‚ comfort‚ and affordability․ Priced at $59․99‚ it targets users seeking a reliable audio experience without breaking the bank․ With features like Tile tracking and water resistance‚ it caters to those who value convenience and durability․ The Sesh Evo is part of Skullcandy’s expanded lineup of affordable true wireless models‚ making it a standout choice in its price range․

1․2 Key Features and Design

The Skullcandy Sesh Evo features a sleek‚ compact design with a charging case that offers protection and portability․ It boasts an IP55 rating‚ making it resistant to dust and water splashes․ The earbuds support Bluetooth 5․2 for stable connectivity and include touch controls for easy operation․ They also come with multiple ear gel sizes for a customizable fit‚ ensuring comfort during extended use․ The design emphasizes practicality and durability‚ appealing to active users seeking reliable everyday earbuds;

Unboxing and Package Contents

The Skullcandy Sesh Evo packaging includes: earbuds‚ charging case‚ USB-C cable‚ three pairs of ear gels (S‚ M‚ L)‚ and a user manual for easy setup and guidance․

2․1 What’s Included in the Box?

The Skullcandy Sesh Evo box contains: earbuds‚ a charging case‚ a USB-C charging cable‚ three pairs of ear gels (small‚ medium‚ large)‚ and a user manual for setup guidance․ The case is compact and durable‚ designed to protect the earbuds․ Ear gels ensure a secure fit‚ while the manual provides detailed instructions for pairing‚ controls‚ and troubleshooting․ The package is straightforward‚ offering everything needed for immediate use․

2․2 First Impressions and Accessories

Unboxing the Skullcandy Sesh Evo reveals a sleek‚ compact design with a durable charging case․ The earbuds feel lightweight and comfortable‚ with ear gels offering a secure fit․ Accessories include a USB-C charging cable and a user manual‚ ensuring everything needed for setup is provided․ The overall presentation is clean and functional‚ with a focus on user convenience․ The earbuds exude a modern aesthetic‚ making a positive first impression․

Getting Started

Remove the earbuds from the case‚ and they automatically turn on and enter pairing mode․ Ensure the LED indicator flashes to confirm proper activation and pairing readiness․

3․1 Initial Setup and Pairing

Start by removing the earbuds from the charging case; they will automatically power on and enter pairing mode․ Ensure the LED light flashes to confirm readiness․ Open your device’s Bluetooth settings‚ locate “Sesh Evo” in the available devices list‚ and select it to pair․ Note: Only select the exact product name‚ as variations like “Sesh Evo-LE” may appear due to Tile tracking․ If pairing fails‚ reset the earbuds by pressing both touch panels for 4 seconds and retry․

3․2 Charging the Earbuds and Case

To charge your Skullcandy Sesh Evo earbuds and case‚ locate the USB-C port on the case‚ typically found on the bottom or side․ Use the provided USB-C cable or a compatible alternative․ Plug the cable into a power source to begin charging․ The LED light on the case will indicate the charging status: red for charging and green when fully charged․ Charging time is approximately 2 hours for a full charge․ For convenience‚ the case also supports Qi wireless charging‚ allowing you to place it on a compatible pad․ Always store the earbuds in the case to maintain charge and protect them․ Avoid extreme temperatures and use the recommended charger to ensure safety and battery longevity․

Controls and Functions

Seamlessly control your Skullcandy Sesh Evo with intuitive touch gestures․ Play/pause‚ answer calls‚ and adjust volume with taps on the earbuds․

4․1 Basic Controls and Gestures

Master essential functions with simple touch commands․ Tap once on either earbud to play/pause music or answer/end calls․ Press twice to skip tracks forward or three times to go back․ Hold for volume control‚ ensuring easy navigation of your audio experience without needing your device․

4․2 Advanced Features and Customization

The Sesh Evo offers Tile tracking‚ enabling easy location recovery via the app․ Active noise cancellation is available‚ reducing ambient noise effectively․ Customize settings like touch controls and sound preferences through the Skullcandy app‚ ensuring a tailored experience that meets your listening preferences and enhances overall functionality seamlessly;

Features and Specifications

The Skullcandy Sesh Evo features Bluetooth 5․2 for stable connectivity‚ IP55 water and dust resistance‚ and up to 24 hours of battery life with the case․

5․1 Technical Specifications and Compatibility

The Skullcandy Sesh Evo features Bluetooth 5․2 for reliable wireless connections and compatibility with both iOS and Android devices․ With an IP55 rating‚ it offers protection against dust and water splashes‚ making it suitable for active use․ The earbuds support up to 24 hours of total playtime‚ including the charging case‚ and utilize USB-C for convenient charging․ They also integrate Tile tracking for easy location retrieval if misplaced․

5․2 Unique Features like Tile Tracking and Water Resistance

The Skullcandy Sesh Evo stands out with Tile tracking‚ enabling users to locate misplaced earbuds via the Tile app․ Its IP55 rating ensures durability against dust and water splashes‚ perfect for workouts or outdoor activities․ Additionally‚ it supports mono or stereo modes‚ allowing seamless switching between using one or both earbuds․ These features enhance convenience and versatility‚ making the Sesh Evo a practical choice for everyday use․

Pairing and Connectivity

The Sesh Evo uses Bluetooth 5․2 for reliable connectivity․ It automatically enters pairing mode when removed from the case‚ supporting both stereo and mono modes seamlessly․

6․1 Troubleshooting Pairing Issues

If pairing issues occur‚ reset the earbuds by pressing both touch panels for 10 seconds until the LEDs flash․ Ensure they are fully charged and in pairing mode․ If problems persist‚ forget the device from your phone’s Bluetooth settings and restart both devices․ Check for software updates and verify that no other devices are connected to the earbuds․ This should resolve most connectivity problems effectively․

6․2 Maintaining a Stable Connection

To ensure a stable connection‚ keep the earbuds within a 10-meter range of your device․ Avoid physical obstructions like walls or furniture․ Close unnecessary apps and disable other Bluetooth devices․ Ensure the earbuds and charging case are updated with the latest firmware․ For optimal performance‚ reset the earbuds periodically and maintain a clear line of sight between the earbuds and your device․ This will help maintain uninterrupted audio playback and call quality․

Customization and Sound Quality

Experience tailored audio with the Skullcandy Sesh Evo‚ offering balanced bass and clear treble․ Customize sound profiles via the Tile app for enhanced listening experiences․

7․1 Sound Quality and Audio Performance

The Skullcandy Sesh Evo delivers balanced audio with clear highs and deep bass‚ supported by Bluetooth 5․2 and AptX technology for enhanced wireless performance․ Designed for immersive listening‚ these earbuds provide a natural sound profile suitable for various music genres․ With active noise cancellation up to 40 dB‚ they effectively minimize ambient noise‚ ensuring a focused audio experience․ The earbuds are optimized for both music and call clarity‚ making them versatile for everyday use․

7․2 Customizing the Sound Experience

Customize your audio experience with the Skullcandy Sesh Evo by adjusting the fit and sound preferences․ Use the included ear gels (S‚ M‚ L) to ensure a secure and comfortable fit‚ enhancing sound quality․ The earbuds support mono mode‚ allowing you to use either bud independently․ With Tile technology integration‚ you can track and customize your listening experience effortlessly․ Personalize settings like active noise cancellation and EQ preferences for a tailored sound profile‚ ensuring optimal audio performance for your needs․

Maintenance and Care

Regularly clean the earbuds with a soft cloth and avoid harsh chemicals․ Store them in the charging case to protect from dust and moisture exposure․

8․1 Cleaning and Storage Tips

For optimal performance‚ clean the Sesh Evo earbuds regularly with a soft‚ dry cloth․ Avoid using harsh chemicals or water‚ as this may damage the components․ Store the earbuds in the provided charging case to protect them from dust and moisture․ Ensure the case is dry before storing to prevent any damage․ Proper storage helps maintain battery health and overall durability․

8․2 Extending Battery Life and Durability

To extend battery life‚ avoid draining the Sesh Evo earbuds to 0% charge frequently․ Charge them when the battery level is low but not depleted․ Store the earbuds in the case when not in use to prevent over-discharge․ Regularly clean the earbuds and case to ensure proper charging contacts․ Avoid exposing them to extreme temperatures or moisture to maintain durability and performance over time․

Troubleshooting Common Issues

Common issues include poor sound quality or lost connections․ Reset the earbuds by pressing both touch panels for 10 seconds to resolve most connectivity and audio problems․

9․1 Resolving Audio and Connectivity Problems

For audio issues‚ ensure earbuds are properly seated and charged․ Restart both earbuds by pressing their touch panels for 10 seconds to reset․ If connectivity falters‚ reset pairing by forgetting the device in Bluetooth settings and re-pairing․ Use Tile tracking to locate lost earbuds and ensure they’re within range․ For persistent problems‚ clean the earbuds and charging ports‚ and reset the earbuds to factory settings if necessary․

9․2 Resetting the Earbuds and Updating Firmware

To reset the Sesh Evo earbuds‚ press the touch panel on both earbuds for 10 seconds until the LED flashes red․ Place them in the charging case to complete the reset․ For firmware updates‚ open the Skullcandy app‚ ensure the earbuds are connected‚ and follow in-app instructions․ Keep the earbuds charged and within range during the update to avoid interruptions․ Resetting and updating firmware can resolve software-related issues and improve performance․

The Skullcandy Sesh Evo offers great value for its price‚ combining solid sound quality‚ durability‚ and user-friendly features‚ making it a strong choice for everyday wireless audio needs․

10․1 Final Thoughts and Recommendations

The Skullcandy Sesh Evo is an excellent choice for those seeking affordable‚ reliable true wireless earbuds․ With its compact design‚ IP55 water resistance‚ and Tile tracking‚ it offers great value for everyday use․ While it may not excel in high-fidelity audio‚ its balanced sound and user-friendly features make it a strong contender in its price range․ Recommended for casual listeners looking for a hassle-free audio experience without breaking the bank․

Bydante

easter quiz with answers pdf

Enhance your Easter celebrations with a free Easter Quiz with Answers PDF. Perfect for family gatherings or school activities, these printable trivia sheets offer fun questions about Easter traditions, symbols, and Bible stories, ensuring an engaging experience for everyone involved.

Overview of Easter-Themed Quizzes

Easter-themed quizzes are a delightful way to engage participants of all ages in festive fun. These quizzes typically include a variety of questions, such as Bible trivia, Easter traditions, symbols, and general knowledge. Available as free printable PDFs, they often feature answers for easy grading. Whether for family gatherings, classrooms, or church activities, Easter quizzes bring entertainment and learning to your celebrations. Designs range from simple to decorated themes, making them versatile for any setting.

Free Printable Easter Quiz PDF Sources

Discover free printable Easter quiz PDFs on websites like allfreeprintable.com and other platforms offering downloadable trivia sheets. These sources provide various designs and question sets for easy access and printing.

Popular Websites Offering Free Easter Trivia Questions

Several websites provide free Easter trivia questions in downloadable PDF formats. Platforms like allfreeprintable.com and other educational sites offer a variety of Easter-themed quizzes, including Bible trivia, general knowledge, and fun puzzles. These resources often feature answer keys and are designed for both kids and adults. Many websites also offer customizable templates and different designs, making it easy to print and use the quizzes for parties, school events, or family gatherings. They are a great way to add fun and learning to your Easter celebrations.

How to Download and Print Easter Quiz PDFs

To download and print Easter quiz PDFs, visit websites offering free resources. Select the desired quiz, click the download link, and save the file. Ensure you have a PDF reader like Adobe Acrobat. Print the document on standard paper for easy distribution. Many PDFs include answer keys and are formatted for clarity. Some sites may require email sign-up for access. Once printed, the quizzes are ready for use at your Easter event, providing fun and engaging activities for all participants.

Types of Easter Quizzes Available

Explore a variety of Easter quizzes, including Bible trivia, dingbats, anagrams, and general knowledge questions. These quizzes cater to different interests and age groups, ensuring fun for everyone.

Bible Trivia Questions for Easter

Engage your group with Bible trivia questions that focus on the true meaning of Easter. These quizzes include questions about Jesus’ resurrection, the Last Supper, and Palm Sunday, making them perfect for church gatherings or family activities. Designed for both kids and adults, they offer a fun way to share the story of Easter while testing knowledge of biblical events. Many PDFs include answer keys and relevant Bible verses for easy reference. They’re a great way to deepen understanding of Easter’s spiritual significance in an enjoyable manner.

Easter Dingbats and Anagrams Puzzles

Add a creative twist to your Easter celebration with dingbats and anagrams puzzles. These fun activities challenge participants to decode clues related to Easter themes, such as movies, traditions, or Bible stories. Available in free printable PDFs, they often include answer keys for easy verification. Perfect for both kids and adults, these puzzles add an interactive and brain-teasing element to your Easter quiz, making it a memorable and enjoyable experience for everyone involved. They’re a great way to keep the fun going during Easter gatherings!

General Knowledge Easter Quiz Questions

Engage your participants with general knowledge Easter quiz questions that cover a wide range of topics, from Easter traditions and symbols to cultural practices and history. These questions are designed to be fun and educational, testing knowledge about the Easter bunny, eggs, and other festive elements. Perfect for both kids and adults, they offer a mix of easy and challenging queries, ensuring everyone can join in the fun. The included answer keys make scoring straightforward and hassle-free.

Creating Your Own Easter Quiz

Designing a custom Easter quiz can be a delightful way to engage family and friends. Start by brainstorming questions about Easter traditions, symbols, and Bible stories. Consider varying difficulty levels to suit both children and adults. Choose a mix of question formats, such as multiple choice, true/false, and open-ended, to keep the quiz interesting. Personalize it by including questions about your family’s Easter traditions or past celebrations. Ensure the design is festive yet easy to read, with optional Easter-themed images. Keep the quiz concise, around 10-15 questions, and prepare an answer key for easy scoring. Consider offering small prizes to add excitement. Test the quiz beforehand to ensure accuracy and clarity, and decide whether to print it or create a digital version for accessibility. With careful planning, your custom Easter quiz will be a fun and memorable activity for your gathering.

Steps to Design a Custom Easter Quiz

Start by planning the content, ensuring a mix of easy, medium, and hard questions. Use a word processor or design tool to create the layout, adding festive fonts and images for a seasonal feel. Organize questions into categories, such as Bible stories, Easter traditions, or movie-themed trivia. Include an answer key at the end for easy scoring. Save the quiz as a PDF for printing or sharing digitally. Customize the design to match your event’s theme, and test the quiz with a small group before the main event to ensure clarity and fun.

Customizing Questions for Different Age Groups

Adapt your Easter quiz to suit various age groups by tailoring question difficulty and content. For children, include simple, visually engaging questions like Easter-themed dingbats or anagrams. Teens might enjoy movie-related trivia or Bible-based riddles. Adults can tackle more complex queries about Easter traditions, history, or cultural practices. Ensure clarity and age-appropriateness, and include an answer key for easy scoring. This customization ensures everyone, from kids to adults, can participate and enjoy the festive quiz.

Hosting an Easter Quiz Party

Transform your Easter celebration into a fun and engaging event with a quiz party. Use printable Easter trivia to create a festive atmosphere and ensure everyone enjoys the holiday spirit.

Fun Ways to Play Easter Trivia Games

Elevate your Easter celebration with exciting trivia games! Divide guests into teams for a competitive edge or organize a trivia egg hunt with questions hidden inside plastic eggs. For a twist, try a Family Feud-inspired format where teams guess popular Easter-related answers. You can also incorporate time-based challenges or themed rounds, such as Bible trivia or Easter traditions. These engaging methods ensure laughter, learning, and memorable moments for all ages during your Easter party.

Scoring Systems and Prize Ideas

Implement a points-based scoring system, awarding 1-3 points for each correct answer based on difficulty. For team play, tally points collectively to crown the winning team. Offer prizes like chocolate bunnies, gift cards, or small Easter-themed trinkets. Consider non-tangible rewards, such as “Golden Easter Egg” trophies or personalized certificates. To add excitement, set up bonus rounds with double points or hidden prizes within the quiz itself, ensuring everyone leaves with a smile and a sense of achievement.

Easter Quiz Answer Keys and Solutions

Easter quiz answer keys are provided in downloadable PDF formats, offering clear solutions for each question. They ensure accuracy and ease of grading for seamless event organization.

Understanding the Answer Key Format

Easter quiz answer keys are typically included in the downloadable PDF files, providing clear and concise solutions for each question. They often feature bolded or highlighted correct answers, making grading easy; The format may include numbered lists, bullet points, or separate sheets for questions and answers. Some keys also offer additional details, such as explanations or scripture references for Bible-based questions. This organized structure ensures clarity and efficiency for hosts and participants alike, enhancing the overall quiz experience.

Common Mistakes to Avoid

When using Easter Quiz PDFs, avoid common errors like misprinting or cropping questions during download. Ensure the answer key is correctly aligned with the questions and that all pages are included. Double-check for formatting issues, such as cut-off text or incorrect numbering. Avoid using outdated or mismatched PDF versions, as this can lead to confusion. Also, ensure the quiz is suitable for your audience’s age and knowledge level to maximize engagement and enjoyment during the activity.

Themed Easter Quiz Ideas

Explore unique Easter quiz themes, such as movie-themed questions, food traditions, or literary references, to add variety and excitement to your celebration with these engaging and creative ideas.

Movie-Themed Easter Quizzes

Add a cinematic twist to your Easter celebration with movie-themed Easter quizzes. Test your knowledge of popular films like Hop or The Easter Bunny Is Comin’ to Town. Questions cover movie quotes, characters, and soundtracks, making it fun for both kids and adults. These quizzes are perfect for family movie nights or themed parties. Download free printable PDFs featuring movie trivia and answer keys for a hassle-free experience. Ensure everyone enjoys the festive spirit with this unique and engaging activity.

Food and Tradition-Themed Easter Quizzes

Discover the flavors and customs of Easter with food and tradition-themed quizzes. Test your knowledge of Easter delicacies like hot cross buns, Easter bread, and chocolate bunnies. Learn about cultural practices, such as making pancakes on Shrove Tuesday or decorating eggs. These quizzes are perfect for educational or festive gatherings, offering insights into the rich history behind Easter traditions. Download free printable PDFs featuring food-related trivia and answer keys to enhance your celebration with fun and learning.

Enhance your Easter celebrations with a free Easter Quiz with Answers PDF, offering fun and educational questions for all ages. Enjoy the Easter spirit together!

Final Tips for Enjoying Your Easter Quiz

Make your Easter quiz a memorable experience by customizing questions for different age groups and adding festive decorations. Encourage teamwork and offer small prizes to keep everyone engaged. Consider incorporating fun twists like trivia egg hunts or themed rounds. Use free printable PDFs with answer keys for easy scoring. Ensure the atmosphere is joyful, with Easter-themed music and treats. Most importantly, let everyone participate and enjoy the festive spirit together!

Bydante

bosch built in microwave instructions

Welcome to the Bosch Built-In Microwave Instructions, your comprehensive guide to seamless installation, efficient operation, and maintenance․ Ensure safety and optimal performance with these detailed guidelines․

1․1 Understanding the Importance of Proper Installation and Usage

Proper installation ensures safety and efficiency, while correct usage prevents accidents and extends the microwave’s lifespan․ Follow guidelines to avoid power issues, uneven cooking, and damage․ Incorrect installation or misuse can lead to hazards, so adhering to the manual is crucial for optimal performance and longevity of your Bosch built-in microwave․

1․2 Overview of Bosch Built-In Microwave Models

Bosch offers a range of built-in microwave models, including the HMB57152UC, HMB50152UC, and Serie 4 BFL553MS0B․ These models feature advanced sensors, touch controls, and customizable settings․ Designed for seamless integration, they combine sleek designs with powerful cooking capabilities, catering to diverse kitchen needs and preferences for modern households․

Pre-Installation Requirements

Ensure proper space measurement, electrical compatibility, and gather necessary tools․ Verify the area meets Bosch specifications for a seamless installation process and optimal microwave performance․

2․1 Measuring the Space for the Microwave

Accurate measurements are crucial for a proper fit․ Measure the width, height, and depth of the installation area․ Ensure the space aligns with Bosch’s specifications for your model․ Check the user manual for exact dimensions and clearance requirements․ Verify cabinetry dimensions and electrical connections before proceeding with installation․

2․2 Ensuring Electrical Compatibility

Verify that your electrical system meets the microwave’s power requirements․ Check the voltage, amperage, and wattage specifications in the user manual․ Ensure a dedicated circuit breaker is installed and matches the appliance’s needs․ Consult a professional if unsure to avoid electrical hazards and ensure proper function․

2․3 Gathering Necessary Tools and Accessories

Collect essential tools like a screwdriver, measuring tape, and level․ Ensure you have mounting brackets, screws, and power cables․ Verify the accessories included with your microwave, such as a turntable or support ring․ Refer to the user manual for specific requirements to ensure a smooth installation process․

Installation Steps

Prepare the built-in frame, mount the microwave securely, and connect electrical components․ Follow the manual for precise steps to ensure safe and proper installation․

3․1 Preparing the Built-In Frame

Ensure the built-in frame is level and securely attached to the cabinet․ Remove any packaging, align the frame with the microwave base, and fasten it using the provided screws․ Avoid kinking the power cable during installation for optimal safety and functionality․

3․2 Mounting the Microwave in the Cabinet

Lift the microwave carefully and align it with the built-in frame in the cabinet․ Secure it using the provided screws, ensuring the power cable is not trapped․ Tighten firmly to prevent movement․ Double-check alignment and stability for proper installation and safe operation․

3․3 Securing the Microwave and Connecting Electricity

Once mounted, secure the microwave tightly to the cabinet using the provided screws․ Ensure the power cable is not damaged or pinched․ Connect the appliance to a grounded electrical outlet as specified in the manual․ Verify the unit is level and stable before use to ensure safe and efficient operation․

Operating the Bosch Built-In Microwave

Secure the microwave firmly to the cabinet using screws, ensuring the power cable isn’t pinched․ Connect to a grounded outlet as specified․ Level the unit for stability and refer to the manual for electrical requirements to ensure safe and efficient operation․

4․1 Basic Controls and Functions

The Bosch built-in microwave features intuitive controls, including buttons for defrosting, cooking, and reheating․ Use the number pad to enter cooking times and power levels․ The start/stop button allows easy operation․ Ensure you follow the user manual for safe usage and optimal results when preparing meals․

4․2 Using Special Features (Defrost, Cook, and Reheat)

Utilize the defrost feature by entering the food’s weight for precise thawing․ The cook function allows setting power levels and time for customized cooking․ Reheat evenly with pre-set options․ Always refer to the user manual for specific guidelines to ensure safe and effective use of these advanced features․

4․3 Setting the Clock and Timer

To set the clock, press the clock button and enter the current time using the number pad․ For the timer, select the timer button, choose the duration, and start․ The microwave will display the set time and timer․ Ensure the clock is set correctly for timer functions to operate properly․ Once done, the settings will be saved automatically․ Refer to the user manual for precise instructions․

Safety Guidelines

Always follow safety precautions to prevent accidents․ Avoid overheating oil, never dry food, and don’t use metal utensils․ Keep children away and ensure proper ventilation․

5․1 General Safety Precautions

Always follow safety guidelines to ensure safe operation․ Avoid using metal utensils, as they can cause sparks; Never heat oil or food with low water content at high power․ Keep children away and ensure proper ventilation․ Follow instructions carefully to prevent accidents and maintain optimal performance․

5․2 Avoiding Common Mistakes

Avoid using metal utensils or heating food with low water content at high power, as this can cause sparks or fires․ Never leave the microwave unattended while in use or operate it without food inside․ Ensure the turntable is correctly placed and follow instructions to prevent malfunctions and ensure safe operation․

5․3 Understanding Error Messages

Familiarize yourself with error codes displayed on your Bosch microwave․ Codes like “E1” or “E2” indicate issues such as power problems or faulty sensors․ Refer to the user manual for specific code explanations․ Addressing errors promptly ensures optimal performance and prevents further malfunctions․ Always consult the manual or contact Bosch support for resolution․

Maintenance and Cleaning

Regularly clean the interior and exterior of your Bosch microwave to maintain performance․ Wipe food residue and spills promptly to prevent odors․ Ensure the turntable is secure and clean․ Refer to the user manual for detailed care instructions and troubleshooting tips to keep your appliance in optimal condition․

6․1 Cleaning the Interior and Exterior

Wipe the interior with a damp cloth, removing food residue․ Avoid abrasive cleaners to prevent scratching․ Clean the exterior with a mild detergent․ Regularly wash the turntable and support ring․ Ensure all surfaces are dry to prevent water spots and maintain your microwave’s appearance and functionality․

6․2 Replacing Parts (Turntable, Support Ring)

Replace the turntable and support ring if damaged․ Ensure genuine Bosch parts are used for compatibility․ Remove the old parts, inspect for debris, and insert the new ones securely․ Refer to the user manual for specific instructions and diagrams to ensure proper installation and functionality․

6․3 Regular Maintenance Tips

Regularly clean the interior and exterior to prevent food residue buildup․ Check and replace worn-out parts promptly․ Ensure proper ventilation to avoid moisture accumulation․ Use Bosch-approved cleaning products for durability․ Refer to the user manual for detailed maintenance schedules and recommendations to keep your microwave operating efficiently and safely over time․

Troubleshooting Common Issues

Identify and resolve common problems like power issues, turntable malfunctions, or uneven cooking․ Follow safety guidelines and troubleshooting steps to restore functionality and prevent future issues efficiently․

7․1 Identifying and Resolving Power Issues

Check the power cord and outlet for damage or disconnection․ Ensure the circuit breaker hasn’t tripped and verify electrical compatibility․ If issues persist, reset the breaker or consult a licensed technician to address wiring or component malfunctions․ Always follow safety guidelines to avoid electrical hazards and ensure proper functioning of your Bosch built-in microwave․

7․2 Fixing Turntable Malfunctions

Check for food residue or obstructions on the turntable or support ring․ Clean thoroughly with warm water and mild detergent․ Ensure the turntable is correctly positioned and spins freely․ If issues persist, consult the user manual or contact Bosch customer support for assistance or replacement parts․

7;3 Addressing Uneven Cooking Problems

Check for food placement issues and ensure the turntable rotates smoothly․ Adjust cooking power levels and time as needed․ Verify food is evenly spaced and covered appropriately․ Clean the interior to prevent interference․ If uneven cooking persists, consult the user manual or contact Bosch support for further troubleshooting assistance․

Programming and Customizing Settings

Explore the advanced features of your Bosch built-in microwave by programming and customizing settings․ Personalize cooking options, adjust power levels, and save preferences for convenient future use․

8․1 Setting Up Smart Features

Enhance your cooking experience by setting up smart features on your Bosch built-in microwave․ Use the control panel to enable Wi-Fi connectivity, download cooking presets, and synchronize with smart home devices for seamless voice control and remote operation․ Ensure your appliance is connected to your home network for advanced functionality․

8․2 Customizing Cooking Presets

Customize cooking presets to suit your preferences by selecting specific power levels, cooking times, and defrost settings․ Use the control panel to save personalized settings for frequently cooked dishes․ Refer to the user manual for guidance on adjusting and storing custom presets for optimal cooking results every time․

8․3 Adjusting Power Levels

Adjusting power levels on your Bosch built-in microwave allows precise control over cooking․ Use the control panel to select from multiple power settings, ensuring optimal results for various dishes․ Refer to the user manual for detailed guidance on how to adjust and utilize power levels effectively for different cooking tasks․

Defrosting and Cooking Tips

Master safe and effective defrosting, achieve optimal cooking results, and avoid overcooking effortlessly with these expert tips for your Bosch built-in microwave․

9․1 Defrosting Food Safely and Effectively

Defrost food evenly by using the defrost function, entering the weight of the food, and selecting the appropriate power level․ Avoid high power for low-water foods to prevent overheating․ Always follow the user manual guidelines for safe and effective defrosting to ensure even thawing and cooking consistency․

9․2 Optimizing Cooking Results

Optimize cooking results by using the microwave’s sensor and power levels․ Cover food to ensure even heating and stir or rotate dishes midway․ Use appropriate containers and avoid overcrowding․ Adjust cooking times based on food quantity and type for consistent results and to prevent overcooking or undercooking․

9․3 Avoiding Overcooking or Undercooking

Prevent overcooking or undercooking by following user manual guidelines, adjusting power levels, and using sensor cooking․ Cover food to ensure even heating and stir or rotate dishes midway․ Check food periodically, as cooking times may vary based on quantity and type․ This ensures optimal results every time․

Accessories and Optional Equipment

Discover Bosch’s range of accessories, including turntables, support rings, and optional installation kits, designed to enhance your microwave’s functionality and ensure proper installation for optimal performance․

10․1 Recommended Accessories for Bosch Microwaves

Bosch offers a variety of accessories to enhance your microwave experience․ These include replacement turntables, support rings, and installation kits․ Additional items like cleaning supplies and protective covers are also available to maintain and protect your appliance, ensuring optimal performance and longevity․

  • Turntable and support ring for even cooking․
  • Installation kits for secure and proper fitting․
  • Cleaning supplies for easy maintenance․
  • Protective covers to prevent dust and splatters․

10․2 Using the Turntable and Support Ring

For optimal performance, always use the turntable and support ring provided with your Bosch microwave․ Place dishes centrally on the turntable to ensure even cooking․ The support ring stabilizes larger dishes and prevents uneven heating․ Regularly clean both to avoid food residue buildup, and reinstall them securely after cleaning for proper operation․

  • Ensure the turntable rotates smoothly for even heating․
  • Use the support ring for larger or irregularly shaped dishes․
  • Clean both parts regularly to maintain hygiene and efficiency․

10․3 Optional Installation Kits

Bosch offers optional installation kits to enhance your built-in microwave setup․ These kits include mounting frames, brackets, and hardware for secure and precise installation․ They ensure proper alignment and stability, preventing any movement during operation․ Always check compatibility with your specific model before purchasing and installing these kits․

  • Includes mounting frames and brackets for stability․
  • Ensures proper alignment and prevents movement․
  • Check compatibility with your microwave model․
  • Warranty and Support

    Bosch provides a comprehensive warranty program, covering parts and labor for a specified period․ Visit the official Bosch website or contact customer support for assistance․ Authorized service centers are available for professional repairs and maintenance․

    11․1 Understanding the Bosch Warranty

    Bosch offers a comprehensive warranty covering parts and labor for a specified period․ This warranty ensures protection against manufacturing defects, providing peace of mind․ Refer to your user manual or Bosch’s official website for detailed terms and conditions․ Coverage varies by model and region, so verify specifics for your appliance․

    11․2 Contacting Bosch Customer Support

    For assistance with your Bosch built-in microwave, contact customer support via phone, email, or live chat․ Visit the official Bosch website for regional contact details and support options․ This service is available to address queries, resolve issues, and provide technical guidance, ensuring a smooth experience with your appliance․

    11․3 Finding Authorized Service Centers

    To locate an authorized Bosch service center, visit the official Bosch website or contact customer support for a list of certified providers․ Ensure reliable repairs by using only Bosch-authorized centers, as they guarantee genuine parts and expert service for your built-in microwave․

    Quick Start Guide

    Unpack and install your Bosch microwave, plug it in, and set the clock․ Explore basic functions like defrost, cook, and reheat to get started effortlessly․

    12․1 First-Time Setup and Initialization

    Unpack your Bosch built-in microwave and place it in the designated space․ Plug it in and press the power button․ Initialize by setting the clock using the control panel․ Ensure all error messages are cleared․ Run a test cycle to verify proper function․ Refer to the user manual for model-specific instructions․

    12․2 Running a Test Cycle

    Press the Start button without placing food inside to run a test cycle․ Ensure the turntable rotates smoothly and no unusual noises occur․ Verify that all lights and controls function properly․ This step confirms the microwave is operational and ready for use․ Refer to the user manual for model-specific test instructions․

    12․3 Essential Features to Try Immediately

    Start with the defrost function by entering the food weight․ Explore sensor cooking for automatic adjustments․ Test the timer for precise control․ Familiarize yourself with preset settings for common tasks․ Ensure the turntable rotates smoothly for even cooking․ These features ensure a seamless experience with your Bosch built-in microwave․

Bydante

a very old man with enormous wings pdf

Gabriel Garcia Marquez’s timeless tale of an angelic figure in a rainy village explores faith, isolation, and human curiosity, now widely accessible in its popular PDF format.

1.1. Author Background: Gabriel Garcia Marquez

Gabriel Garcia Marquez, a Nobel Prize-winning Colombian author, is renowned for his magical realism. Born in 1927 in Aracataca, Colombia, he blends fantasy and reality in his works. His unique storytelling style captivates global readers, making his works, like A Very Old Man with Enormous Wings, timeless classics, now widely accessible in PDF format for modern audiences.

1.2. Title and Publication Details

First published in 1955, A Very Old Man with Enormous Wings is a short story by Gabriel Garcia Marquez, translated by Gregory Rabassa. It appeared in his collection Leaf Storm and has since become a cornerstone of magical realism. The PDF version, widely available today, ensures its enduring accessibility and popularity among readers worldwide.

Plot Summary

The story revolves around a mysterious old man with enormous wings who arrives in a rainy village, sparking fear, curiosity, and religious debate among the community.

2.1. Setting: The Rainy Village

The story unfolds in a remote, rain-soaked village, where the persistent downpour creates a gloomy, isolated atmosphere. The villagers, stuck in their mundane routines, are suddenly disrupted by the arrival of the mysterious old man with wings, sparking a mix of fear, curiosity, and religious fervor in the small, superstitious community.

2.2. The Discovery of the Old Man with Wings

Pelayo, a poor villager, stumbles upon the old man with enormous wings in his courtyard during a relentless rainstorm. The man, frail and muddy, struggles to move, his massive wings tangled and filthy. Pelayo initially mistakes him for a castaway but soon realizes the extraordinary nature of his discovery, which quickly draws the attention of his wife, Elisenda, and the entire village.

2.3. The Reaction of the Family and Community

The family and neighbors are astonished by the old man’s wings, triggering a mix of fear, curiosity, and religious awe. Pelayo and Elisenda initially view him as a burden but later exploit his presence for profit. The community flocks to see the “angel,” seeking miracles, while the local priest questions his divine authenticity, adding to the story’s magical realism and human complexity.

Themes and Symbolism

The story explores themes of faith, isolation, and human curiosity, with the old man’s wings symbolizing both divine mystery and burdensome otherness, reflecting Marquez’s magical realism.

3.1. The Theme of Faith and Religion

The story delves into faith and religion through the villagers’ reactions to the old man with wings, seen as an angel. His presence sparks religious fervor, yet his earthly struggles contrast with divine expectations, challenging traditional beliefs. The PDF version highlights how Marquez uses magical realism to explore spirituality and humanity’s complex relationship with the divine.

3.2. The Symbolism of the Old Man’s Wings

The old man’s enormous wings symbolize divine mystery and humanity’s contradictions. Their dirty, half-plucked state contrasts with their grandeur, reflecting the tension between the sacred and the mundane. The wings evoke both awe and fear, embodying the unknown. In the PDF version, this imagery highlights the duality of hope and suffering, resonating deeply with the villagers’ complex reactions to his presence.

Character Analysis

The story revolves around the enigmatic old man with enormous wings, whose mysterious presence contrasts with the grounded reactions of Pelayo, Elisenda, and their ill son, highlighting themes of faith and humanity.

4.1. The Old Man with Enormous Wings

The old man with enormous wings is a mysterious, frail figure with colossal, dirty wings. His appearance is both captivating and unsettling, evoking a mix of fear and fascination in the villagers. His presence challenges their understanding of the divine and the unknown, while his helplessness underscores themes of isolation and humanity.

4.2. Pelayo and Elisenda: The Family’s Perspective

Pelayo and Elisenda, a poor farming couple, initially react with confusion and fear upon discovering the old man. Their newborn son’s illness adds to their turmoil, but the old man’s presence mysteriously aids his recovery. While Pelayo is practical and skeptical, Elisenda shows cautious curiosity. Their moral complexity shines as they balance kindness with exploitation, reflecting humanity’s duality in the face of the divine.

Style and Literary Devices

Gabriel Garcia Marquez employs magical realism and vivid imagery in the PDF version, blending the ordinary with the extraordinary, creating a captivating and surreal atmosphere.

5.1. Magical Realism in the Story

The PDF version of “A Very Old Man with Enormous Wings” masterfully showcases Marquez’s signature magical realism. The story seamlessly blends fantastical elements, like the old man’s wings, with mundane village life. This unique narrative style captivates readers by presenting the extraordinary as ordinary, creating a surreal yet believable atmosphere that explores themes of faith and humanity.

5.2. Use of Imagery and Description

The PDF version vividly captures Marquez’s rich imagery, describing the old man’s colossal, dirty wings and the villagers’ fascination. The rain-soaked setting and the family’s reactions are intricately detailed, creating a surreal atmosphere. Marquez’s descriptions blend the mundane with the magical, making the extraordinary seem ordinary and immersing readers in the story’s emotional depth and visual beauty.

The Significance of the PDF Version

The PDF version enhances accessibility, making Marquez’s masterpiece widely available for readers worldwide, ensuring its magical realism and timeless themes reach a broader audience effortlessly and conveniently.

6.1. Accessibility and Popularity of the PDF Format

The PDF version of “A Very Old Man with Enormous Wings” enhances accessibility, allowing readers to access the story anytime, anywhere. Its popularity stems from the ease of sharing, storing, and reading on various devices. The format ensures the story’s magical realism and timeless themes reach a broader audience, making it a preferred choice for both casual readers and scholars alike.

6.2. Key Features of the PDF Edition

The PDF edition of “A Very Old Man with Enormous Wings” offers crisp text, clear formatting, and easy navigation. It includes the complete story, ensuring readers experience Marquez’s magical realism without interruption. The file is lightweight, making it simple to download and share. Additionally, the PDF preserves the original translation by Gregory Rabassa, maintaining the story’s emotional depth and literary richness for readers worldwide.

Literary Analysis and Reviews

Scholars and critics praise the story’s exploration of faith and isolation, with the PDF version enabling easy access for analysis. It preserves Marquez’s unique style and depth.

7.1. Critical Reception of the Story

Critics acclaim the story for its magical realism and profound symbolism. The PDF version has enhanced its accessibility, allowing readers to engage deeply with Marquez’s exploration of human nature, faith, and isolation. Reviewers highlight the universal themes and emotional depth, making it a cornerstone of literary analysis and academic study worldwide.

7.2. Scholarly Interpretations of the Text

Scholars interpret the old man with wings as a symbol of divine ambiguity and human skepticism. The PDF format has facilitated deeper academic exploration, revealing themes of faith, isolation, and the mundane coexisting with the miraculous. Analysts highlight Marquez’s critique of religious dogma and societal responses to the unknown, enriching the story’s layered significance in literary studies.

Educational Resources and Study Guides

The PDF version offers study guides, lesson plans, and essay prompts, aiding educators and students in exploring themes, symbols, and literary devices in Marquez’s timeless tale.

8.1. Study Guides and Lesson Plans

The PDF version of “A Very Old Man with Enormous Wings” is accompanied by detailed study guides and lesson plans, offering insights into themes, symbols, and literary devices. These resources include interactive exercises, discussion prompts, and analysis of Marquez’s magical realism, making it easier for educators to integrate the story into classroom curricula and enhance student understanding.

8.2. Essay Questions and Analysis Prompts

Essay questions focus on themes like faith, isolation, and human reaction to the extraordinary. Prompts include analyzing the old man’s symbolism, the family’s transformation, and Marquez’s use of magical realism. Students are encouraged to explore the cultural context and the story’s moral implications, fostering deeper understanding through critical thinking and textual analysis.

Adaptations and Interpretations

The story has inspired various adaptations, including stage productions and visual interpretations, bringing Marquez’s magical realism to life for diverse audiences through creative storytelling and multimedia formats.

9.1. Stage Productions and Theatrical Adaptations

Adaptations of the story have been staged in theaters worldwide, captivating audiences with creative interpretations. Productions often use minimalistic sets and props to emphasize the magical realism of the narrative.

One notable adaptation at the Kirk Douglas Theater featured two storytellers, a kitchen table, and tiny figurines, blending humor and depth to explore the story’s themes of faith and isolation.

9.2. Visual and Multimedia Interpretations

The story has inspired various visual adaptations, including comics and graphic novels, which bring the magical realism to life. A notable comic adaptation by Little Angel Theatre captures the essence of the narrative with illustrations that enhance the emotional depth of the old man’s journey and the villagers’ reactions to his presence.

The Story’s Impact and Legacy

The PDF version of “A Very Old Man with Enormous Wings” has made the story widely accessible, solidifying its place as a magical realism classic, influencing literature and culture globally.

10.1. Cultural and Social Influence

The story’s themes of faith and isolation resonate universally, making it a cultural icon. Its exploration of human curiosity and spirituality continues to inspire artistic adaptations and philosophical discussions, while the PDF format ensures its accessibility, fostering educational and literary engagement worldwide.

10.2. The Story’s Place in Literary History

“A Very Old Man with Enormous Wings” is a cornerstone of magical realism, showcasing Marquez’s mastery of blending the surreal with the mundane. Its enduring popularity solidifies it as a seminal work in world literature, influencing countless writers. The PDF version ensures its legacy endures, making it accessible to new generations of readers and scholars alike.

“A Very Old Man with Enormous Wings” is a fascinating exploration of human nature and faith, while its PDF version ensures easy access to this timeless magical realist masterpiece.

11.1. Final Thoughts on the Story’s Relevance

The story remains a profound reflection on faith, isolation, and human curiosity. Its themes are timeless, resonating across generations. The PDF version ensures accessibility, making Marquez’s masterpiece available to a global audience, preserving its cultural and literary significance for future readers to explore and appreciate.

11.2. Encouragement to Read the PDF Version

Reading the PDF version of “A Very Old Man with Enormous Wings” offers a convenient and immersive way to experience Marquez’s magical realism. The format ensures accessibility, allowing readers to engage with the story’s profound themes and emotional depth anytime, anywhere. It’s a must-read for those seeking a thought-provoking and timeless literary experience.

Bydante

bread maker morphy richards instructions

Morphy Richards bread makers offer a convenient and efficient way to bake fresh bread at home․ With various models available, they cater to different baking needs, providing features like delayed timers, customizable settings, and non-stick pans for easy bread removal․ Designed for both novice and experienced bakers, these machines ensure consistent results and simplify the bread-making process with user-friendly controls and included recipe guides․

1․1 Importance of Reading the Manual

Reading the manual for your Morphy Richards bread maker is crucial for optimal performance and safety․ It provides essential guidelines for first-time setup, operation, and maintenance․ The manual includes safety precautions, troubleshooting tips, and recipes to ensure perfect bread every time․ Understanding the features and custom settings helps you make the most of your appliance․ Additionally, the manual outlines warranty details and maintenance routines to prolong the machine’s lifespan․ By following the instructions, you can avoid common mistakes and enjoy consistent baking results․ It’s a comprehensive guide that empowers you to use your bread maker confidently and effectively․

Key Features and Benefits of Morphy Richards Bread Maker

Morphy Richards bread makers feature delayed start timers, non-stick pans, and customizable settings, offering convenience, consistency, and versatility for homemade bread baking experiences․

2․1 Detailed Overview of Features

The Morphy Richards bread maker comes with a range of features designed to enhance your baking experience․ It includes a powerful 600W motor, delayed start timer, and customizable settings for crust color and loaf size․ The non-stick pan ensures easy bread removal, while the cool-touch exterior guarantees safe handling․ Advanced models offer programmable options for artisan bread, gluten-free recipes, and even cake baking․ The intuitive interface and clear LCD display make navigation simple․ Additionally, the machine includes a 2-year guarantee, covering repairs and ensuring long-term reliability․ These features make it a versatile and user-friendly appliance for both beginners and experienced bakers, catering to diverse dietary needs and preferences․

Setting Up Your Bread Maker for First Use

Before first use, unpack, wash, and dry the pan and accessories․ Place the unit on a stable, heat-resistant surface․ Plug in and ensure all parts are secure for safe operation․

3․1 First-Time Preparation and Initial Setup

Before using your Morphy Richards bread maker, ensure all parts are washed and dried․ Place the machine on a stable, heat-resistant surface․ Carefully unpack and assemble the bread pan, kneading paddle, and lid․ Plug in the unit and familiarize yourself with the control panel․ Read the manual to understand basic operations and safety guidelines․ Preheat the machine according to the instructions to prepare it for its first use․ This initial setup ensures optimal performance and longevity of your bread maker․ Always follow the manual’s instructions for proper preparation to achieve the best baking results․

Essential Recipes for Beginners

Start with simple recipes like classic white bread or wholemeal, using the included guide for precise measurements․ These easy recipes ensure consistent results and build confidence․

4․1 Basic Bread Recipes to Get You Started

Begin your bread-making journey with simple recipes like classic white bread or wholemeal bread․ These recipes are perfect for mastering the basics․ Follow the manual’s guidelines for ingredient ratios and settings․ Start with a basic white bread recipe using flour, yeast, salt, sugar, and water․ Gradually experiment with whole grains or herbs for added flavor․ For gluten-free options, use specialized flours and adjust settings as instructed․ Always measure ingredients precisely and select the appropriate bread size and crust color․ These foundational recipes ensure success and build confidence for more complex creations․ Regular practice will refine your skills and expand your repertoire․

Advanced Features and Customization Options

Explore advanced features like delayed timers, crust color settings, and programmable options for tailored bread-making․ Customize recipes to suit preferences, ensuring perfect results every time effortlessly․

5․1 Exploring Custom Settings for Personalized Bread

The Morphy Richards bread maker offers advanced customization options to tailor your bread-making experience․ With adjustable settings for crust color, loaf size, and baking time, you can create bread that suits your preferences perfectly․ Explore programmable options to save custom recipes and ensure consistent results․ Delayed start timers allow for overnight baking, while specific modes for gluten-free or whole-grain bread cater to diverse dietary needs․ Models like the Fastbake 48281 and Premium Plus 48324 feature unique settings for rapid baking or artisan-style crusts․ Experiment with these features to craft personalized bread recipes that match your taste and lifestyle effortlessly․

Safety Precautions and Guidelines

Always unplug the bread maker before cleaning to avoid electrical shock․ Keep it away from children and ensure proper ventilation during operation for safe baking;

6․1 Important Safety Tips for Using Your Bread Maker

Always unplug the bread maker before cleaning to prevent electrical shock․ Avoid exposing the appliance to water or moisture․ Keep children away during operation and ensure the machine is placed on a stable, heat-resistant surface․ Never insert metal objects or sharp tools into the bread maker, as this can cause damage․ Allow the machine to cool down before cleaning or storing․ Follow the instructions for loading ingredients to avoid overfilling, which may lead to spills․ Regularly inspect the power cord and plug for damage․ Use only compatible spare parts and adhere to the manufacturer’s guidelines for maintenance and repair․

Maintenance and Troubleshooting Tips

Regularly clean the bread maker to prevent crumbs and dough residue buildup․ Check for damage on cords and plugs before use․ Use compatible spare parts for repairs to ensure optimal performance and longevity․

7․1 Cleaning and Regular Maintenance

Regular maintenance ensures your Morphy Richards bread maker performs optimally․ Always unplug the device before cleaning to avoid electrical shock․ Wipe the exterior with a damp cloth, avoiding harsh chemicals․ The baking pan and utensils should be washed by hand or in a dishwasher if specified․ For tough dough residue, soak parts in warm water before scrubbing gently․ Never submerge the main unit in water․ Dry all components thoroughly after cleaning to prevent rust․ Refer to the user manual for model-specific maintenance tips to extend the lifespan of your bread maker and maintain hygiene standards for consistent baking results․

Where to Find User Manuals and Support

Morphy Richards bread maker manuals are available online at their official website or through retailers like Argos․ PDF downloads and customer support services are also accessible․

8․1 Accessing Resources and Customer Support

For Morphy Richards bread maker users, accessing resources and customer support is straightforward․ The official Morphy Richards website offers downloadable PDF manuals for various models, ensuring easy access to instructions․ Additionally, retailers like Argos provide product support and manuals for specific bread makers․ Customers can also contact Morphy Richards directly through email or phone for assistance․ Online platforms like the Morphy Richards customer service page offer FAQs, troubleshooting guides, and warranty information․ Furthermore, community forums and review sites often share user experiences and tips, providing additional support for optimal use of the bread maker․

The Morphy Richards bread maker is a versatile and user-friendly appliance that simplifies bread making for both novices and experienced bakers․ With its range of features, including delayed timers and customizable settings, it offers convenience and flexibility․ The availability of detailed manuals and customer support ensures users can troubleshoot and optimize their baking experience․ By following the instructions and exploring recipes, users can achieve consistent, high-quality results․ Whether you’re a casual baker or a dedicated enthusiast, the Morphy Richards bread maker is a valuable addition to your kitchen, providing fresh, homemade bread with minimal effort and maximum satisfaction․

Bydante

l5p delete instructions

An L5P delete involves removing emissions components like the DPF, EGR, and SCR systems to enhance engine performance and reduce maintenance. This guide provides step-by-step instructions for the process.

1.1 What is an L5P Delete?

An L5P delete refers to the removal of emissions components like the Diesel Particulate Filter (DPF), Exhaust Gas Recirculation (EGR), and Selective Catalytic Reduction (SCR) systems from a Duramax L5P engine. This process aims to improve engine performance, reduce maintenance costs, and eliminate issues related to clogged emissions systems. It typically involves installing a DPF delete pipe and recalibrating the engine computer for proper functionality.

1.2 Why Perform an L5P Delete?

Performing an L5P delete enhances engine performance and improves fuel efficiency by eliminating restrictive emissions components. It reduces maintenance costs associated with cleaning or replacing the DPF and EGR systems. Additionally, it removes the risk of EGR-related issues and potential system clogs, offering a more reliable and powerful engine operation. This modification is particularly beneficial for diesel trucks under heavy use or in regions with strict emissions testing.

Benefits of L5P Delete

An L5P delete improves engine performance, enhances fuel efficiency, and reduces maintenance costs by eliminating emissions components like the DPF and EGR systems, offering a cost-effective solution for diesel trucks.

2.1 Improved Engine Performance

Removing the DPF and EGR systems reduces backpressure and allows for better airflow, resulting in increased power and torque. The engine operates more efficiently, delivering enhanced throttle response and smoother performance. This modification is particularly beneficial for diesel trucks, as it unlocks their full potential and improves overall drivability without the restrictions imposed by emissions-related components.

2.2 Enhanced Fuel Efficiency

By eliminating the DPF and EGR systems, exhaust flow is optimized, reducing backpressure and enabling the engine to run more efficiently. This leads to improved fuel economy, especially under heavy loads or towing conditions. The removal of these restrictive components allows for better combustion efficiency, resulting in noticeable savings on fuel costs over time.

2.3 Reduced Maintenance Costs

Removing the DPF and EGR systems eliminates the need for costly repairs, replacements, and cleanings associated with these components. Without these systems, there’s less risk of clogging or failure, reducing long-term maintenance expenses. Additionally, the simplified exhaust system minimizes the need for frequent inspections and filter replacements, leading to significant savings over time.

Tools and Materials Needed

The process requires a socket set, wrenches, screwdrivers, and the L5P delete kit, including a DPF delete pipe and EGR delete components for a complete installation.

  • Socket set
  • Wrenches
  • Screwdrivers
  • DPF delete pipe
  • EGR delete kit

3.1 L5P Delete Kit Components

The L5P delete kit typically includes a DPF delete pipe, EGR delete components, and sometimes an SCR delete kit. These parts are designed to replace or remove emissions-related systems, improving engine performance and reducing maintenance needs. The kit may also include additional components like exhaust gaskets, clamps, and hardware for a complete installation. Each part is specifically engineered to fit the Duramax L5P engine, ensuring compatibility and functionality.

  • DPF delete pipe
  • EGR delete components
  • SCR delete kit (optional)
  • Exhaust gaskets and clamps
  • Hardware for installation

3.2 Required Tools for Installation

Installing an L5P delete kit requires basic tools like wrenches, sockets, and exhaust tools. Specialized tools such as a saw or cutter may be needed for exhaust modifications. Ensure you have a torque wrench and jack stands for safe lifting. Additionally, tuning software like HP Tuners is necessary for recalibrating the ECM post-installation.

  • Socket set and wrenches
  • Exhaust saw or cutter
  • Jack stands and torque wrench
  • Tuning software (e.g., HP Tuners)

Step-by-Step Installation Guide

This guide outlines the process of removing emissions components and installing a DPF delete pipe, followed by EGR system modifications and ECM tuning for optimal performance.

  • Remove the DPF and EGR systems
  • Install the DPF delete pipe
  • Reinstall and modify the EGR system
  • Tune the ECM for proper calibration

4.1 Preparing for the Installation

Before starting, gather all tools and materials, including the L5P delete kit, basic mechanical tools, and a tuner for ECM calibration. Ensure the truck is on level ground with the engine cool. Consult the kit’s instructions and factory service manual for specific details. Disconnect the battery to prevent electrical issues during the process. Lay out all components neatly for easy access.

  • Tools: wrenches, sockets, and pneumatic tools
  • Materials: DPF delete pipe, EGR delete kit, and tuner
  • Prepare a clean workspace
  • Ensure proper safety precautions

4.2 Removing the DPF System

Begin by disconnecting the battery to prevent electrical issues. Remove the exhaust front pipe and downpipe, which may require rotation and pulling. Use wrenches and sockets to loosen connections. Carefully extract the DPF system, taking note of its mounting points. Set aside the original components for potential reuse or storage. This step is crucial for installing the DPF delete pipe.

  • Disconnect the battery
  • Remove exhaust pipes
  • Extract DPF system
  • Secure original components

4.3 Installing the DPF Delete Pipe

After removing the DPF system, align the DPF delete pipe with the exhaust flange. Secure it using the provided hardware, ensuring tight connections. Reattach the downpipe and front exhaust section, tightening all bolts evenly. Double-check for leaks and proper alignment. This step completes the physical installation, preparing the system for tuning.

  • Align the delete pipe
  • Secure all connections
  • Reattach exhaust components
  • Inspect for leaks

4.4 Removing and Reinstalling the EGR System

Disconnect the EGR cooler electrical connector and remove the mounting bolts. Carefully lift the EGR cooler and bypass valve, then set them aside. Install the EGR delete kit components, ensuring proper alignment and secure connections. Reattach all necessary coolant and vacuum lines, tightening all fittings firmly to prevent leaks. Double-check all connections for a leak-free installation.

  • Disconnect electrical connectors
  • Remove mounting bolts
  • Install EGR delete components
  • Reattach coolant and vacuum lines

Tuning and Recalibration

Tuning and recalibrating your ECM is crucial after an L5P delete to ensure optimal performance and compatibility with the modifications. Use HP Tuners for precise calibration.

  • Load custom tuning software
  • Adjust engine parameters
  • Monitor performance

5.1 Importance of Proper Tuning

Proper tuning is critical after an L5P delete to ensure the ECM operates efficiently with the new modifications. It optimizes fuel flow, enhances performance, and prevents engine damage. Without tuning, the engine may experience issues like poor idle, reduced power, and increased emissions. Tuning also ensures compliance with emissions standards and maximizes the benefits of the delete. Always use reputable software like HP Tuners for accurate recalibration.

5.2 Using HP Tuners for ECM Calibration

HP Tuners is a powerful tool for recalibrating the ECM after an L5P delete. Connect the device to your truck’s OBD-II port, scan for DTCs, and load custom tunes to optimize engine performance. This software ensures proper fuel flow, boosts power, and improves efficiency. It’s user-friendly for experienced tuners but may require professional assistance for optimal results and to avoid potential engine issues.

Potential Issues and Solutions

Common issues during installation include leaks, DTCs, or reduced performance. Solutions involve verifying connections, ensuring proper tuning, and consulting professional mechanics if problems persist or worsen.

6.1 Common Problems During Installation

Leaks, DTCs, or reduced performance are common issues during installation. These often result from improper connections, incorrect torque specifications, or incompatible components. Ensuring all connections are secure and using the correct tools can mitigate these problems. Additionally, improper software calibration or incomplete kit components may cause issues, requiring consulting with professionals or forums for troubleshooting guidance.

6.2 Troubleshooting Post-Installation Issues

Post-installation issues may include error codes, reduced performance, or DPF regeneration warnings. Use a scan tool to check for codes and ensure proper ECM calibration. Verify all connections are secure and free from leaks. If issues persist, consult the installation guide or seek assistance from professionals or online forums for troubleshooting specific problems related to the L5P delete.

Maintenance and Upkeep

Regular maintenance is crucial post-delete, including checking exhaust connections and ensuring proper engine performance. Monitor for leaks and clean filters to maintain efficiency and avoid issues.

7.1 Regular Maintenance Tips

Regular maintenance after an L5P delete is essential to ensure optimal performance. Inspect exhaust connections and monitor for leaks to prevent damage. Clean or replace filters as needed to maintain airflow and efficiency. Check engine performance regularly and address any issues promptly to avoid long-term damage. Follow a routine maintenance schedule to keep your engine running smoothly and reliably.

7.2 Monitoring Performance Post-Delete

After completing the L5P delete, monitor engine performance regularly to ensure optimal functioning. Look for signs of issues such as increased back pressure or decreased fuel efficiency. Inspect exhaust connections and components to maintain proper function. Regular monitoring helps identify potential problems early, preventing major repairs and preserving the benefits of the delete.

Regulatory Considerations

Performing an L5P delete involves removing emissions components like DPF, EGR, and SCR systems. This modification violates federal and state emissions standards. Always check local regulations to avoid penalties.

8.1 Understanding Emissions Regulations

Emissions regulations are laws designed to reduce pollution from vehicles. The L5P delete involves removing components like the DPF, EGR, and SCR systems, which are mandated by these regulations. These systems are required to minimize harmful emissions, and their removal can result in penalties or fines. Understanding these regulations is crucial to avoid legal consequences and ensure compliance with environmental standards.

8.2 Legal Implications of L5P Delete

Performing an L5P delete may violate emissions regulations, leading to legal consequences. Removing components like the DPF, EGR, and SCR systems can result in fines or penalties, especially during inspections. This modification is considered non-compliant with environmental standards, potentially voiding your vehicle’s warranty and exposing you to legal action if caught by authorities.

DIY vs. Professional Installation

The L5P delete process is DIY-friendly for those with basic mechanical skills, but professional installation is recommended for complex scenarios or to avoid potential risks.

9.1 DIY-Friendly Nature of the Process

The L5P delete process is designed to be DIY-friendly, with detailed step-by-step guides and video tutorials available. Basic mechanical skills are sufficient for completion. Enthusiasts can confidently tackle the installation using the provided instructions and components, ensuring a seamless experience without the need for advanced expertise.

9.2 When to Seek Professional Help

While the L5P delete process is DIY-friendly, complex steps like DPF removal or EGR system recalibration may require professional expertise. If unfamiliar with advanced mechanical tasks or troubleshooting, seeking help ensures proper installation and prevents potential engine damage. Additionally, tuning and recalibration are critical for optimal performance, making professional assistance highly recommended for these stages to avoid issues.

The L5P delete enhances performance and efficiency while reducing maintenance costs. Proper execution ensures optimal results, making it a worthwhile modification for diesel enthusiasts seeking improved engine capabilities.

10.1 Final Thoughts on L5P Delete

The L5P delete is a popular modification for enhancing diesel engine performance and reducing maintenance costs. While it offers significant benefits, proper installation and tuning are crucial to avoid issues. DIY enthusiasts with mechanical skills can successfully perform the delete, but professional assistance is recommended for complex steps. Always ensure compliance with local emissions regulations to avoid legal complications.

10.2 Importance of Proper Execution

Proper execution of an L5P delete is critical to ensure optimal engine performance and avoid potential issues. Improper installation can lead to reduced efficiency, increased emissions, or even engine damage. Adhering to step-by-step instructions and using quality components is essential. Additionally, ensuring the ECM is correctly recalibrated post-delete is vital for maintaining engine health and performance. Attention to detail guarantees a successful and trouble-free modification.