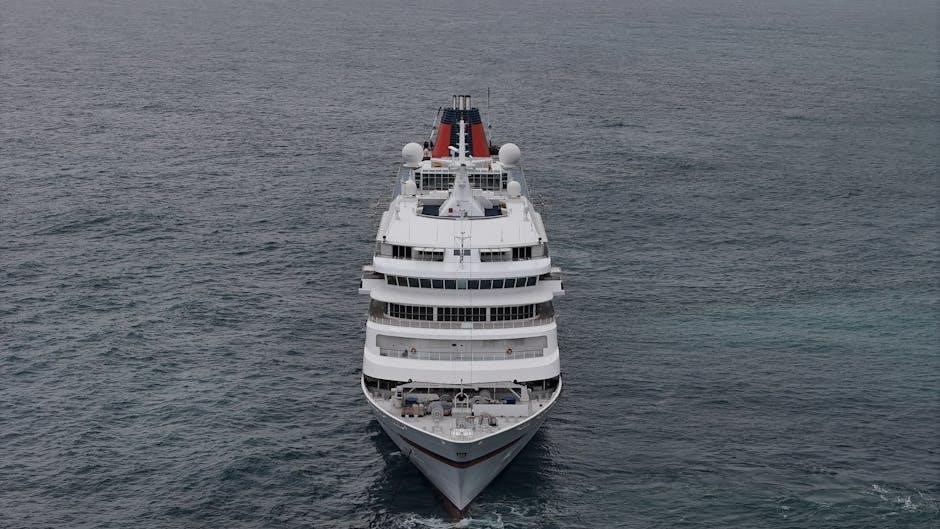
Author Archive dante

Bydante

manual de manejo de missouri en español

The Missouri Driver’s Manual in Spanish is a vital resource for Spanish-speaking drivers, providing essential information on traffic laws, road signs, and safe driving practices in Missouri.

Overview of the Manual

The Missouri Driver’s Manual in Spanish is a comprehensive guide designed to help Spanish-speaking drivers understand the state’s traffic laws, road signs, and safe driving practices. Available in PDF and audio formats, it covers essential topics such as rules of the road, traffic signals, and licensing requirements. The manual is free to download and serves as a crucial resource for both new and experienced drivers, ensuring they are well-prepared for the driver’s exam and equipped to drive safely in Missouri.

Importance for Spanish-Speaking Drivers

The Missouri Driver’s Manual in Spanish is crucial for Spanish-speaking drivers, offering clear and accessible information on traffic laws, road signs, and safe driving techniques. By providing content in their native language, it ensures understanding and compliance with state regulations, reducing barriers to obtaining a driver’s license. This resource is vital for new residents and non-English speakers, promoting road safety and equality in accessing driving privileges in Missouri.

Key Sections of the Missouri Driver’s Manual

The manual includes essential sections on traffic signs, rules of the road, and safe driving practices, ensuring Spanish-speaking drivers understand Missouri’s driving regulations and safety guidelines.

Traffic Signs and Signals

The Missouri Driver’s Manual in Spanish provides a comprehensive overview of traffic signs and signals, ensuring drivers understand their meanings and importance. It covers various types of signs, including warning, regulatory, and construction signs, as well as traffic signals and pedestrian signals. Clear visual descriptions help drivers recognize and interpret signs quickly. Understanding these signs is crucial for safe driving and adhering to Missouri’s traffic laws; The manual emphasizes the importance of obeying signals to ensure roadway safety for all users.

Rules of the Road

The Missouri Driver’s Manual in Spanish outlines the essential rules of the road to ensure safe and lawful driving. It covers topics such as right-of-way laws, speed limits, and proper procedures at intersections. The manual also emphasizes the importance of adhering to traffic laws, including those related to seat belt use and driving under the influence. By understanding these rules, drivers can reduce the risk of accidents and contribute to a safer roadway environment for everyone in Missouri.

Safe Driving Practices

The Missouri Driver’s Manual in Spanish emphasizes safe driving practices to reduce accidents and promote responsible driving. It covers topics such as defensive driving techniques, maintaining a safe following distance, and handling adverse weather conditions. The manual also highlights the importance of using headlights appropriately, avoiding distractions while driving, and being aware of pedestrian and bicycle traffic. By following these guidelines, drivers can significantly lower the risk of accidents and contribute to a safer roadway environment in Missouri.

Obtaining the Manual

The Missouri Driver’s Manual in Spanish can be downloaded as a PDF or accessed in audio format from the Missouri Department of Revenue’s official website or YouTube channel.

Downloading the PDF Version

The Missouri Driver’s Manual in Spanish is available for free download as a PDF from the Missouri Department of Revenue’s official website. This version is convenient for offline study and includes all essential chapters, such as the table of contents, driver license information, and traffic rules. The PDF format ensures easy navigation and accessibility on any device. It is identical to the printed version, providing accurate and official information to prepare for the driver’s exam. Additionally, the manual covers key topics like road signs, driving laws, and safe practices, making it a comprehensive resource for Spanish-speaking drivers. The PDF can be downloaded directly from the Missouri DOR website or through trusted online platforms, ensuring quick and easy access. This feature is particularly useful for those who prefer self-paced learning or need to study without internet connectivity. The manual is also split into chapters, allowing users to focus on specific areas, such as traffic signals or license requirements, before taking the exam. Furthermore, the PDF version is regularly updated to reflect the latest driving laws and regulations in Missouri, ensuring that all information is current and relevant. By downloading the PDF, drivers can efficiently prepare for their exams and gain a thorough understanding of safe driving practices in Missouri. The availability of the manual in Spanish further ensures inclusivity, making it accessible to a broader audience. Overall, the PDF version of the Missouri Driver’s Manual in Spanish is a valuable tool for anyone seeking to obtain a driver’s license in the state. It is also complemented by an audio version available on the Missouri Department of Revenue’s YouTube channel, catering to different learning preferences. The combination of these resources provides a well-rounded approach to exam preparation and driving education. The manual’s clarity and organization make it an indispensable guide for both new and experienced drivers. By leveraging these resources, drivers can confidently navigate Missouri’s roads and adhere to all applicable traffic laws. The PDF version is a testament to Missouri’s commitment to providing equal access to driving education for all residents, regardless of their primary language. It serves as a critical step toward ensuring road safety and promoting responsible driving practices across the state.

Accessing the Audio Version

The Missouri Driver’s Manual in Spanish is also available as an audio version, accessible through the Missouri Department of Revenue’s official YouTube channel. This resource is designed to assist Spanish-speaking drivers in studying for the driver’s exam. The audio version covers the same essential topics as the written manual, including traffic signs, road rules, and safe driving practices. It is a convenient option for individuals who prefer auditory learning or need additional support. The audio guide is free and easily accessible, making it a valuable tool for exam preparation. It complements the PDF version and ensures that all drivers have the resources needed to succeed. The audio version is particularly helpful for those who may find reading the manual challenging or prefer to study on the go. It is regularly updated to reflect the latest driving laws and regulations, ensuring accuracy and relevance. By utilizing the audio version, drivers can gain a deeper understanding of the material and feel more confident when taking the exam. This resource underscores Missouri’s commitment to providing accessible and inclusive driver education for all residents. The audio version is a practical and effective way to prepare for the driver’s exam, offering flexibility and ease of use; It is an excellent supplement to the written manual, catering to different learning styles and preferences.

Preparing for the Driver’s Exam

The Missouri Driver’s Manual in Spanish is your primary study resource. Use practice tests, study materials, and review exam formats to ensure readiness for the driver’s exam.

Practice Tests and Study Materials

The Missouri Driver’s Manual in Spanish offers a variety of study tools, including 50 practice questions and interactive guides. These resources help drivers understand traffic laws, signs, and safe driving practices. The manual is complemented by online practice tests and audio versions available on YouTube. Additionally, structured PDF chapters and community support make studying easier. Use these materials to prepare effectively for the written and driving exams, ensuring a thorough understanding of Missouri’s driving regulations.

Understanding the Exam Format

The Missouri Driver’s Manual in Spanish helps drivers understand the exam format, which includes a written test and a driving skills test. The written exam covers traffic signs, road rules, and safe driving practices. It consists of 10 questions and requires a passing score of at least 80%. Applicants must also complete a vision test. The manual provides a clear outline of what to expect, ensuring drivers are well-prepared for both the written and practical exams.

Types of Driver’s Licenses in Missouri

Missouri offers three main driver’s licenses: Regular, Commercial (CDL), and Motorcycle, each tailored to different driving needs and requirements.

Regular Driver’s License

A Regular Driver’s License in Missouri allows individuals to operate non-commercial vehicles. It is available to residents aged 16 and older, with requirements including proof of identity, residency, and legal presence. Applicants must pass vision, written, and driving tests. The license is renewable every six years. Additional fees and documentation apply for underage drivers. This license is essential for everyday driving needs in Missouri.

Commercial Driver’s License (CDL)

A Commercial Driver’s License (CDL) is required for operating commercial vehicles in Missouri. It is divided into classes (A, B, C) based on vehicle weight and type. Applicants must meet specific eligibility criteria, including age, residency, and medical standards. Additional endorsements are needed for specialized cargo, such as hazardous materials or passengers. The CDL process involves written exams, skills tests, and background checks. It is essential for professional drivers to ensure public safety and comply with federal regulations. The manual provides detailed guidance for obtaining and maintaining a CDL.

Motorcycle License

A Motorcycle License in Missouri requires specific training and testing. The manual details requirements for obtaining a Class M license, including vision tests, written exams, and road skills assessments. It covers motorcycle-specific safety tips, such as handling hazards and maintaining safe distances. The Motorcycle Operator Manual is available in Spanish, ensuring accessibility for all riders. It emphasizes the importance of proper gear and defensive driving techniques to reduce accident risks. This section is tailored for motorcyclists seeking to legally and safely operate their vehicles in Missouri.

Legal Requirements and Updates

The Spanish Missouri Driver’s Manual highlights legal requirements, including proof of identity, residency, and legal presence. Recent updates ensure compliance with current state driving laws and regulations.

Documentation Needed for Application

Applicants must provide proof of identity, residency, and legal presence in the U.S. Documents such as a valid passport, birth certificate, Social Security card, and utility bills are required. These documents must be original or certified copies and up-to-date to ensure compliance with state regulations. Additional requirements may apply for non-citizens, such as a valid visa or green card. Ensuring all documents are in order is crucial for a smooth application process.

Recent Updates to the Manual

The Missouri Driver’s Manual in Spanish has been updated to reflect current traffic laws and regulations. Key changes include revised sections on legal presence requirements and underage possession of substances; The 2025 edition is now available in both PDF and audio formats, accessible on the Missouri Department of Revenue’s website and YouTube channel. These updates ensure Spanish-speaking drivers receive accurate and comprehensive information to prepare for their exams and drive safely in Missouri.

Additional Resources

The Missouri DOR offers online tools, PDF guides, and an audio version of the manual; Additional support is available through community resources and state assistance programs to aid Spanish-speaking drivers.

Online Tools and Guides

The Missouri DOR provides online tools and guides to help Spanish-speaking drivers prepare for their exams. These include practice tests, interactive guides, and AI assistant support for clarifying complex terms. The manual is available on the Missouri DOR website and YouTube channel, offering audio versions and chapter-by-chapter resources. These tools ensure drivers can study effectively and understand traffic laws, signs, and safe driving practices in a convenient and accessible format.

Community and State Support

The Missouri DOR collaborates with community organizations to support Spanish-speaking drivers, ensuring access to the manual and resources. Local libraries and community centers often provide free access to the Spanish driver’s manual and practice tests. Additionally, state-funded programs offer free training materials and workshops to help drivers understand traffic laws and prepare for exams. This community-focused approach ensures equal opportunities for all residents to obtain a driver’s license and drive safely in Missouri.

The Missouri Driver’s Manual in Spanish is a comprehensive guide that equips drivers with essential knowledge for safe and confident driving. Study diligently, practice regularly, and utilize available resources to ensure success on your driving journey in Missouri.

Final Tips for Success

Mastering the Missouri Driver’s Manual in Spanish requires consistent study and practice. Utilize online resources, such as practice tests, to reinforce your understanding of traffic laws and signs. Listen to the audio version for additional support. Focus on key areas like road safety and legal requirements. Stay calm during the exam, and don’t hesitate to seek clarification if needed. Regular review and practical application of the manual’s content will significantly improve your chances of success.

Bydante

singer fashion mate instruction manual

This comprehensive guide provides detailed instructions for setting up, operating, and maintaining your Singer Fashion Mate sewing machine. Designed for both beginners and experienced users, it ensures seamless sewing experiences.

Discover key features, safety tips, and troubleshooting solutions to maximize your sewing potential and keep your machine in optimal condition. Master various stitching techniques with ease using this essential resource.

1.1 Purpose of the Manual

The Singer Fashion Mate instruction manual is designed to guide users in understanding and utilizing their sewing machine effectively. It provides clear, step-by-step instructions for setup, operation, and maintenance, ensuring optimal performance and longevity of the machine.

Whether you’re a beginner or an experienced sewist, this manual offers comprehensive guidance, troubleshooting tips, and safety precautions to enhance your sewing experience and help you achieve professional-quality results effortlessly.

1.2 Key Features of the Singer Fashion Mate Sewing Machine

The Singer Fashion Mate sewing machine is equipped with an array of features designed to enhance your sewing experience. It includes multiple stitch options, automatic tension, and interchangeable presser feet for various fabrics and techniques. The machine also offers a free-arm design for easy sewing of cuffs and sleeves, along with a built-in needle threader for convenience. These features make it versatile and user-friendly for both basic and advanced sewing projects.

Safety Precautions

Always unplug the machine before cleaning or maintenance. Avoid loose clothing near moving parts and keep children away. Follow guidelines to ensure safe and secure operation.

2.1 General Safety Rules

  • Always unplug the machine before cleaning, lubricating, or performing maintenance to avoid accidents.
  • Keep loose clothing and long hair tied back to prevent entanglement with moving parts.
  • Ensure the work area is well-lit and free from clutter to maintain clear visibility.
  • Keep children and pets away from the sewing machine while it is in operation.
  • Avoid using the machine near water or in humid environments to prevent electrical hazards.

Adhering to these rules ensures a safe and secure sewing experience.

2.2 Electrical Safety Guidelines

  • Always unplug the machine before cleaning, lubricating, or performing maintenance to prevent electric shock.
  • Keep the sewing machine away from water or moisture to avoid electrical hazards.
  • Never use damaged power cords or plugs, as they can cause electrical malfunctions.
  • Avoid overloading electrical outlets with multiple high-power devices.
  • Use only Singer-approved power adapters and accessories to ensure compatibility and safety.

Following these guidelines helps protect against electrical risks and ensures safe operation of your Singer Fashion Mate sewing machine.

Setting Up Your Singer Fashion Mate Sewing Machine

Unpack and assemble the machine carefully, ensuring all parts are included. Check the power cord, place it on a stable surface, and refer to your manual for proper setup;

3.1 Unpacking and Assembling the Machine

Unpack your Singer Fashion Mate sewing machine carefully to avoid damage. Ensure all components, including the machine, accessories, and manual, are included in the box. Place the machine on a stable surface and verify that all parts are undamaged. Follow the step-by-step assembly instructions provided in the manual to ensure proper setup. This will help you avoid any issues during operation and ensure your machine is ready for use.

3.2 Threading and Bobbin Setup

Proper threading and bobbin setup are crucial for smooth operation. Follow the manual’s step-by-step guide to ensure correct thread placement and bobbin installation. Always turn off the machine before starting. Use the bobbin specifically designed for your Singer Fashion Mate model to prevent issues. Refer to the manual’s diagrams for clarity. Correct setup ensures consistent stitching and minimizes potential problems during sewing. Proper tension is key to avoiding fabric bunching or thread breakage.

Operating the Singer Fashion Mate Sewing Machine

Follow the step-by-step guide in the manual to operate your Singer Fashion Mate. Use the control panel to select stitches and adjust settings. Ensure proper fabric alignment and tension for smooth sewing. Refer to the manual for specific operations and troubleshooting tips to maximize your sewing experience. Always turn off the machine when not in use to ensure safety and longevity.

4.1 Basic Sewing Operations

Start by turning on the machine and selecting the desired stitch. Properly thread the machine and bobbin as outlined in the manual. Align fabric edges evenly under the presser foot. Gently guide the fabric with steady hands, ensuring even tension. Use the control panel to adjust stitch length and width for different fabrics. Always turn off the machine when not in use. Follow the manual’s guidance for smooth, consistent sewing results. Proper threading and fabric alignment are essential for optimal performance. Keep the work area clear and well-lit to avoid accidents.

4.2 Advanced Features and Techniques

Explore advanced stitching options, including decorative and stretch stitches, perfect for intricate designs. Utilize the automatic buttonhole feature for precise results. Attachments like the zipper foot and blind hem foot enhance versatility. Experiment with free-arm sewing for cuffs and sleeves. Adjust tension settings for various fabrics to ensure professional finishes. The Singer Fashion Mate also supports quilting and embroidery with specialized stitches, making it ideal for complex projects. Refer to the manual for step-by-step guidance on mastering these techniques. Proper use of these features ensures flawless and professional-looking seams every time. Regular practice will help you unlock the machine’s full potential, enabling you to tackle a wide range of sewing tasks with confidence and precision.

Troubleshooting Common Issues

This section helps identify and resolve common problems, such as thread breakage or machine jamming. Refer to error codes and step-by-step solutions for quick fixes.

5.1 Identifying and Solving Common Problems

This section provides solutions for issues like thread breakage, uneven stitching, or machine jamming. Check for loose threads, incorrect tension settings, or improper needle alignment. If the machine stops suddenly, ensure the bobbin is correctly placed and the power cord is secure. For persistent issues, consult the error code chart or contact Singer support for assistance. Regular maintenance and proper usage can prevent many common problems.

5.2 Understanding Error Codes and Solutions

Error codes on your Singer Fashion Mate sewing machine indicate specific issues. For example, E1 may signal a malfunction in the needle bar, while E2 could indicate a bobbin error. Refer to the manual or Singer’s official website for a detailed list of codes and solutions. If issues persist, contact Singer support for professional assistance. Regular maintenance and proper usage can help minimize errors and ensure smooth operation.

Maintenance and Care

Regularly clean and lubricate your Singer Fashion Mate to ensure optimal performance. Store it in a dry, cool place to protect its components and extend its lifespan.

6.1 Cleaning the Machine

Regular cleaning is essential for maintaining your Singer Fashion Mate’s performance. Turn off and unplug the machine before cleaning. Use a soft brush or cloth to remove dust and lint from the bobbin case, feed dogs, and other visible areas. Avoid harsh chemicals or abrasive materials that may damage the finish. For detailed cleaning instructions, refer to the manual or Singer’s official support resources to ensure proper care and longevity of your machine.

6.2 Lubricating Moving Parts

Regular lubrication ensures smooth operation of your Singer Fashion Mate. Turn off and unplug the machine before lubricating. Apply a few drops of sewing machine oil to the moving parts, such as the bobbin hook and gear shafts. Avoid over-lubrication to prevent attracting dust. Refer to the manual for specific locations and instructions. Proper lubrication extends the machine’s lifespan and maintains optimal performance for years of reliable sewing.

Accessories and Optional Attachments

Explore Singer-approved accessories like zipper feet, buttonhole makers, and extension tables to enhance your sewing experience. Visit Singer’s official website or authorized dealers for compatible attachments.

7.1 Compatible Accessories

The Singer Fashion Mate sewing machine supports a variety of compatible accessories to enhance your sewing experience; These include zipper feet, buttonhole makers, and extension tables. Visit Singer’s official website or authorized dealers to explore the full range of compatible attachments. Ensure all accessories are Singer-approved to maintain machine performance and safety. Properly installed attachments can expand your creative possibilities and improve sewing efficiency.

7.2 Installing and Using Attachments

To install attachments on your Singer Fashion Mate, turn off the machine and unplug it. Follow the step-by-step instructions in the manual for specific attachments. Each accessory is designed for particular tasks, such as zipper feet for seams or buttonhole makers for precise stitching. Always ensure proper alignment and secure installation to maintain functionality. Refer to Singer’s official website or support channels for additional guidance or troubleshooting. Proper usage enhances your sewing experience and prevents machine damage.

Resources and Support

Access official Singer support through www.singerco.com, email, or 1-800-474-6437 for live assistance. Singer provides reliable resources to address all your sewing machine needs effectively.

8.1 Official Singer Support Channels

For assistance, visit Singer’s official website at www.singerco.com or contact their dedicated support team via email or phone at 1-800-474-6437. These channels provide direct access to troubleshooting guides, repair services, and expert advice, ensuring your Singer Fashion Mate operates smoothly and efficiently. Additionally, Singer offers live one-on-one support from certified professionals to address specific queries or technical issues promptly and effectively.

8.2 Online Communities and Forums

Engage with online sewing communities and forums dedicated to Singer Fashion Mate users. These platforms offer valuable troubleshooting tips, project ideas, and advice from experienced sewists. Share your experiences, ask questions, and gain insights from a supportive community. Many forums also feature tutorials and resources to enhance your sewing skills. Participating in these discussions can help you optimize your machine’s performance and explore new creative possibilities.

Bydante

year 7 maths test with answers pdf

Year 7 Maths tests assess students’ understanding of key concepts like operations with integers and geometry. Regular practice with past papers and resources like Cambridge Year 7 Maths Learner Book helps build confidence and improve problem-solving skills.

1.1 Overview of Year 7 Maths Curriculum

The Year 7 Maths curriculum focuses on building foundational skills in key areas such as operations with integers, geometry, and measurement. Students learn to solve problems involving addition, subtraction, multiplication, and division of integers, as well as understanding basic geometric shapes and their properties. The curriculum also introduces concepts of data analysis and probability, preparing students for more complex maths in higher grades. Regular practice with past papers and resources like the Cambridge Year 7 Maths Learner Book supports their learning journey.

1;2 Importance of Maths Tests in Year 7

Maths tests in Year 7 are crucial for assessing students’ understanding of key concepts and identifying areas for improvement. They help build problem-solving skills, time management, and exam readiness. Regular testing also fosters confidence and familiarity with test formats, ensuring students are well-prepared for future exams. By practicing with resources like past papers and the Cambridge Year 7 Maths Learner Book, students can refine their abilities and achieve better academic outcomes. These tests are essential for laying a strong foundation for higher-grade maths.

Essential Strategies for Success in Year 7 Maths Tests

Active study techniques, such as solving past papers and practicing regularly, are key to excelling in Year 7 maths tests. Use available resources effectively.

2.1 Active Study Techniques

Active study techniques involve engaging deeply with material, such as solving practice questions and reviewing mistakes. Using resources like the Cambridge Year 7 Maths Learner Book can enhance understanding. Regular revision helps reinforce key concepts, ensuring students are well-prepared for their tests. By actively participating in problem-solving, students build confidence and improve their mathematical reasoning skills. This approach fosters a strong foundation for success in Year 7 maths tests and beyond. Consistent effort leads to measurable progress.

2.2 Maximizing Practice with Past Papers

Practicing with past papers is a proven way to improve test performance. It helps students identify question patterns, understand exam formats, and build problem-solving speed. By simulating real test conditions, students can enhance their time management and reduce exam anxiety. Reviewing answers, especially incorrect ones, allows learners to understand mistakes and improve weak areas. Regular practice with past papers, combined with active learning, ensures a strong grasp of key concepts and boosts confidence for Year 7 maths tests. Consistent effort yields noticeable progress.

Understanding the Test Structure

Year 7 maths tests typically include multiple-choice and open-response questions covering operations with integers and geometry. Time management is crucial to complete all sections effectively.

3.1 Types of Questions in Year 7 Maths Tests

Year 7 maths tests include multiple-choice, true-false, short-answer, and word-problem questions. Multiple-choice tests require selecting the correct answer from options, while true-false questions assess factual knowledge. Short-answer questions demand concise mathematical solutions, and word problems apply maths to real-life scenarios. These question types evaluate problem-solving skills, understanding, and the ability to communicate solutions clearly. Regular practice with past papers and resources like the Cambridge Year 7 Maths Learner Book helps students familiarize themselves with these formats and improve their performance.

3.2 Time Management Tips

Effective time management is crucial for success in Year 7 maths tests. Allocate time evenly to each question, spending no more than a minute on simple problems and up to three minutes on complex ones. Skip difficult questions initially and return to them later. Use the remaining time to review answers and ensure all questions are attempted. This strategy helps maximize scores and reduces stress during the test. Practice with past papers aids in refining timing skills.

Key Topics Covered in Year 7 Maths Tests

Year 7 maths tests focus on operations with integers, geometry, and measurement. These topics form the foundation for advanced maths concepts and real-world applications.

4.1 Operations with Integers

Operations with integers are a core component of Year 7 maths tests. Students are assessed on their ability to perform addition, subtraction, multiplication, and division with positive and negative integers. Simplifying fractions and solving equations involving integers are also key skills. These questions often require careful manipulation of numbers and a solid understanding of basic arithmetic principles. Regular practice with past papers helps students master these operations and build confidence in their problem-solving abilities.

4.2 Geometry and Measurement

Geometry and measurement are fundamental areas in Year 7 maths tests, focusing on understanding shapes, angles, and volume calculations. Students are required to interpret and solve problems involving perimeter, area, and properties of 2D and 3D shapes. Practical applications of measurement, such as converting units, are also emphasized. These topics build foundational skills for higher-level maths, making consistent practice and review essential for success. Regular use of resources like past papers and learner books can enhance accuracy and speed.

Benefits of Using Practice Tests

Practice tests enhance preparation by familiarizing students with test formats and identifying weak areas. They build confidence, improve time management, and reinforce problem-solving skills effectively.

5.1 Building Confidence with Practice Tests

Practice tests play a crucial role in boosting students’ confidence by familiarizing them with test formats and question types. Regularly attempting practice tests helps students identify their strengths and weaknesses, allowing them to focus on areas that need improvement. Over time, this consistent practice reduces anxiety and builds a sense of readiness for actual exams. Additionally, reviewing answers and explanations reinforces understanding, enabling students to approach tests with greater self-assurance and problem-solving skills.

5.2 Identifying Weak Areas

Practice tests are invaluable for identifying areas where students need improvement. By reviewing answered questions, learners can pinpoint topics they struggle with, such as operations with integers or geometry. This focused approach allows for targeted revision, ensuring weaker areas receive extra attention. Utilizing resources like the Cambridge Year 7 Maths Learner Book and online platforms provides structured support. Regularly analyzing test results helps track progress and address gaps in understanding, leading to more effective study habits and improved overall performance.

How to Review and Learn from Answers

Understanding correct and incorrect answers helps students identify mistakes and improve. Simplify fractions and break down solutions into clear steps for better comprehension and future reference.

6.1 Understanding Correct and Incorrect Answers

Reviewing answers helps students identify mistakes and understand where they went wrong. Correct answers reinforce key concepts, while incorrect ones highlight areas for improvement. Simplifying solutions and breaking them into clear steps ensures better comprehension. Analyzing errors allows students to learn from their mistakes and avoid repeating them. This process builds confidence and improves problem-solving skills, helping students master the material effectively. Regular review of answers is essential for long-term success in Year 7 Maths.

6.2 Simplifying Fractions and Solutions

Simplifying fractions and solutions makes them easier to understand and work with. Breaking down complex problems into manageable steps ensures clarity. For instance, reducing fractions like 4/8 to 1/2 saves time and minimizes errors. Clear step-by-step solutions help students grasp concepts deeply. This approach builds a strong foundation and boosts confidence, particularly when preparing for Year 7 Maths tests. Regular practice in simplifying fractions enhances overall problem-solving efficiency and accuracy.

General Exam Tips for Year 7 Students

Effective exam strategies include staying calm, managing time wisely, and using resources like calculators. Regular practice with past papers enhances confidence and familiarizes students with test formats, ensuring better performance.

7.1 Staying Calm and Focused

Staying calm and focused during exams is crucial for Year 7 students. Taking deep breaths and reading questions carefully can prevent panic. Practicing mindfulness or simple relaxation techniques beforehand helps maintain composure. Ensuring a good night’s sleep and a healthy breakfast on test day also supports mental clarity. Students should remind themselves that it’s okay to make mistakes and that asking for help is a sign of strength, not weakness. Regular practice builds confidence, reducing anxiety and allowing students to perform at their best.

7.2 Using Available Resources Effectively

Utilizing available resources like textbooks, past papers, and online platforms can significantly enhance exam preparation. Cambridge Year 7 Maths Learner Book offers structured lessons and practice questions. Online platforms provide interactive exercises and timed tests to simulate exam conditions. Regularly reviewing answers and explanations helps identify strengths and weaknesses. Encourage students to use these tools consistently to build familiarity and confidence with the test format and content, ensuring they are well-prepared for their Year 7 Maths tests.

Recommended Resources for Year 7 Maths

The Cambridge Year 7 Maths Learner Book is an excellent resource, providing comprehensive lessons and practice questions. Online platforms like XtraMath and past papers offer additional support for test preparation.

8.1 Cambridge Year 7 Maths Learner Book

The Cambridge Year 7 Maths Learner Book is a comprehensive resource designed to support students in mastering key maths concepts. It covers a wide range of topics, including operations with integers and geometry, through detailed explanations and practice questions. Available as a free PDF download, this book provides students with the opportunity to work through problems at their own pace. Its structured approach and clear solutions make it an invaluable tool for preparing for Year 7 maths tests and building a strong foundation in mathematics.

8.2 Online Platforms for Practice

Online platforms offer interactive and engaging ways to practice Year 7 maths skills. Websites like Khan Academy, Mathletics, and XtraMath provide structured exercises and quizzes tailored to the curriculum. These platforms often include progress tracking, instant feedback, and accessible resources. Many offer free or low-cost access, making them ideal for students seeking additional practice. They cover key topics such as operations with integers and geometry, helping students build confidence and improve their problem-solving abilities for upcoming maths tests. Regular use of these tools can significantly enhance understanding and performance.

Final Tips for Achieving High Grades

Regular revision, consistent practice, and seeking support when needed are key to success. Simplify solutions, stay calm, and use available resources effectively to achieve high grades.

9.1 Regular Revision and Practice

Consistent practice and regular revision are critical for mastering Year 7 Maths. Use past papers to identify weaknesses and focus on areas needing improvement. Allocate time daily for problem-solving to build confidence and fluency. Utilize resources like the Cambridge Learner Book for structured study. Regularly reviewing notes and textbook exercises ensures a strong foundation, helping students approach tests with confidence and readiness. This routine fosters long-term understanding and success.

9;2 Seeking Support When Needed

Encourage students to ask for help when struggling with Maths concepts. Teachers, classmates, and online platforms can provide valuable guidance. Utilizing resources like Cambridge Learner Book answers or online forums can clarify doubts. Regularly seeking support ensures misunderstandings are addressed early, preventing gaps in knowledge. This proactive approach fosters confidence and improves problem-solving skills, leading to better test performance and overall academic success. Remember, seeking help is a sign of strength, not weakness.

Year 7 Maths tests are a crucial step in foundational maths skills. Practice with past papers, seeking support, and regular revision are key to success and confidence.

10.1 Summary of Key Points

Year 7 Maths tests evaluate foundational skills in operations with integers, geometry, and measurement. Active study techniques, such as practicing past papers and simplifying fractions, enhance understanding. Utilizing resources like the Cambridge Year 7 Maths Learner Book and online platforms supports learning. Regular revision and seeking help when needed are crucial for success. Understanding correct and incorrect answers helps identify weak areas, while time management and staying calm during exams ensure optimal performance. Consistent effort and confidence-building practices lead to achieving high grades.

10.2 Encouragement for Future Success

Remember, consistent effort and regular practice are key to mastering Year 7 Maths. Each test is a step toward building a strong foundation for future success. Stay confident, ask questions, and seek support when needed. Celebrate small achievements and keep a positive mindset. With dedication and the right resources, you’ll excel in Maths and beyond. Keep pushing forward—your hard work will pay off!

Bydante

minolta x 700 manual

The Minolta X-700 manual is essential for understanding and optimizing the use of this iconic SLR camera. It provides detailed guidance on both basic and advanced features, ensuring photographers can unlock its full potential; The manual covers everything from aperture priority mode to manual exposure control, offering comprehensive insights for enthusiasts and professionals alike. Regular maintenance tips and troubleshooting solutions are also included to prolong the camera’s longevity and performance. Whether you’re a novice or an experienced photographer, this manual serves as an indispensable resource for mastering the Minolta X-700.

Overview of the Minolta X-700 Camera

The Minolta X-700 is an iconic SLR camera renowned for its advanced features and user-friendly design. As part of the Minolta Program System, it offers aperture priority and programmed auto-exposure modes, making it versatile for both casual and professional photography. Compatible with a wide range of lenses and accessories, the X-700 remains a favorite among photographers due to its reliability and creative control options.

Importance of the Manual for Optimal Use

The Minolta X-700 manual is crucial for unlocking the camera’s full potential. It provides detailed insights into advanced features like aperture priority and manual modes, ensuring precise control. Maintenance tips and troubleshooting guides help extend the camera’s lifespan. Whether you’re a novice or an expert, the manual is an essential tool to enhance your photography experience and master the X-700’s capabilities effectively.

Minolta X-700 Service Manual

The Minolta X-700 Service Manual offers comprehensive guidance for maintenance and repair. It includes detailed technical specifications, circuit diagrams, and step-by-step instructions for troubleshooting and servicing the camera.

Features and Specifications Detailed

The Minolta X-700 manual highlights its advanced features, including aperture priority mode, manual exposure control, and programmed auto-exposure. It details the camera’s robust build, MD lens mount compatibility, and integration with the Minolta Program System. Specifications cover shutter speeds, metering systems, and flash compatibility, ensuring photographers understand the camera’s capabilities and how to utilize them effectively for diverse shooting scenarios.

Technical Specifications and Diagrams

The Minolta X-700 manual provides detailed technical specifications, including shutter speeds of 1/1000 to 1 second, ISO range of 12-3200, and metering systems. Diagrams illustrate the camera’s internal components, such as the shutter mechanism and aperture control. Schematics for circuit boards and lens mounts are included, offering a comprehensive understanding of the camera’s engineering and functionality for repair and maintenance purposes.

Download Options and Availability

The Minolta X-700 manual is widely available for download in PDF format from various sources. Websites like mikebutkus.org and elektrotanya.com offer high-quality scans of the original manual, including service and repair guides. Additionally, platforms like Rapidshare and Lensinc.net provide downloadable versions, ensuring easy access for users seeking detailed instructions and technical diagrams. Files are typically free and range in size from 5 MB to 30 MB, catering to different needs.

Minolta X-700 Repair Manual

The Minolta X-700 repair manual provides detailed instructions for resolving common issues, including circuit diagrams and step-by-step guides. It covers technical specifications, maintenance tips, and safety precautions, ensuring users can perform repairs confidently. The manual is available online as a PDF, offering comprehensive support for photographers seeking to restore their camera to optimal functionality and extend its lifespan effectively.

Common Issues and Solutions

Common issues with the Minolta X-700 include faulty shutters, inaccurate metering, and viewfinder fogging. Solutions involve cleaning the shutter curtains, adjusting the light meter, and replacing faulty seals. The repair manual provides step-by-step guides for these fixes, ensuring users can address problems effectively. Regular maintenance, such as cleaning and lubricating moving parts, helps prevent these issues and extends the camera’s lifespan.

Step-by-Step Repair Instructions

The Minolta X-700 repair manual provides clear, step-by-step guidance for resolving common issues. Start by identifying the problem through diagnostic tests. Gather necessary tools, such as screwdrivers and replacement parts. Follow the manual’s instructions to disassemble, repair, or replace faulty components. Ensure proper alignment and reassembly, then test functionality to confirm repairs. Always refer to the manual for specific procedures and safety precautions.

Tools and Resources Needed

The Minolta X-700 repair requires specific tools, such as precision screwdrivers, torque wrenches, and electrical test equipment. Ensure you have replacement parts, like capacitors or circuit boards, as outlined in the service manual. Download the PDF manual for detailed diagrams and instructions. Use anti-static precautions to protect sensitive components during repairs. Refer to the manual’s guidelines for proper tool usage and safety measures.

Minolta X-700 Owner’s Manual

The Minolta X-700 Owner’s Manual is a comprehensive guide designed for both novice and experienced photographers. It covers basic operations, advanced features, and expert techniques to enhance your photography skills and maximize the camera’s potential. The manual ensures users understand every function, from aperture settings to flash synchronization, helping them achieve professional-quality results effortlessly.

Basic Camera Operations

The Minolta X-700 manual provides clear instructions for basic camera operations, including film loading, battery installation, and mode selection. It guides users through setting aperture, shutter speed, and ISO, ensuring a smooth start for photographers. The manual also explains the camera’s core functions, such as focusing, metering, and flash synchronization, helping users master fundamental photography techniques with ease and confidence.

Advanced Features and Modes

The Minolta X-700 manual details advanced features like aperture priority mode, manual exposure control, and programmed auto-exposure. It explains how to use metered manual mode for precise control and creative effects. The manual also covers flash synchronization, multiple exposure techniques, and depth-of-field preview, empowering photographers to explore advanced creative possibilities with confidence and precision.

Tips for Better Photography

Mastering the Minolta X-700 involves understanding its advanced modes and applying practical techniques. Use aperture priority for precise depth of field control and experiment with manual exposure for creative effects. Properly synchronize flash units for balanced lighting and explore multiple exposures for artistic results. Regularly clean the lens and sensor, and familiarize yourself with the camera’s metering system for optimal results in various lighting conditions.

Minolta X-700 Circuit Diagrams

The Minolta X-700 circuit diagrams provide a detailed electrical layout, enabling users to identify components and understand their functions. These diagrams are essential for repairs and modifications, ensuring safe and accurate troubleshooting of the camera’s internal systems.

Understanding the Electrical Layout

The Minolta X-700’s circuit diagrams reveal its intricate electrical architecture, showcasing how components like sensors, motors, and switches interconnect. These diagrams are crucial for diagnosing issues, enabling precise location of faults and guiding repairs. By understanding the layout, users can safely navigate the camera’s internal systems, ensuring modifications and troubleshooting are performed effectively without risking damage to critical components.

Component Identification and Function

The Minolta X-700’s circuit diagrams detail essential components such as sensors, motors, and switches, each serving specific roles in camera operation. The shutter mechanism, aperture control, and metering system are highlighted, enabling precise adjustments. Understanding these components is vital for repairs and customization, as outlined in the service manual, which provides a clear guide to their functions and interconnections.

Safety Precautions for Handling

When working with the Minolta X-700, ensure proper handling to avoid damage or injury. Disconnect the battery before servicing to prevent electrical shocks. Use insulated tools for internal repairs to protect components from static discharge. Avoid touching sensitive electronics or circuit boards to maintain functionality. Follow all safety guidelines in the service manual to ensure safe and effective maintenance of your camera.

Minolta X-700 Camera Modes

The Minolta X-700 offers versatile modes, including Aperture Priority, Manual, and Programmed Auto-Exposure. These modes provide precise control over exposure settings, catering to both novice and professional photographers.

Aperture Priority Mode

In Aperture Priority Mode, the Minolta X-700 allows users to set the aperture, while the camera automatically adjusts the shutter speed for proper exposure. This mode is ideal for controlling depth of field, enabling creative focus effects. Photographers can easily experiment with lighting conditions while maintaining precise control over their compositions. The manual provides clear instructions for optimizing this feature.

Manual Mode and Exposure Control

Manual Mode on the Minolta X-700 offers full-metered exposure control, allowing photographers to manually set both aperture and shutter speed for precise creative control. This mode is ideal for achieving specific effects, such as intentional overexposure or underexposure. The manual provides detailed guidance on using the built-in metering system to ensure accurate exposures, making it a powerful tool for advanced photographers seeking full control over their images.

Programmed Auto-Exposure Mode

The Minolta X-700’s Programmed Auto-Exposure Mode simplifies photography by automatically setting both aperture and shutter speed for optimal exposure. This mode is ideal for beginners and professionals alike, offering ease of use while maintaining high-quality results. The manual provides clear instructions on how to utilize this feature effectively, ensuring seamless photography without manual adjustments, allowing users to focus on composition and creativity.

Accessories and Compatible Equipment

The Minolta X-700 supports a wide range of accessories, including lenses with the SR mount, flash units like the Auto Electroflash 280PX, and other compatible devices for enhanced functionality.

Lenses and Mounts

The Minolta X-700 uses the SR mount, compatible with a wide range of MD and MC lenses. Popular options include the MD 50mm f/1.7, MD 28mm f/2.8, and MD 70-210mm f/3.5. These lenses offer versatility for various photography needs, from portraits to landscapes. The SR mount ensures optimal performance and compatibility, making it easy to expand your creative possibilities with high-quality optics.

Flash Units and Accessories

The Minolta X-700 supports various flash units, including the Auto Electroflash 280PX, offering reliable illumination. Its hot shoe and TTL flash metering ensure precise exposure control. Additional accessories like remote cords and external flash units enhance functionality, providing versatility for both casual and professional photography needs, and ensuring optimal performance in diverse lighting conditions.

Other Compatible Devices

The Minolta X-700 is compatible with a range of accessories, including remote cords, motor drives, and external flash units. These devices enhance functionality, offering flexibility for various photography needs. Compatibility ensures seamless integration with the camera, providing photographers with additional tools to capture high-quality images in diverse settings and lighting conditions, while maintaining optimal performance and versatility;

Troubleshooting and Maintenance

This section covers troubleshooting common issues and maintenance tips for the Minolta X-700, ensuring optimal performance and longevity. Regular maintenance and prompt issue resolution are vital for preserving camera functionality and extending its lifespan.

Common Problems and Solutions

Common issues with the Minolta X-700 include shutter sticking, light leaks, and faulty metering. Solutions involve cleaning the shutter curtains, replacing worn seals, and adjusting or replacing the light meter. Proper maintenance, such as regular cleaning and lubrication of moving parts, helps prevent these problems. Refer to the manual for step-by-step repair guidance and ensure optimal camera performance.

Maintenance Tips for Longevity

Regularly clean the camera’s exterior and viewfinder to prevent dust buildup. Lubricate moving parts like the film advance and shutter mechanism to ensure smooth operation. Store the camera in a dry, cool place to avoid moisture damage. Check and replace worn light seals to prevent light leaks. Refer to the manual for detailed maintenance schedules and procedures to extend the camera’s lifespan and performance.

When to Seek Professional Help

If your Minolta X-700 experiences complex issues like faulty electronics, internal mechanical failures, or severe damage, consult a professional. DIY repairs for intricate problems can lead to further damage or safety risks. Professionals have the expertise, tools, and experience to handle such repairs effectively, ensuring your camera’s longevity and optimal performance without compromising its value.

The Minolta X-700 manual is a comprehensive guide for photographers, offering detailed insights into camera operations, maintenance, and troubleshooting. For further reading, visit Mike Butkus’ website or online archives for downloadable PDFs and additional resources.

The Minolta X-700 manual provides a detailed guide to camera operations, maintenance, and troubleshooting. It covers basic and advanced features, including aperture priority and manual modes. The manual also offers maintenance tips and solutions for common issues. Additional resources, such as downloadable PDFs from Mike Butkus’ website, are recommended for further reference. This guide is invaluable for both novice and experienced photographers.

Recommended Resources and Links

For comprehensive guidance, visit mikebutkus.org for high-quality Minolta X-700 manual scans. ElektroTanya offers detailed circuit diagrams and repair guides. Rapidshare provides additional service manuals, while LensInc.net includes supplementary materials. These resources ensure optimal understanding and maintenance of your camera, catering to both enthusiasts and professionals seeking in-depth knowledge.

Bydante

motor nameplate details pdf

A motor nameplate is a standardized data plate providing essential operational and technical specifications. It includes horsepower, voltage, and other critical details for proper installation and maintenance.

What is a Motor Nameplate?

A motor nameplate is a permanent data plate attached to electric motors, providing essential technical and operational specifications. It includes details such as horsepower, voltage, current, speed, efficiency class, and insulation ratings. The nameplate acts as a quick reference for installing, maintaining, and operating the motor correctly. Manufacturers standardize the format to ensure consistency, making it easier for technicians to identify key information. It also includes critical data like phase, frequency, service factor, and frame size. This information is vital for ensuring the motor operates within its designed parameters, adheres to safety standards, and meets application requirements. The nameplate is a compliance document, verifying the motor meets industry standards like NEMA or IEC. Understanding the nameplate is crucial for proper motor selection, installation, and maintenance, ensuring safe and efficient operation.

Importance of Understanding Motor Nameplate Information

Understanding motor nameplate information is crucial for ensuring safe, efficient, and correct operation of electric motors. The nameplate provides essential details like horsepower, voltage, and efficiency, which are vital for proper installation, maintenance, and troubleshooting. It helps technicians verify that the motor is suitable for the intended application and operates within specified limits. Misinterpreting nameplate data can lead to overloading, reduced efficiency, or even safety hazards. Additionally, the nameplate ensures compliance with industry standards, such as NEMA or IEC, providing a reference for compliance and regulatory requirements. Proper interpretation of nameplate information also aids in selecting the right replacement motor and performing routine maintenance. This understanding is fundamental for optimizing motor performance, reducing downtime, and extending the motor’s lifespan in industrial and commercial settings.

Essential Information on a Motor Nameplate

A motor nameplate includes horsepower, voltage, current, operating speed, efficiency class, insulation class, and other critical specifications. These details ensure proper motor selection, installation, and maintenance.

Horsepower, Voltage, and Current Ratings

Horsepower (HP) indicates the motor’s mechanical output power, essential for determining its suitability for specific applications. Voltage ratings specify the motor’s designed operating voltage, crucial for compatibility with power supplies. Current ratings, often listed as full-load amps (FLA), indicate the expected current draw under normal operation. These ratings are vital for selecting appropriate wiring, circuit breakers, and motor control devices. Proper matching of voltage and current ensures efficient operation and prevents overheating or premature wear. Understanding these ratings helps in sizing the motor correctly for the load, ensuring optimal performance and safety. Always refer to the nameplate for these values to avoid mismatches and potential system failures.

Operating Speed and Efficiency Class

Operating speed, typically measured in revolutions per minute (RPM), indicates the motor’s rotational velocity under full-load conditions. This value is crucial for matching the motor to its intended application, ensuring proper mechanical system operation. Efficiency class, often denoted by standards like IE1, IE2, or IE3, reflects the motor’s energy efficiency by comparing input power to output power. Higher efficiency classes mean less energy loss as heat, leading to lower operational costs and reduced environmental impact. The nameplate provides these specifications to help users select the most suitable motor for their needs, balancing performance, energy consumption, and cost. Understanding these ratings ensures optimal motor performance and contributes to overall system efficiency and sustainability.

Insulation Class and Temperature Rise

The insulation class on a motor nameplate indicates the material’s ability to withstand heat, ensuring reliable operation within specified temperature limits. Common classes include A, B, F, and H, with higher classes tolerating greater heat. Temperature rise, measured in degrees Celsius, reflects the increase in motor temperature above ambient levels during operation. This specification is critical for determining the motor’s suitability for high-temperature environments and ensuring longevity. Exceeding the rated temperature can lead to insulation degradation, reducing motor lifespan and efficiency. Proper understanding of these ratings helps in selecting motors for demanding applications and maintaining optimal performance under various operating conditions. Adhering to these limits is essential for safe and efficient motor operation, as specified by standards like NEMA or IEC.

Operational Specifications

Operational specifications outline the motor’s functional requirements, including phase, frequency, and duty cycle. These details ensure compatibility with power supplies and intended applications, optimizing performance and efficiency.

Phase and Frequency Ratings

Phase and frequency ratings are crucial for motor operation. Most motors are designed for three-phase power, which offers high torque and efficiency. The standard frequency is typically 50 or 60 Hz, depending on regional power systems. These ratings ensure the motor operates in sync with the electrical grid, preventing issues like voltage fluctuations or overheating. Matching the motor’s phase and frequency to the power supply is essential for optimal performance and longevity. Incorrect configurations can lead to reduced efficiency or even motor failure. Always verify these specifications before installation to ensure compatibility and safe operation. This data is clearly marked on the nameplate, making it easy to identify and apply correctly. Proper alignment with the power source guarantees reliable motor functionality and minimizes potential risks.

Service Factor and Duty Cycle

The service factor (SF) indicates the maximum overload a motor can handle without damaging. Typically, motors have a service factor of 1.0 or 1.15, meaning they can operate at 100% or 115% of their rated horsepower. Duty cycle refers to the motor’s operating pattern, such as continuous, intermittent, or periodic operation. Understanding these ratings ensures the motor is used within its design limits, preventing overheating or premature wear. For example, a motor with a 1.15 SF should not exceed 115% of its rated load for extended periods. Duty cycles are crucial for applications with varying workloads, as they determine how often the motor can start, run, and rest. Properly matching the motor’s service factor and duty cycle to the application ensures safe, efficient, and reliable operation. These specifications are vital for industrial and commercial motor installations. Always consult the nameplate for accurate ratings.

Frame Size and Mounting Dimensions

Frame size and mounting dimensions are critical details on a motor nameplate, ensuring compatibility with existing machinery and installations. The frame size, often standardized according to NEMA or IEC specifications, determines the motor’s physical dimensions and mounting requirements. Mounting dimensions include shaft diameter, bolt hole patterns, and overall length, enabling precise alignment and secure installation. These specifications are essential for maintaining mechanical integrity and preventing vibration or misalignment issues. Proper frame size and mounting ensure efficient power transmission and reduce wear on connected equipment. Always verify these dimensions during motor replacement or installation to guarantee compatibility and optimal performance. Accurate frame size and mounting details are vital for industrial and commercial applications, ensuring motors operate safely and efficiently within their intended systems. These measurements are standardized to simplify installation processes across various motor types and applications.

How to Read and Interpret Nameplate Data

Reading and interpreting motor nameplate data is essential for understanding specifications like horsepower, voltage, and efficiency. Always verify frame size and mounting dimensions for compatibility and optimal performance.

A Step-by-Step Guide to Understanding Nameplate Details

Start by locating the nameplate on the motor, typically found on the exterior. Identify the manufacturer and model number for reference. Next, review the horsepower rating, which indicates the motor’s power output. Check the voltage and current ratings to ensure compatibility with your power supply. Note the operating speed in RPM and the efficiency class, which affects energy consumption. Verify the insulation class and temperature rise for safe operation. Look for phase and frequency information to match your electrical system. Finally, ensure the frame size and mounting dimensions align with your application. This systematic approach ensures accurate interpretation of all critical specifications for optimal motor performance and safety.

Common Symbols and Abbreviations Used

Motor nameplates use standardized symbols and abbreviations to convey essential information. Common terms include HP for horsepower, V for voltage, and RPM for revolutions per minute. Efficiency classes like IE1, IE2, and IE3 indicate energy efficiency levels. NEMA and IEC denote frame size standards, while PH specifies the number of phases (e.g., 3PH or 1PH). Insulation classes are marked as A, B, F, or H, representing temperature tolerance. Hz stands for frequency, and PF denotes power factor. These symbols ensure consistency and clarity, allowing technicians to quickly identify motor specifications. Understanding these abbreviations is crucial for proper installation, operation, and maintenance of electric motors. Always refer to manufacturer guidelines for specific interpretations, as variations may exist. This standardized approach ensures safe and efficient motor operation across applications.

Understanding motor nameplate details is crucial for ensuring proper installation, operation, and maintenance of electric motors. The nameplate provides essential information, including horsepower, voltage, efficiency, and frame size, which are vital for selecting the right motor for specific applications. By interpreting these details, technicians can optimize motor performance, reduce energy consumption, and minimize downtime. The use of standardized symbols and abbreviations ensures consistency across manufacturers, making it easier to identify key specifications quickly. Whether for industrial, commercial, or residential use, motor nameplate details are indispensable for achieving safe and efficient operation. Always refer to manufacturer guidelines for precise interpretations, as slight variations may exist. This knowledge empowers professionals to make informed decisions, ensuring motors function at their best. In conclusion, motor nameplates are a cornerstone of effective motor management and maintenance.

Bydante

love to dream temp guide

Welcome to the Love to Dream temperature guide‚ designed to help parents ensure their baby’s sleep environment is safe and comfortable. This guide provides essential insights into TOG ratings‚ room temperatures‚ and dressing your baby appropriately for optimal sleep.

Understanding TOG Ratings

TOG (Thermal Overall Grade) measures the warmth of baby sleepwear. It helps parents choose the right clothing for their baby’s room temperature‚ ensuring comfort and safety. Common ratings include 0.2‚ 1.0‚ 2.5‚ and 3.5 TOG.

What is TOG?

TOG stands for Thermal Overall Grade‚ a measure of the warmth or thermal resistance of baby sleepwear. It indicates how much heat a garment retains‚ helping parents choose appropriate clothing for their baby’s room temperature. TOG ratings ensure babies stay comfortable without overheating or feeling too cold. Common TOG ratings include 0.2‚ 1;0‚ 2.5‚ and 3.5‚ each suitable for different temperature ranges. For example‚ 0.2 TOG is ideal for warmer rooms (24°C-27°C)‚ while 3.5 TOG is best for colder environments. Love to Dream products use TOG ratings to guide parents in selecting sleepwear that matches their baby’s needs‚ promoting safe and cozy sleep; Understanding TOG helps parents create a balanced sleep environment‚ reducing the risk of overheating and ensuring their baby’s comfort. This system is essential for maintaining optimal temperatures and preventing sleep disruptions. By using TOG-rated sleepwear‚ parents can confidently dress their baby according to the room’s temperature‚ ensuring a restful night’s sleep for everyone.

Importance of TOG in Baby Sleep

Understanding and using the correct TOG rating is crucial for ensuring your baby’s safety and comfort during sleep. TOG measures the thermal resistance of sleepwear‚ helping parents maintain an optimal room temperature for their baby. Proper TOG levels prevent overheating‚ a known risk factor for Sudden Infant Death Syndrome (SIDS)‚ while also ensuring the baby stays warm enough in cooler environments. A well-chosen TOG rating promotes better sleep quality‚ as it helps regulate the baby’s body temperature‚ reducing restlessness and discomfort. Love to Dream’s TOG-rated sleepwear is designed to provide the right amount of warmth for different room temperatures‚ giving parents peace of mind. By dressing your baby according to the TOG guide‚ you create a sleep environment that supports their physical and emotional well-being‚ fostering healthy sleep habits from an early age.

  • Prevents overheating and ensures proper body temperature regulation.
  • Reduces the risk of sleep disruptions caused by being too hot or cold.
  • Supports safer sleep by aligning with recommended safety guidelines.
  • Helps parents make informed decisions about their baby’s sleepwear.

Room Temperature Guide for Baby Sleep

Maintaining the right room temperature is vital for your baby’s comfort and safety. The ideal range is 20-24°C (68-75°F)‚ ensuring your baby isn’t too hot or cold. Adjust sleepwear according to this guide for optimal comfort.

High Room Temperatures (Above 24°C/75°F)

When room temperatures exceed 24°C (75°F)‚ it’s essential to ensure your baby doesn’t overheat. Overheating can lead to discomfort and increased risk of sleep disturbances. For temperatures above 24°C‚ opt for lightweight sleepwear with a 0.2 TOG rating‚ specifically designed for warmer environments. This ensures your baby stays cool without compromising safety.

  • Avoid using heavy blankets or thick sleepwear‚ as they can trap heat.
  • Keep the room well-ventilated to maintain a comfortable environment.
  • Monitor your baby for signs of overheating‚ such as sweating‚ flushed skin‚ or restlessness.
  • Consider using breathable fabrics that allow for proper airflow.

By dressing your baby appropriately and maintaining a cooler room temperature‚ you can promote a safe and restful sleep environment‚ even in warmer conditions.

Moderate Room Temperatures (20-24°C/68-75°F)

Moderate room temperatures between 20-24°C (68-75°F) are ideal for your baby’s sleep. At these temperatures‚ your baby can stay comfortable without the risk of overheating or feeling too chilly. For this range‚ a 1.0 TOG-rated sleepwear is recommended‚ as it provides the perfect balance of warmth and breathability.

  • Dress your baby in lightweight layers that match the TOG rating for their sleepwear.
  • Ensure the room is well-ventilated to maintain a stable temperature.
  • Monitor your baby for signs of comfort‚ such as relaxed movements and steady breathing.
  • Avoid using extra blankets unless necessary‚ as this can lead to overheating.

Maintaining a consistent room temperature within this range helps promote better sleep quality and ensures your baby stays comfortable throughout the night. Always prioritize breathable fabrics and appropriate layering to create a safe sleep environment.

Low Room Temperatures (Below 20°C/68°F)

For room temperatures below 20°C (68°F)‚ it’s essential to ensure your baby stays warm and comfortable. Love to Dream recommends using sleepwear with a higher TOG rating‚ such as 2.5 TOG or 3.5 TOG‚ to provide adequate warmth without risking overheating.

  • A 2.5 TOG-rated sleep bag is ideal for temperatures between 16-20°C (61-68°F).
  • For temperatures below 16°C (61°F)‚ a 3.5 TOG-rated sleep bag is recommended to keep your baby cozy.
  • Always check the room temperature with a thermometer to ensure accuracy.
  • Dress your baby in layers‚ but avoid over-layering‚ as this can lead to discomfort.
  • Look for sleepwear made from breathable‚ high-quality materials to regulate body heat effectively.

Remember‚ a well-regulated sleep environment is crucial for your baby’s safety and comfort. Always prioritize their needs and adjust their clothing according to the room temperature to ensure a restful sleep.

How to Choose the Right TOG for Your Baby

Selecting the appropriate TOG (Thermal Overall Grade) for your baby’s sleepwear is crucial for maintaining a safe and comfortable sleep environment. The TOG rating indicates the warmth of the garment‚ so matching it to your baby’s room temperature is essential.

  • Use a room thermometer to accurately measure the room temperature.
  • Refer to the Love to Dream temperature guide to align the TOG rating with the room temperature.
  • 0.2 TOG is ideal for warmer rooms (24-27°C/75-81°F)‚ while 1.0 TOG suits moderate temperatures (20-24°C/68-75°F).
  • For cooler rooms (16-20°C/61-68°F)‚ opt for 2.5 TOG‚ and for temperatures below 16°C (61°F)‚ choose 3.5 TOG.
  • Consider your baby’s individual comfort level; some babies prefer slightly warmer or cooler conditions.
  • Always ensure sleepwear is made from breathable‚ high-quality materials to promote proper temperature regulation.

By choosing the right TOG‚ you can help your baby sleep comfortably and safely‚ ensuring a restful night for the whole family.

Dressing Your Baby in Layers for Optimal Comfort

Dressing your baby in layers is a practical and effective way to ensure their comfort and regulate their body temperature during sleep. This method allows you to easily adjust their clothing based on the room temperature and their individual needs.

Start with a lightweight‚ breathable base layer‚ such as a onesie or a sleeveless vest made from natural fabrics like cotton or bamboo. This helps wick away moisture and keeps your baby’s skin dry. Next‚ add a sleepwear layer with a TOG rating appropriate for the room temperature‚ such as a Love to Dream swaddle or sleep bag.

  • For warmer rooms (above 24°C/75°F)‚ opt for a lightweight 0.2 TOG layer.
  • In moderate temperatures (20-24°C/68-75°F)‚ a 1.0 TOG layer is ideal.
  • Cooler rooms may require adding an extra layer‚ such as a sleepsuit or pyjamas‚ under the sleep bag.

Always avoid overbundling‚ as this can lead to overheating. Check your baby’s cues‚ such as their chest feeling warm but not sweaty‚ to ensure they are comfortable. Layering ensures flexibility and helps maintain a safe sleep environment.

Maintaining a Safe Sleep Environment

Creating a safe sleep environment is crucial for your baby’s well-being and reduces the risk of sleep-related hazards. Ensure the room is well-ventilated and free from any potential dangers‚ such as loose bedding‚ cords‚ or sharp objects.

Use a firm‚ snug-fitting mattress and a tight-fitting sheet to prevent your baby from getting trapped. Avoid soft bedding‚ bumper pads‚ or stuffed animals in the crib‚ as these can pose suffocation risks. Keep the crib away from windows‚ blinds‚ or curtains to prevent accidental entanglement.

Regularly check the room temperature and ensure it remains within a safe range (20-24°C/68-75°F). Dress your baby in layers according to the TOG rating of their sleepwear‚ and avoid overbundling‚ which can lead to overheating. Monitor your baby’s comfort by feeling their chest or back—they should feel warm‚ not hot or sweaty.

By maintaining a safe and comfortable sleep environment‚ you can promote better sleep for your baby while minimizing potential risks. Always prioritize your baby’s safety and comfort‚ and consult a healthcare professional if you have any concerns.

Remember‚ a comfortable baby is a happy baby. Always monitor your baby’s comfort by checking their temperature and adjusting their clothing accordingly. Avoid overheating‚ as it can pose serious risks‚ and ensure the room remains within a safe temperature range (20-24°C/68-75°F).

For specific guidance‚ refer to Love to Dream’s temperature guide‚ which offers detailed recommendations for different TOG ratings and room conditions. By following these guidelines‚ you can create a sleep-friendly environment that promotes better rest for your baby while minimizing potential risks.

With the right knowledge and tools‚ you can help your baby sleep soundly and safely‚ giving you peace of mind as a parent. Always prioritize your baby’s comfort and safety‚ and don’t hesitate to seek advice if you have any concerns.

Bydante

jeff nippard bodybuilding program pdf

Jeff Nippard’s bodybuilding program is a science-backed, hypertrophy-focused plan designed for muscle growth. Popular among lifters, it combines periodization and progressive overload for effective results.

1.1 Overview of Jeff Nippard and His Approach to Bodybuilding

Jeff Nippard is a renowned bodybuilder, powerlifter, and science communicator with over 5.75 million YouTube subscribers. Known for his minimalist yet effective training principles, Jeff emphasizes hypertrophy and progressive overload. His approach combines scientific research with practical application, making it accessible for all fitness levels. As a natural bodybuilding advocate, Jeff promotes drug-free physique development. With impressive lifts like a 502-pound squat and 518-pound deadlift, he has established himself as a credible authority in strength training and muscle growth, offering programs tailored to achieve maximum results through dedication and consistency.

1.2 Key Features of the Program

Jeff Nippard’s bodybuilding program is structured around hypertrophy and progressive overload, with a focus on compound movements and periodized training blocks. It emphasizes an upper/lower split, ensuring balanced muscle development. The program includes detailed nutrition guidelines, advocating for a caloric surplus to support muscle growth. Supplement recommendations are also provided to optimize results. Designed for both beginners and advanced lifters, it offers a clear, science-backed approach to achieving a strong, aesthetic physique. The program’s clarity and effectiveness have made it popular among those seeking structured, goal-oriented training.

Structure of the Jeff Nippard Bodybuilding Program

Jeff Nippard’s program is divided into two progressive training blocks: Foundation and Intensification. It uses an upper/lower split, focusing on compound movements and high training frequency.

2.1 Training Blocks and Periodization

Jeff Nippard’s program is structured into two distinct training blocks, each designed to optimize muscle growth. The Foundation Block (Weeks 1-5) focuses on establishing consistency and building a base level of strength and hypertrophy. This phase emphasizes progressive overload through incremental increases in weight or volume. The Intensity Block (Weeks 6-10) shifts towards more advanced techniques, such as higher intensity sets and specialized exercises, to maximize muscle development. This periodized approach ensures sustained progress and minimizes plateaus, making it effective for both intermediate and advanced lifters.

2.2 Workout Frequency and Volume

Jeff Nippard’s program typically follows a 4-day upper/lower split, allowing for optimal recovery and muscle growth. Each muscle group is trained 2-3 times weekly, ensuring sufficient volume for hypertrophy. The program begins with moderate volume and gradually increases to prevent overtraining. Compound movements are prioritized to maximize efficiency and engagement. Progressive overload is emphasized, enabling lifters to adapt and grow. This structured approach balances frequency and volume, promoting sustained muscle development without burnout, and is adaptable to different fitness levels for consistent progress.

Training Philosophy Behind the Program

Jeff Nippard’s program revolves around hypertrophy and progressive overload, blending scientific principles with practical application. It emphasizes consistency, muscle engagement, and sustainable growth for all fitness levels.

3.1 Emphasis on Hypertrophy and Muscle Growth

Jeff Nippard’s program prioritizes hypertrophy, focusing on muscle growth through targeted exercises. By optimizing training volume and intensity, it ensures maximal muscle stimulation, promoting lean muscle development and physique enhancement.

3.2 Role of Progressive Overload

Progressive overload is central to Jeff Nippard’s program, emphasizing gradual increases in weight or reps to stimulate muscle growth. This approach ensures continuous challenge to muscle fibers, preventing plateaus and promoting hypertrophy. By systematically adding intensity, the program aligns with scientific principles of muscle adaptation, making it effective for long-term gains. Nippard’s structured training blocks ensure overload is applied safely and sustainably, avoiding injury while maximizing progress. This method is foundational to achieving the program’s goal of building lean, strong muscle tissue efficiently.

Workout Routine Details

Jeff Nippard’s program features an upper/lower split with high training frequency, focusing on compound lifts and accessory exercises to target all major muscle groups effectively.

4.1 Upper/Lower Split and Exercise Selection

Jeff Nippard’s program uses an upper/lower split, dividing workouts into upper body and lower body days. This approach maximizes muscle growth by allowing frequent training of each muscle group. Exercises are selected to target both compound movements, like squats and deadlifts, and accessory exercises for isolation and hypertrophy. The program emphasizes progressive overload and periodization, with a focus on increasing intensity over time. It also includes detailed warm-up routines to prevent injury and optimize performance. This structured yet flexible approach ensures balanced development and avoids overtraining, making it suitable for both intermediate and advanced lifters.

4.2 Focus on Compound Movements

Jeff Nippard’s program heavily emphasizes compound movements like squats, deadlifts, and bench presses, which recruit multiple muscle groups simultaneously. These exercises are foundational for building overall strength and muscle mass. The program incorporates variations of these lifts to target different muscle fibers and ensure comprehensive development. By prioritizing compound movements, the program maximizes training efficiency and promotes proportional growth. Accessory exercises are also included to address specific muscle groups, but the core focus remains on mastering and progressing with compound lifts. This approach ensures a balanced and effective path to hypertrophy, avoiding the pitfalls of over-specialization.

Nutrition and Supplementation Guidelines

A caloric surplus is essential for muscle growth, with a focus on protein-rich diets. Supplements like whey protein and creatine are recommended to optimize results and recovery.

5.1 Importance of Caloric Surplus for Muscle Growth

Achieving a caloric surplus is crucial for muscle growth, as it provides the energy needed for hypertrophy. Jeff Nippard emphasizes that without sufficient calories, muscle gain is limited. The program recommends a moderate surplus to avoid excess fat gain while supporting muscle development. Tracking macronutrients, particularly protein, is essential to ensure muscle repair and growth. A well-structured diet with adequate carbohydrates and fats complements protein intake, creating an optimal environment for muscle synthesis. Consistency in maintaining this surplus, combined with progressive overload, maximizes hypertrophy efforts and leads to noticeable results over time.

5.2 Recommended Supplements for Optimal Results

Jeff Nippard’s program emphasizes a minimalist approach to supplements, focusing on proven essentials. Protein powder is recommended to meet daily protein goals, especially post-workout. Creatine monohydrate is highly endorsed for its ability to enhance strength and endurance. Branched-Chain Amino Acids (BCAAs) can aid recovery and reduce muscle soreness. Additionally, omega-3 fish oil supports joint health and reduces inflammation. A multivitamin may be suggested to fill nutritional gaps. While supplements are optional, they can complement a well-structured diet and training program, helping to optimize muscle growth and recovery. Consistency with these basics, combined with proper nutrition, maximizes results.

Mental Preparation and Consistency

Mental preparation and consistency are crucial for success in Jeff Nippard’s program. A strong mind-muscle connection and disciplined approach ensure sustained progress and long-term muscle growth.

6.1 Mind-Muscle Connection and Training Mindset

A strong mind-muscle connection is essential for maximizing gains in Jeff Nippard’s program. Focus on intentional movement, engaging target muscles during exercises. A disciplined mindset ensures consistency, while mental resilience helps overcome challenges. Nippard emphasizes the importance of staying present during workouts, avoiding distractions, and maintaining a growth-oriented perspective. This mental approach, combined with scientific training principles, fosters sustainable progress and muscle development. By cultivating focus and determination, lifters can optimize their results and stay motivated throughout the program.

6.2 Tips for Maintaining Long-Term Consistency

Maintaining consistency in Jeff Nippard’s program requires a structured approach. Set clear, achievable goals and track progress regularly. Establish a routine with scheduled workouts and rest days. Prioritize recovery through adequate sleep, nutrition, and stress management. Stay accountable by sharing goals with a community or partner. Celebrate small victories to maintain motivation. Embrace patience, as muscle growth is gradual. Adjust routines to avoid plateaus and prevent overtraining. Consistency, not perfection, is key to long-term success in Nippard’s program.

Results and Testimonials

Jeff Nippard’s program has yielded impressive results, with many users sharing success stories and before-and-after transformations. Positive feedback highlights its effectiveness in achieving significant muscle growth and strength gains.

7.1 Success Stories from Program Participants

Participants of Jeff Nippard’s bodybuilding program have reported significant hypertrophy and strength gains. Many share testimonials of achieving lean muscle growth and improved physiques. Several users highlight dramatic transformations, with some gaining over 30 pounds of muscle within a year. Others praise the program’s structured approach, noting increased bench press and squat numbers by 100 pounds or more. The focus on compound movements and progressive overload is frequently credited for these results. Success stories often emphasize the program’s sustainability and effectiveness for both beginners and advanced lifters, making it a top choice for those seeking consistent progress in bodybuilding.

7.2 Before-and-After Transformations

Participants of Jeff Nippard’s program often share dramatic before-and-after photos showcasing significant muscle growth and improved physiques; Many report visible gains in muscle mass and definition within 6-12 months. A common transformation includes increased chest and shoulder development, along with enhanced leg thickness. Users often highlight a noticeable improvement in overall muscular balance and symmetry. Some individuals have posted remarkable changes, such as a 50-pound increase in lean muscle mass. These transformations are attributed to the program’s structured approach, emphasizing compound movements and progressive overload. The visual results demonstrate the program’s effectiveness in achieving hypertrophy and strength goals for dedicated followers.

Comparison with Other Bodybuilding Programs

Jeff Nippard’s program excels with its science-backed, hypertrophy-focused approach, blending periodization and overload. It uniquely combines powerlifting and bodybuilding, offering a balanced, effective path for muscle growth and strength.

8.1 Unique Aspects Compared to Traditional Programs

Jeff Nippard’s program stands out with its minimalist yet effective approach. Unlike traditional programs, it blends powerlifting and bodybuilding seamlessly, focusing on progressive overload and hypertrophy. Nippard emphasizes science-backed training principles, ensuring each exercise is optimized for muscle growth. The program’s structure, divided into foundation and strength blocks, offers a clear progression path. Additionally, Nippard’s commitment to drug-free bodybuilding and his educational content make it accessible and trustworthy for natural lifters. This holistic method, combining detailed workout plans with nutrition and mindset guidance, sets it apart from conventional routines.

8.2 How It Stands Out in the Fitness Industry

Jeff Nippard’s program excels due to its transparency and evidence-based methods. Unlike many fitness plans, it avoids gimmicks, focusing instead on proven techniques. Nippard’s credentials as a natural bodybuilder and powerlifter add credibility, while his educational content bridges the gap between science and practical application. The program’s adaptability to various fitness levels and its emphasis on long-term sustainability make it a favorite among serious lifters. Its availability in PDF format ensures accessibility, further solidifying its reputation as a comprehensive and user-friendly resource in the fitness industry.

Bydante

yamaha tsr-7850 manual

The Yamaha TSR-7850 manual is your comprehensive guide to understanding and utilizing the AV receiver’s features, ensuring proper setup, and troubleshooting common issues effectively.

1.1 Overview of the Yamaha TSR-7850 AV Receiver

The Yamaha TSR-7850 is a high-performance AV receiver designed for home entertainment, offering immersive sound and advanced connectivity. It supports 7.1 channels, Dolby Atmos, and DTS:X, ensuring a cinematic audio experience. With MusicCast multi-room capabilities, it seamlessly integrates with other Yamaha devices for whole-home audio. The receiver features HDMI ARC, 4K HDR support, and a user-friendly interface. Its compact design and robust functionality make it ideal for modern home theaters. The included remote and Yamaha AV Controller app provide convenient control, enhancing your listening experience.

1.2 Importance of the Manual for Proper Usage

The Yamaha TSR-7850 manual is essential for maximizing the receiver’s potential and ensuring optimal performance. It provides detailed instructions for setup, operation, and troubleshooting, helping users understand advanced features like Dolby Atmos and MusicCast. Proper configuration of inputs, outputs, and settings requires guidance from the manual to avoid errors. Additionally, it offers maintenance tips and firmware update procedures to keep the device functioning at its best. Referencing the manual ensures users can resolve common issues and fully enjoy their home entertainment experience with minimal hassle.

Key Features of the Yamaha TSR-7850

The Yamaha TSR-7850 offers Dolby Atmos, DTS:X, and MusicCast multi-room audio, with Wi-Fi and Bluetooth connectivity, 4K HDMI support, and a user-friendly app for seamless control.

2.1 Output Power and Channel Specifications

The Yamaha TSR-7850 is a 7.2-channel AV receiver, delivering 95W per channel at 8Ω. It supports dual subwoofer outputs for enhanced bass performance and features 4K/60Hz HDMI pass-through with HDR10, Dolby Vision, and HLG compatibility. This ensures high-quality audio and video output, making it suitable for immersive home theater experiences. The receiver also supports advanced audio formats like Dolby Atmos and DTS:X, providing a rich and dynamic soundstage for movies and music.

2.2 Support for Dolby Atmos and DTS:X

The Yamaha TSR-7850 offers robust support for Dolby Atmos and DTS:X, enabling immersive 3D audio experiences. These formats allow sound to be precisely placed in 3D space, enhancing movie and gaming experiences. The receiver’s advanced audio processing ensures accurate rendering of these formats, providing a lifelike soundstage. With height channel support, it delivers a cinematic atmosphere, making it ideal for home theaters seeking premium audio quality and spatial depth.

2.3 MusicCast Multi-Room Audio Capabilities

The Yamaha TSR-7850 integrates seamlessly with MusicCast, enabling multi-room audio distribution. This feature allows users to stream music wirelessly across compatible devices, creating a synchronized audio experience throughout the home. Through the Yamaha AV Controller App, users can control playback, select sources, and adjust settings effortlessly. MusicCast supports various audio formats and services, ensuring high-quality sound reproduction. It also works with voice assistants like Alexa, enhancing convenience. This capability makes the TSR-7850 a versatile hub for whole-home entertainment and personalized listening experiences.

Setting Up the Yamaha TSR-7850

Setting up the Yamaha TSR-7850 is straightforward, involving initial installation, connecting devices, and configuring inputs for optimal performance. The manual guides you through each step effortlessly.

3.1 Initial Installation and Preparation

The Yamaha TSR-7850 manual begins with initial installation steps, ensuring proper placement and connection. Unbox carefully, position the receiver on a stable surface, and connect the power cable; Read the supplied Quick Start Guide for initial setup instructions. Familiarize yourself with the unit’s ports and controls before powering on. Ensure all accessories, like the remote, are ready. This preparation ensures a smooth setup process, allowing you to enjoy enhanced audio and video experiences right away.

3.2 Connecting Devices and Configuring Inputs

Connect your devices to the Yamaha TSR-7850 using HDMI, optical, or analog inputs. Identify the correct ports for your equipment and secure connections firmly. Use the on-screen menu to configure input settings, assigning the correct input type to each device. Rename inputs for easier identification. For HDMI connections, ensure the correct ARC (Audio Return Channel) settings are enabled for TV audio. Refer to the manual for specific port functions and configuration steps to ensure optimal performance and seamless integration of all connected devices.

Advanced Configuration and Customization

Explore advanced settings like speaker impedance adjustments and utilizing the advanced setup menu for tailored audio experiences, enhancing performance to match your home theater preferences precisely.

4.1 Adjusting Speaker Impedance Settings

Adjusting speaker impedance settings on the Yamaha TSR-7850 ensures optimal audio performance. Access the advanced setup menu to configure impedance settings, matching your speaker system for accurate sound reproduction. Proper calibration prevents damage and enhances clarity. Refer to the manual for detailed steps to navigate the menu and select the correct impedance for your speakers. This customization ensures balanced output and maintains the longevity of your audio system. Always follow the guidelines provided in the manual for precise adjustments.

4.2 Utilizing the Advanced Setup Menu

The Yamaha TSR-7850’s Advanced Setup Menu allows for detailed customization of audio and video settings. Accessible via the remote control, this menu enables adjustments to audio parameters, HDMI settings, and zone configurations. Users can fine-tune settings such as speaker impedance, sound modes, and network preferences. The menu also provides options for firmware updates and system diagnostics. By following the manual’s guidelines, users can optimize their home theater experience. Proper navigation of this menu ensures seamless integration of all connected devices and enhances overall performance. Refer to the manual for step-by-step instructions.

Troubleshooting Common Issues

This section helps diagnose and resolve common problems, such as no sound output or HDMI connectivity issues, ensuring optimal performance and addressing potential errors effectively.

5.1 Diagnosing No Sound Output

Start by ensuring all cables are securely connected to the correct ports. Verify the input selection matches the connected device. Check the speaker settings in the menu to confirm they are configured properly. Ensure the volume is not muted or set too low. If using HDMI, check the ARC (Audio Return Channel) settings on both the receiver and the TV. Resetting the receiver to factory settings may resolve the issue. Consult the manual for detailed reset instructions if needed.

5.2 Resolving HDMI ARC Connectivity Problems

Ensure HDMI ARC is enabled on both the Yamaha TSR-7850 and your TV. Restart both devices to establish a fresh connection. Verify that the HDMI cable is securely connected to the ARC-compatible ports. If issues persist, update the receiver’s firmware to the latest version. Resetting the receiver to factory settings may also resolve the problem, but be aware this will erase custom configurations. Consult the manual for detailed instructions on resetting and reconfiguring HDMI settings.

Firmware Updates and Maintenance

Regularly check for firmware updates to ensure optimal performance. Updates enhance features and fix issues. Follow the manual’s instructions to install the latest version successfully.

6.1 Checking for Firmware Updates

To ensure your Yamaha TSR-7850 operates at its best, regularly check for firmware updates. Use the Yamaha AV Controller app or navigate through the receiver’s menu system to the ADVANCED SETUP menu. Select Firmware Update to verify if a new version is available. A stable internet connection is required for the process. Updating firmware improves performance, adds features, and resolves potential issues. Always follow the on-screen instructions carefully to avoid interruptions during the update process.

6.2 Installing the Latest Firmware Version

Installing the latest firmware on your Yamaha TSR-7850 enhances performance and adds new features. Use the Yamaha AV Controller app or the receiver’s ADVANCED SETUP menu to initiate the update. Ensure a stable internet connection and follow on-screen instructions carefully. Do not interrupt the update process, as it may cause system instability. Once complete, restart the receiver to apply the changes. Regular updates ensure optimal functionality and compatibility with the latest technologies.

The Yamaha TSR-7850 manual provides essential guidance for optimizing your AV receiver experience. By following the instructions, you can unlock its full potential, ensuring seamless performance and enhanced audio quality for years to come.

7.1 Summary of Key Points

The Yamaha TSR-7850 manual serves as a detailed guide for setting up and optimizing your AV receiver. It covers essential features like Dolby Atmos, DTS:X, and MusicCast multi-room audio. The manual provides step-by-step instructions for installation, configuration, and troubleshooting common issues. Regular firmware updates and proper maintenance are emphasized to ensure peak performance. By following the manual, users can unlock the full potential of their system, enhancing their home entertainment experience with high-quality sound and seamless connectivity.

7.2 Final Tips for Optimal Performance

For optimal performance, ensure regular firmware updates and proper speaker impedance settings. Use the Yamaha AV Controller App for convenient control. Refer to the manual for advanced configurations and troubleshooting. Maintain a stable power supply and clean connections to avoid audio issues. Experiment with sound modes to enhance your listening experience. Always follow the manual’s guidelines for setup and maintenance to maximize the TSR-7850’s capabilities and enjoy high-quality audio consistently.

Bydante

dodge ram 1500 codes list pdf

The Dodge Ram 1500‚ a robust pickup truck‚ relies on OBD-II codes for diagnostics. These codes‚ stored in the PCM‚ indicate issues like misfires or emission problems‚ essential for timely repairs and maintaining performance. Referencing a detailed codes list PDF ensures accurate troubleshooting and prolongs vehicle longevity.

Overview of the Dodge Ram 1500 and Its Maintenance Importance

The Dodge Ram 1500 is a powerful pickup truck known for its durability and performance. Regular maintenance is crucial to ensure its longevity and reliability. Understanding fault codes‚ such as those found in a Dodge Ram 1500 codes list PDF‚ helps identify issues early‚ preventing costly repairs. Proper diagnostics and timely fixes ensure optimal engine performance‚ fuel efficiency‚ and safety. Routine checks also maintain emissions standards and overall vehicle health‚ making it essential for owners to stay informed and proactive about their truck’s condition.

Understanding OBD-II Codes

OBD-II codes are standardized diagnostic trouble codes used across all vehicles‚ including the Dodge Ram 1500. They help identify specific issues with the engine‚ emissions‚ or other systems; Referencing a Dodge Ram 1500 codes list PDF provides a quick guide to understanding and resolving these codes efficiently.

What Are OBD-II Codes and Their Structure

OBD-II codes are standardized diagnostic trouble codes used to identify vehicle issues. Each code consists of a five-character alphanumeric structure‚ starting with a letter (P‚ C‚ B‚ U) indicating the system affected. The subsequent digits specify the fault type and location. For example‚ P0171 refers to a system too lean in Bank 1. These codes are essential for quick diagnosis and repairs‚ especially when referenced from a Dodge Ram 1500 codes list PDF‚ ensuring accurate troubleshooting and maintenance.

How OBD-II Codes Relate to the Dodge Ram 1500

OBD-II codes are crucial for diagnosing issues in the Dodge Ram 1500. The truck’s Powertrain Control Module (PCM) generates these codes when detecting faults‚ such as misfires or emission system leaks. Codes like P0300 or P0401 are common‚ indicating specific problems that can be addressed using a codes list PDF. This system ensures precise troubleshooting‚ helping owners maintain their vehicle’s performance and longevity by identifying and resolving issues promptly.

Common Fault Codes for Dodge Ram 1500

The Dodge Ram 1500 frequently encounters codes like P0300‚ P0171‚ and P0401‚ indicating misfires‚ lean engine conditions‚ and EGR issues. These codes‚ detailed in a codes list PDF‚ guide owners in identifying and addressing common problems‚ ensuring efficient repairs and maintaining the truck’s optimal performance and longevity.

P0300 ⎼ Random Cylinder Misfire Detected

The P0300 code indicates a random cylinder misfire in the engine. This occurs when the powertrain control module detects an inconsistent or erratic firing pattern across multiple cylinders. Common causes include faulty spark plugs‚ ignition coils‚ or fuel injectors. A vacuum leak‚ low fuel pressure‚ or worn-out piston rings may also trigger this code. Symptoms often include a rough engine idle‚ decreased power‚ and a noticeable decrease in fuel efficiency. Addressing this issue promptly is crucial to prevent potential damage to the catalytic converter or other engine components. Referencing a detailed codes list PDF can provide specific troubleshooting steps for accurate diagnosis and repair.

P0171 ⎼ System Too Lean (Bank 1)

The P0171 code signifies that the engine’s air-fuel mixture in Bank 1 is too lean‚ meaning there’s an excessive amount of air relative to fuel. This can result from a vacuum leak‚ faulty mass airflow sensor‚ or oxygen sensor malfunction. It may also stem from clogged fuel injectors or a failing fuel pressure regulator. Symptoms include a rough engine idle‚ poor acceleration‚ and reduced overall performance. Ignoring this code can lead to increased emissions and potential damage to the catalytic converter. Consulting a codes list PDF provides detailed guidance for diagnosing and resolving this issue effectively.

P0304 ー Cylinder 4 Misfire Detected

The P0304 code indicates a misfire in cylinder 4‚ which can be caused by a faulty spark plug‚ ignition coil‚ or fuel injector. A vacuum leak or low fuel pressure may also trigger this code. Symptoms include a rough engine idle‚ poor performance‚ and a decrease in fuel efficiency. Ignoring this issue can lead to more severe damage‚ such as catalytic converter failure. Consulting a codes list PDF or repair manual is essential for accurate diagnosis and repairs‚ ensuring the issue is resolved promptly to prevent further complications.

P0401 ⎼ Exhaust Gas Recirculation (EGR) Flow Insufficient

The P0401 code signifies a problem with the Exhaust Gas Recirculation (EGR) system‚ specifically insufficient flow. This can occur due to a clogged EGR valve‚ blocked EGR cooler‚ or faulty vacuum hoses. Symptoms may include rough engine idle‚ decreased performance‚ and increased emissions. Addressing this issue promptly is crucial‚ as prolonged neglect can lead to engine damage or emissions test failures. Referencing a codes list PDF or repair manual is recommended for precise diagnosis and repair steps‚ ensuring the EGR system functions correctly to maintain engine efficiency and reduce emissions.

P0442 ⎼ Evaporative Emission Control (EVAP) System Small Leak

The P0442 code indicates a small leak in the Evaporative Emission Control (EVAP) system. Common causes include a loose or damaged gas cap‚ cracked fuel lines‚ or faulty connectors. This leak allows fuel vapors to escape‚ which can lead to decreased fuel efficiency and emissions issues. A codes list PDF can guide diagnostics‚ suggesting a visual inspection of components and pressure tests. Addressing the issue promptly prevents further damage and ensures compliance with emissions standards‚ maintaining the vehicle’s performance and environmental efficiency.

Reading and Interpreting Dodge Ram 1500 Codes

Use an OBD-II scanner to retrieve fault codes from your Dodge Ram 1500. Codes are stored in the PCM and can be referenced in a codes list PDF for detailed explanations‚ aiding in diagnosis and repairs.

How to Use an OBD-II Scanner for Code Retrieval

Connect the OBD-II scanner to the vehicle’s port‚ typically located under the dashboard. Turn the ignition on but do not start the engine. Allow the scanner to communicate with the PCM. Once connected‚ select the “Read Codes” option to retrieve stored fault codes. Refer to a Dodge Ram 1500 codes list PDF for code interpretations. Common codes like P0300 or P0171 indicate specific issues. After repairs‚ clear the codes and test drive the vehicle to ensure no new codes appear.

Diagnosing Issues from Fault Codes

Fault codes like P0300 or P0171 in the Dodge Ram 1500 indicate specific issues. Use an OBD-II scanner and a codes list PDF for accurate diagnosis.

Steps to Diagnose Common Codes

To diagnose Dodge Ram 1500 codes‚ start by retrieving the fault codes using an OBD-II scanner connected to the vehicle’s PCM. Reference a Dodge Ram 1500 codes list PDF to understand the code meanings. Perform a visual inspection of related components‚ such as spark plugs or wiring‚ based on the code. Use specialized tools to test system performance. After repairs‚ clear the codes and test drive the vehicle to ensure the issue is resolved. Always follow a systematic approach to avoid misdiagnosis.

Importance of Code Severity Levels

Understanding the severity levels of Dodge Ram 1500 fault codes is crucial for prioritizing repairs. Codes are categorized as critical‚ moderate‚ or low based on their impact. Critical codes‚ like P0300‚ indicate immediate issues affecting engine performance and safety. Moderate codes‚ such as P0171‚ may not cause instant damage but can lead to problems over time. Low-severity codes‚ like P0442‚ often relate to emissions. Referencing a detailed codes list PDF helps determine the urgency of each code‚ ensuring timely and effective maintenance to prevent further damage and maintain optimal vehicle operation. Addressing severe codes promptly avoids costly repairs and enhances safety.

Generic vs. Manufacturer-Specific Codes

Generic codes apply universally across vehicles‚ while manufacturer-specific codes are unique to brands like Dodge. For the Ram 1500‚ a codes list PDF differentiates these‚ ensuring accurate diagnostics.

Differences Between Generic and Specific Codes

Generic codes‚ such as P0300‚ are universal OBD-II codes applicable to all vehicles. Manufacturer-specific codes‚ like those starting with “P1xxx‚” are unique to brands like Dodge. While generic codes indicate common issues‚ specific codes provide detailed‚ brand-exclusive diagnostics. For the Dodge Ram 1500‚ a codes list PDF often includes both types‚ helping technicians identify whether the issue is widespread or specific to Chrysler Group vehicles. This distinction is crucial for precise repairs and ensures accurate troubleshooting.

How to Identify Manufacturer-Specific Codes

Manufacturer-specific codes for the Dodge Ram 1500 begin with “P1” and are unique to Chrysler Group vehicles. These codes are distinct from generic OBD-II codes and provide detailed diagnostics tailored to specific systems. For example‚ codes like P1XXX are exclusive to Dodge and require a codes list PDF or official repair manual for accurate interpretation. These codes often relate to proprietary systems‚ such as Chrysler’s engine or transmission controls‚ ensuring precise troubleshooting for issues unique to the vehicle’s design;

Resources for Dodge Ram 1500 Code Reference

Official repair manuals and online databases provide detailed codes list PDF for Dodge Ram 1500‚ ensuring accurate diagnosis and repairs. These resources are indispensable for technicians and owners.

Official Repair Manuals and Code Lists

Official repair manuals for the Dodge Ram 1500 are essential resources for understanding and addressing fault codes; These manuals‚ often provided by Chrysler‚ include detailed code lists and repair procedures. They cover various systems‚ such as powertrain‚ emissions‚ and electrical components. By referencing these documents‚ owners and technicians can accurately diagnose issues like P0300 or P0401. The manuals are typically available as PDF downloads from Chrysler’s service website or authorized dealerships‚ ensuring easy access to critical diagnostic information.

Online Forums and Code Lookup Tools

Online forums and code lookup tools are invaluable for diagnosing Dodge Ram 1500 fault codes. Websites like Reddit’s r/DodgeRam or specialized automotive forums offer detailed discussions and solutions from experienced owners and technicians. Additionally‚ code lookup platforms provide instant access to definitions for codes like P0300 or P0401. These resources often include repair guides and troubleshooting tips‚ making them indispensable for resolving issues efficiently. However‚ always verify information with official manuals to ensure accuracy and safety.

Regularly checking Dodge Ram 1500 fault codes using a comprehensive PDF list ensures timely repairs‚ enhances performance‚ and prevents costly damages‚ making it essential for proper vehicle maintenance.

Importance of Regular Code Checks for Vehicle Maintenance

Regular code checks are crucial for maintaining the Dodge Ram 1500’s health. By identifying issues early‚ such as misfires or emission problems‚ owners can prevent minor faults from becoming major repairs. A codes list PDF provides a clear reference‚ helping drivers understand and address problems promptly. This practice not only extends the vehicle’s lifespan but also ensures optimal performance‚ fuel efficiency‚ and safety. Consistent monitoring with the right tools and resources is key to responsible ownership.

Bydante

seam guide ruler

The Seam Guide Ruler is an essential sewing tool designed to enhance precision and efficiency. It helps set accurate seam allowances and align fabric perfectly, ensuring professional results for sewists of all skill levels.

What is a Seam Guide Ruler?

A Seam Guide Ruler is a versatile sewing tool designed to help sewists achieve precise stitch alignment and consistent seam allowances. It typically attaches magnetically to the sewing machine’s bed, providing a stable guide for fabric movement. Featuring markings for various seam allowances, it allows users to set accurate measurements effortlessly. The ruler often includes multiple holes or slots to accommodate different projects and fabric types. Its compact design makes it easy to use on any sewing machine, ensuring straight stitching and professional-quality results. This tool is especially useful for quilting, dressmaking, and other projects requiring exact seam alignment, making it a must-have for both beginners and experienced sewists.

Importance of Seam Guide Rulers in Sewing

The Seam Guide Ruler is indispensable in sewing as it ensures consistency and accuracy in seam allowances, which are crucial for a professional finish. By maintaining precise alignment, it prevents fabric shifting, reducing errors and the need for costly rework. This tool is particularly valuable for intricate projects like quilting and tailoring, where even slight deviations can affect the final outcome. Additionally, it saves time by eliminating the need for manual measurements, allowing sewists to focus on creativity and efficiency. Its role in enhancing both productivity and quality makes it an essential asset for sewists of all levels, from hobbyists to professionals.

Key Features of a Seam Guide Ruler

A Seam Guide Ruler features adjustable seam allowance settings, magnetic attachment for stability, and multiple measurement markings, ensuring versatility and precision in various sewing tasks.

Design and Construction

The Seam Guide Ruler is crafted from durable materials, such as stainless steel or high-quality plastic, ensuring longevity and precision. Its compact design allows for easy handling, while the ruler’s edge is typically smooth and straight, enabling consistent fabric alignment. Many models feature a magnetic base, which securely attaches to sewing machine beds, preventing movement during use. The ruler often includes measurement markings in inches or millimeters, along with graduated scales for different seam allowances. Ergonomic design elements, such as a non-slip surface, enhance user comfort and control. Overall, the ruler’s construction prioritizes functionality, making it a practical tool for both amateur and professional sewists.

Adjustable Seam Allowance Settings

The Seam Guide Ruler offers adjustable seam allowance settings, allowing users to customize the width of their seams. This feature is particularly useful for projects requiring specific measurements, such as quilting or garment construction. By adjusting the ruler, sewists can set seam allowances ranging from 1/4 inch to 1 inch or more, ensuring consistent stitching. The adjustability enhances versatility, accommodating different fabric types and project needs. This feature is especially beneficial for professional sewists who work on diverse tasks, as it saves time and reduces the need for multiple tools. The precise adjustments ensure accurate results, making the ruler a must-have for achieving perfect seams every time.

Magnetic Attachment for Stability

The magnetic attachment on the seam guide ruler offers exceptional stability, ensuring the ruler stays securely in place during sewing; This feature is crucial for maintaining consistent seam allowances and preventing slippage, which can ruin a project. The strong magnetic grip adheres firmly to the sewing machine, allowing for smooth and accurate stitching. Sewists can work with confidence, knowing their fabric is properly aligned. This stability is especially beneficial for intricate patterns and heavy fabrics, where precision is key. The magnetic attachment is easy to install and adjust, making it a practical tool for both beginners and experienced sewists alike, ensuring versatility.

How to Use a Seam Guide Ruler

Attach the ruler to your sewing machine using its magnetic base or clip-on feature. Align fabric edges with the ruler’s markings for consistent seams and precise stitching.

Step-by-Step Guide to Setting Up the Ruler

Setting up a seam guide ruler is straightforward. First, ensure your sewing machine is clean and free of debris. Attach the ruler using its magnetic base or clip-on mechanism, aligning it with the edge of your machine’s throat plate. Next, determine your desired seam allowance and adjust the ruler accordingly. Some models feature adjustable settings, while others may require manual positioning. Once secured, test the setup by running a scrap piece of fabric through the machine to confirm accurate alignment. Proper installation ensures consistent stitching and professional-quality seams.

Aligning Fabric for Accurate Stitching

Aligning fabric for accurate stitching is simplified with a seam guide ruler. Start by placing the fabric under the sewing machine’s presser foot, ensuring the edge aligns with the ruler’s guide. The ruler’s edge acts as a visual reference, helping maintain a straight line. For consistent seams, position the fabric so the desired seam allowance matches the ruler’s markings; Gently guide the fabric as you sew, keeping it flush against the ruler to prevent drift. This method ensures precise, uniform stitching and minimizes the risk of crooked seams. Regular use enhances your ability to align fabric intuitively, leading to professional-quality results.

Tips for Achieving Perfect Seams

To achieve perfect seams, use the seam guide ruler to maintain consistent alignment and spacing. Ensure fabric is smooth and free of wrinkles before stitching. Use the ruler’s measurements to set precise seam allowances, and keep the fabric edge flush against the guide as you sew. For thick fabrics, consider using a walking foot to enhance stability. Press seams immediately after sewing to set the stitches and create a crisp finish. Regularly check the ruler’s placement to avoid misalignment. By following these tips, you can achieve professional-quality seams with ease and precision, making your sewing projects look polished and professional.

Benefits of Using a Seam Guide Ruler

The Seam Guide Ruler enhances accuracy, saves time, and offers versatility, making it an indispensable tool for sewists seeking professional results across various projects.

Improved Accuracy in Sewing

The Seam Guide Ruler significantly enhances sewing accuracy by providing a clear guide for fabric alignment and stitch placement. Its magnetic attachment ensures stability, reducing the likelihood of uneven seams. With adjustable settings, sewists can maintain consistent seam allowances, crucial for professional results. This tool minimizes errors, especially when working with intricate patterns or delicate fabrics. By keeping the fabric steady and aligned, it allows for precise stitching, making it ideal for both beginners and experienced sewists. The ruler’s design ensures that every seam is consistent, eliminating guesswork and fostering confidence in each project.

Time-Saving for Professional Sewists

The Seam Guide Ruler is a game-changer for professional sewists, offering unparalleled efficiency in their workflows. By providing precise alignment and consistent seam allowances, it eliminates the need for constant adjustments, saving valuable time. The magnetic attachment ensures the ruler stays in place, allowing for smooth, uninterrupted sewing sessions. Professionals can complete projects faster without compromising quality, making it an indispensable tool for meeting tight deadlines. Its ability to maintain accuracy and stability streamlines the sewing process, enabling sewists to focus on creativity and productivity. This tool is a must-have for anyone seeking to optimize their sewing routine and deliver exceptional results efficiently.

Versatility in Various Sewing Projects

The Seam Guide Ruler excels across a wide range of sewing projects, from quilting to garment construction. Its adjustable settings accommodate different seam allowances, making it ideal for diverse fabrics and techniques. Whether working on delicate linens or sturdy denim, the ruler ensures consistent results. Crafters can use it for precise hems, accurate topstitching, and aligned seams in home decor projects. The magnetic attachment works seamlessly on various sewing machines, adapting to different setups. This versatility makes the Seam Guide Ruler a go-to tool for any project, enhancing both creativity and technical accuracy. It’s perfect for quilters, tailors, and DIY enthusiasts alike, ensuring professional-looking finishes every time.

Reviews and Recommendations

The Seam Guide Ruler is highly praised for its accuracy and ease of use. Popular brands like Madam Sew offer well-regarded models, earning positive user feedback for durability and versatility. Many sewists recommend it as a must-have tool for both professionals and hobbyists, ensuring precise stitching and seamless results across various projects.

Popular Brands and Models

Madam Sew is a leading brand offering high-quality seam guide rulers, known for their durability and precision. Their Magnetic Seam Guide is particularly popular, praised for its ease of use and versatility across different sewing machines. Another notable brand is Creative Grids, which offers a range of rulers designed for both quilters and general sewists. These tools are often recommended by professionals and hobbyists alike, ensuring accurate stitching and consistent results. Their innovative designs cater to various sewing needs, making them indispensable for achieving perfect seams in any project.

User Feedback and Ratings

Users highly praise seam guide rulers for their effectiveness and ease of use. Many sewists highlight the magnetic attachment as a standout feature, ensuring stability during stitching. Reviews often mention improved accuracy and reduced errors, especially for beginners. Professional sewists appreciate the time-saving aspect, while hobbyists love the versatility across various projects. High ratings consistently emphasize the durability and value for money. Feedback frequently notes how these tools simplify sewing, making them a must-have for achieving professional-quality results. Overall, user satisfaction is exceptionally high, with many considering the seam guide ruler an indispensable addition to their sewing toolkit.

The Seam Guide Ruler is an indispensable tool for achieving precise and professional sewing results. Its versatility and ease of use make it a must-have for every sewist.

Why Every Sewist Needs a Seam Guide Ruler

The Seam Guide Ruler is an indispensable tool for sewists, ensuring precise seam allowances and fabric alignment. It enhances accuracy, saves time, and offers versatility across projects. Whether you’re a beginner or a professional, this ruler streamlines the sewing process, reducing errors and boosting efficiency. Its adjustable settings and magnetic attachment provide stability, making it a must-have for achieving professional results. Every sewist deserves this tool to elevate their craftsmanship and enjoy a seamless sewing experience.