The Ford Crown Victoria, a classic American sedan, has garnered attention for manual transmission swaps, offering enhanced driving control and a more engaging experience for enthusiasts.
1;1 Overview of the Crown Victoria and Manual Transmission
The Ford Crown Victoria, a full-size sedan known for its durability and performance, was historically equipped with automatic transmissions. However, enthusiasts have explored manual transmission swaps to enhance driver engagement and performance. The Crown Vic’s robust platform makes it a popular candidate for such modifications, offering improved control and fuel efficiency. While factory manual options were limited, aftermarket solutions and community-driven swaps have made it possible to install manual transmissions, appealing to drivers seeking a more hands-on driving experience.
1.2 Benefits of a Manual Transmission in the Crown Vic
Installing a manual transmission in a Crown Victoria offers several advantages, including improved fuel efficiency and lower maintenance costs compared to automatics. Drivers gain better control over acceleration and deceleration, enhancing overall driving performance. The direct connection between the engine and wheels provides a more engaging experience. Additionally, manual transmissions are generally lighter, reducing vehicle weight and improving power-to-weight ratio. These benefits make a manual swap a desirable modification for Crown Vic enthusiasts seeking enhanced driving dynamics and cost savings.
The History of Manual Transmission in Crown Victoria
The Crown Victoria historically offered limited manual transmission options, primarily in early models, with most later vehicles featuring automatic transmissions, reflecting market preferences for convenience.
2.1 Evolution of Transmission Options in Crown Vic
Early Crown Victorias featured manual transmissions, but as the market shifted toward comfort, automatics became standard. The 1997 model marked a significant shift away from manual options, catering to civilian and police fleets prioritizing ease of use. Over time, manual transmissions were phased out, with later models exclusively offering automatics, reflecting broader automotive trends and consumer preferences for convenience and ease of operation.
2.2 Discontinuation of Manual Transmission in Later Models
By the late 1990s, Ford phased out manual transmissions in Crown Victorias, prioritizing automatics for ease of use. The 2008 model year saw the final discontinuation, reflecting a broader industry shift toward convenience. This change catered to police and civilian fleets, which valued seamless operation. Despite this, enthusiasts continue to explore manual swaps, breathing new life into the Crown Vic’s legacy through aftermarket solutions and community-driven modifications. The discontinuation marked the end of an era but sparked a dedicated aftermarket movement.
The Process of Swapping to a Manual Transmission
Swapping to a manual transmission in a Crown Vic involves modifying the clutch pedal assembly, transmission mounting, and wiring. It requires mechanical expertise and precise modifications to ensure compatibility and functionality, making it a challenging but rewarding project for enthusiasts.
3.1 Steps Involved in Converting to a Manual Transmission
Converting a Crown Vic to a manual transmission involves several key steps. First, acquire a compatible manual transmission and clutch system. Next, modify the pedal assembly by grafting a manual clutch pedal onto the existing brake pedal setup. The transmission must then be mounted securely, ensuring proper alignment. Wiring and hydraulic systems need adjustment to support manual operation. Finally, test the setup to ensure smooth gear shifts and proper clutch engagement.
3.2 Necessary Modifications for a Successful Swap
Key modifications include grinding the clutch pedal shaft and welding it to the Crown Vic assembly. Install the correct manual transmission gear for accurate speedometer readings. Fabricate a custom clutch/brake pedal box by combining components. Ensure proper transmission mounting and alignment. Adjust wiring and hydraulic systems to support manual operation. Regular fluid and filter changes are crucial for maintenance. These modifications ensure seamless integration and optimal performance of the manual transmission in your Crown Vic.
Choosing the Right Manual Transmission for Your Crown Vic
Selecting the right manual transmission for your Crown Vic involves ensuring compatibility with your vehicle’s specifications. Popular options include the T-5 or T-45, known for durability and performance. Consider your driving habits and whether you’re aiming for daily reliability or race-specific enhancements. Always consult forums or transmission specialists to make an informed decision.
4.1 Compatibility and Popular Manual Transmission Options
Ensuring compatibility is crucial when selecting a manual transmission for your Crown Vic. The T-5 and T-45 are popular choices, offering durability and smooth shifting; These transmissions are often sought after for their compatibility with the Crown Vic’s engine and drivetrain. Additionally, enthusiasts recommend exploring aftermarket kits, such as those from ADTR, which simplify the swap process. Always verify specifications and consult forums or specialists to ensure a seamless integration with your vehicle’s setup.
4.2 Considerations for Racing or Performance Builds
For high-performance or racing applications, choosing the right manual transmission is vital. The Tremec T-56 or TKO series are favored for their strength and reliability under extreme conditions. These transmissions offer precise gear engagement and durability, essential for racing environments. Additionally, modifying the clutch system and installing a lightweight flywheel can enhance performance. Experts recommend upgrading the driveshaft and axles to handle increased torque. Always consult performance specialists to ensure the transmission aligns with your build’s specific needs and goals.
Maintenance and Repair of a Manual Transmission
Regular fluid changes and filter replacements are essential for optimal performance. Inspect for wear on clutch components and gears. Address any leaks promptly to prevent damage.
5.1 Fluid and Filter Replacement Recommendations
For Crown Vic manual transmissions, replace the gear oil every 30,000 miles. Use high-quality synthetic fluid compatible with the transmission type. Change the filter during each service to maintain cleanliness and prevent contamination. Regular fluid changes ensure smooth shifting and prolong component life. Refer to the owner’s manual for specific recommendations and intervals to keep the transmission running at peak performance.
5.2 Common Issues and Troubleshooting Tips
Common issues with Crown Vic manual transmissions include clutch master cylinder failure and grinding gears. Check for worn synchronizers or bearings if shifting feels rough. Fluid leaks around the transmission pan or bellhousing are another concern. Troubleshoot by inspecting seals and gaskets. If gears slip, ensure proper clutch engagement and adjust the pedal if necessary; Regular fluid checks and filter replacements can prevent many of these issues. Always refer to the owner’s manual for specific diagnostic procedures.
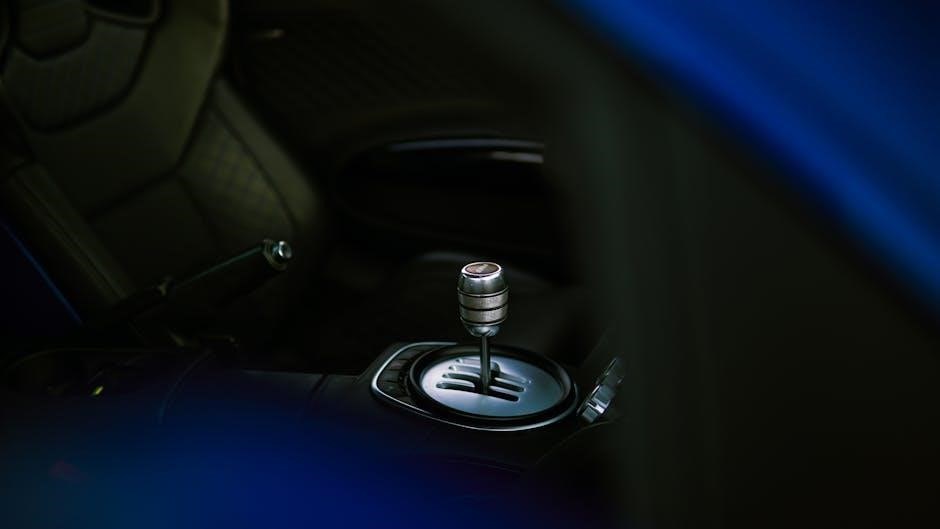
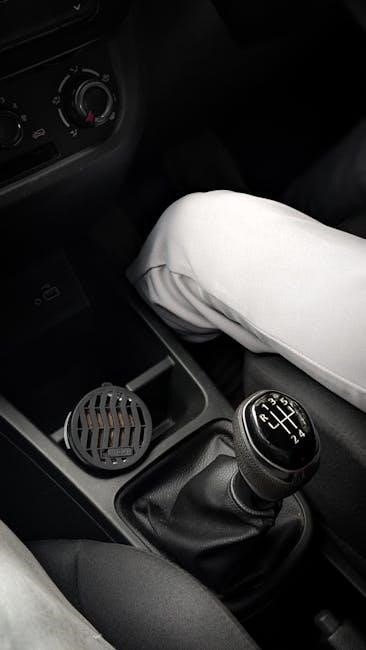
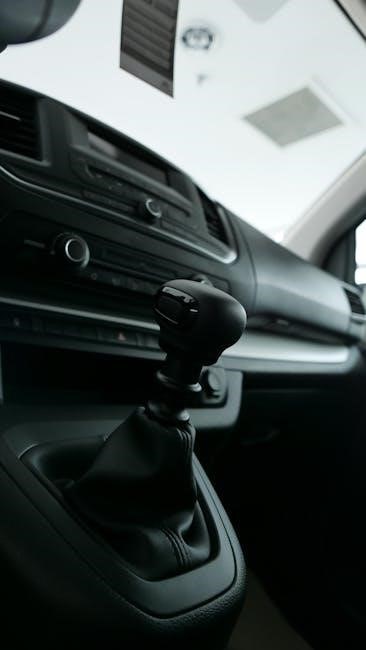
The Gear Shifting Mechanism in Crown Vic
The Crown Vic’s manual transmission relies on a precise gear shifting mechanism, with clutch engagement and synchronizers ensuring smooth transitions between gears for optimal performance and control.
6.1 Understanding the Gear Shifting Process
The gear shifting process in a Crown Vic with a manual transmission involves pressing the clutch pedal, moving the gearshift through the gate, and releasing the clutch smoothly. This ensures seamless power delivery and smooth acceleration. Proper synchronization of clutch and accelerator is crucial for avoiding wear on components like the clutch disc and pressure plate. Over time, drivers develop muscle memory, making the process intuitive and efficient, enhancing overall driving performance and control.
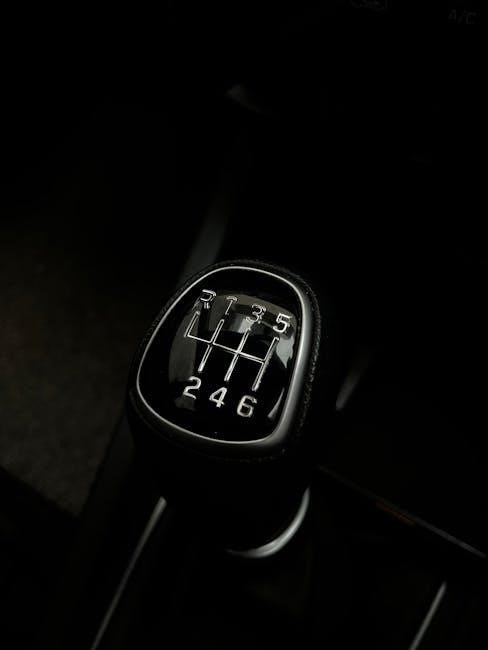
6.2 Dogleg Transmissions and Their Unique Features
Dogleg transmissions feature a unique shift pattern where first gear is located below reverse, optimizing quick access to higher gears during racing. This design reduces shifting time and enhances acceleration. The Crown Vic’s manual swap often involves integrating dogleg transmissions for performance gains. Modifications like custom mounts and linkages are typically required for compatibility. The gearshift’s precise alignment ensures smooth engagement, making it a popular choice for enthusiasts seeking improved control and speed in their Crown Victoria builds.

Speedometer Setup for Manual Transmission
Proper gear installation ensures accurate speedometer readings. Calibration is crucial for correct function, requiring precise setup to maintain reliable speed tracking and optimal performance in Crown Vic manual swaps.
7.1 Proper Gear Installation for Accurate Speedo Reading
Acquiring the correct manual transmission gear for the speedometer is essential. Ensure it’s installed at the transmission’s end to maintain accurate speed readings. This step prevents discrepancies and ensures the speedometer functions correctly, providing reliable data during drives. Proper installation avoids costly repairs and maintains optimal performance.
7.2 Calibration and Adjustment Tips
Calibrating your Crown Vic’s speedometer after a manual swap is crucial for accuracy. Ensure the speedometer gear matches the transmission’s gear ratio. Adjust the gear ratio settings in the ECU or use a calibration tool for precise readings. Regularly check and maintain proper fluid levels to avoid mechanical issues. Test drive the vehicle to verify accuracy and make fine-tuned adjustments as needed for smooth, reliable performance.

Performance Upgrades for Manual Transmission Crown Vic
Upgrading your Crown Vic with a manual transmission enhances performance, offering better control and acceleration. Consider lightweight components and tuning for optimal results and a sportier feel.
8.1 Enhancing Performance with a Manual Swap
Swapping to a manual transmission in a Crown Vic significantly improves performance by offering precise gear control and quicker acceleration. This upgrade enhances driver engagement and responsiveness, making it ideal for enthusiasts seeking a sportier feel. Additionally, manual transmissions often reduce weight and improve fuel efficiency, further boosting overall vehicle performance and handling capabilities. Many Crown Vic owners opt for this swap to unlock the car’s full potential.
8.2 Additional Modifications for Optimal Results
For optimal performance post-manual swap in a Crown Vic, consider upgrading the clutch and flywheel to handle increased power. A short-throw shifter enhances shifting precision, while a lightweight driveshaft improves acceleration. Upgrading the rear differential and axles ensures durability under stress. Performance-oriented tires and suspension modifications further refine handling. These upgrades collectively maximize the benefits of a manual transmission, delivering a balanced blend of power and control for both street driving and track performance.

Community and Resources for Manual Transmission Crown Vic
Active forums, online communities, and specialized resources provide valuable support for Crown Vic manual transmission projects. Websites like CrownVic.net and the FRPP catalog offer essential guides and parts. Enthusiasts share insights and solutions, fostering a collaborative environment for modifications and troubleshooting. These platforms are vital for accessing technical expertise and ensuring successful swaps or upgrades.
9.1 Forums and Online Communities for Support
Online forums like CrownVic.net serve as hubs for Crown Vic enthusiasts, offering detailed guides, troubleshooting tips, and shared experiences. These platforms provide invaluable support for manual transmission swaps, with members discussing everything from pedal assembly modifications to speedometer calibration. Additionally, resources like the FRPP catalog are frequently recommended for sourcing genuine parts. These communities foster collaboration, helping owners overcome challenges and achieve successful manual transmission conversions. They are indispensable for both novice and experienced Crown Vic modifiers.
9.2 Recommended Parts and Suppliers
For a successful manual transmission swap, enthusiasts recommend sourcing parts from trusted suppliers like Trevor Jackson and ADTR, which offer compatible components. The ADTR master cylinder kit is particularly popular for its reliability. Additionally, the Ford Racing Performance Parts (FRPP) catalog is a go-to resource for genuine Ford components. Online forums like CrownVic.net often highlight these suppliers, ensuring enthusiasts can find the right parts for their Crown Vic manual transmission projects.