Icebreakers are activities designed to help people connect, reduce awkwardness, and encourage interaction in various settings, making them essential for group dynamics and team building.
Definition and Purpose of Icebreakers
Icebreakers are activities designed to help participants feel comfortable and engaged in group settings. They involve interactive exercises that encourage sharing, collaboration, and connection. The primary purpose of icebreakers is to break down social barriers, foster camaraderie, and create a relaxed environment for communication. These activities are often used at the beginning of meetings, workshops, or events to help people get to know each other. Icebreakers can take many forms, including games, group mixers, and creative challenges, all aimed at promoting teamwork and reducing initial awkwardness. By facilitating interaction, they set the stage for productive discussions and meaningful relationships. Effective icebreakers are simple, inclusive, and tailored to the group’s context, ensuring everyone feels involved and valued.
Importance of Icebreakers in Group Dynamics
Icebreakers play a crucial role in group dynamics by fostering a positive and inclusive atmosphere. They help individuals overcome initial shyness and establish connections, which are essential for effective collaboration. By encouraging participation and interaction, icebreakers enhance communication, trust, and teamwork. They also provide a platform for diverse personalities to shine, ensuring that everyone feels valued. In educational and corporate settings, icebreakers can improve focus, creativity, and problem-solving skills by creating a relaxed environment. They are particularly beneficial in diverse groups, helping to break down cultural or social barriers. Overall, icebreakers set the foundation for successful group interactions, making them an indispensable tool for facilitators and leaders aiming to build cohesive and productive teams.
Types of Icebreaker Activities
Icebreaker activities include group mixers, warm-ups, energizers, and team-building games. These interactive and collaborative exercises help participants connect, fostering engagement and camaraderie in both in-person and virtual settings.
Group Mixers and Warm-Ups
Group mixers and warm-ups are activities designed to encourage initial interactions and ease participants into a collaborative mindset. These exercises often involve simple, low-stakes tasks that prompt movement and casual conversation. Examples include icebreaker questions, quick introductions, or games like “Two Truths and a Lie.” These activities help participants feel comfortable, break down barriers, and establish a positive atmosphere. They are particularly effective at the start of meetings or events to transition individuals into a group-oriented mindset. By fostering connections and energy, mixers and warm-ups set the stage for more productive and engaging interactions later on.
Energizers and Playful Activities
Energizers and playful activities are designed to boost energy, creativity, and engagement within a group. These exercises are often dynamic and interactive, aiming to revitalize participants during long meetings or sessions. Examples include quick games like “Count Up,” where teams count sequentially without speaking, or “Human Bingo,” which encourages mingling. These activities are particularly effective in breaking monotony and fostering a lively atmosphere. They are ideal for transitioning between tasks or re-energizing groups. By incorporating elements of fun and movement, they help participants refocus and collaborate more effectively. Energizers are versatile and can be adapted to various settings, making them a valuable tool for facilitators seeking to maintain group momentum and enthusiasm. They are simple yet impactful ways to enhance group dynamics and productivity.
Team Building and Collaboration Games
Team building and collaboration games are structured activities that encourage groups to work together towards a common goal. These exercises are designed to strengthen communication, trust, and problem-solving skills. Examples include the “Egg Drop Challenge,” where teams must collaborate to protect an egg during a drop, and “Scavenger Hunts,” which promote coordination and strategy. These games often involve creative problem-solving and require active participation from all members. They are particularly effective in corporate and educational settings to foster unity and enhance teamwork. By emphasizing shared objectives, these activities help build stronger, more cohesive teams. They are essential for developing collaboration skills and ensuring successful group dynamics in various environments.
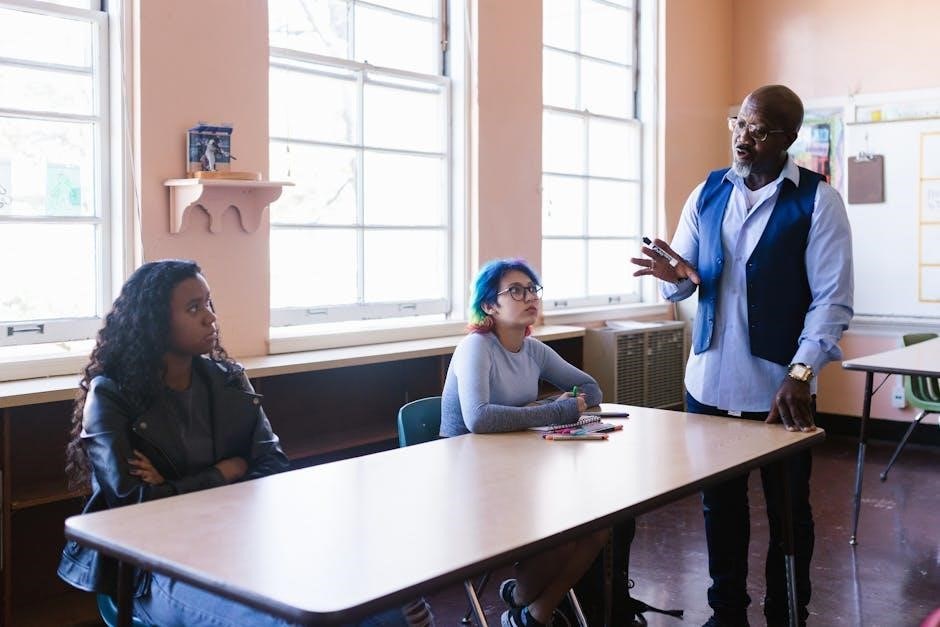
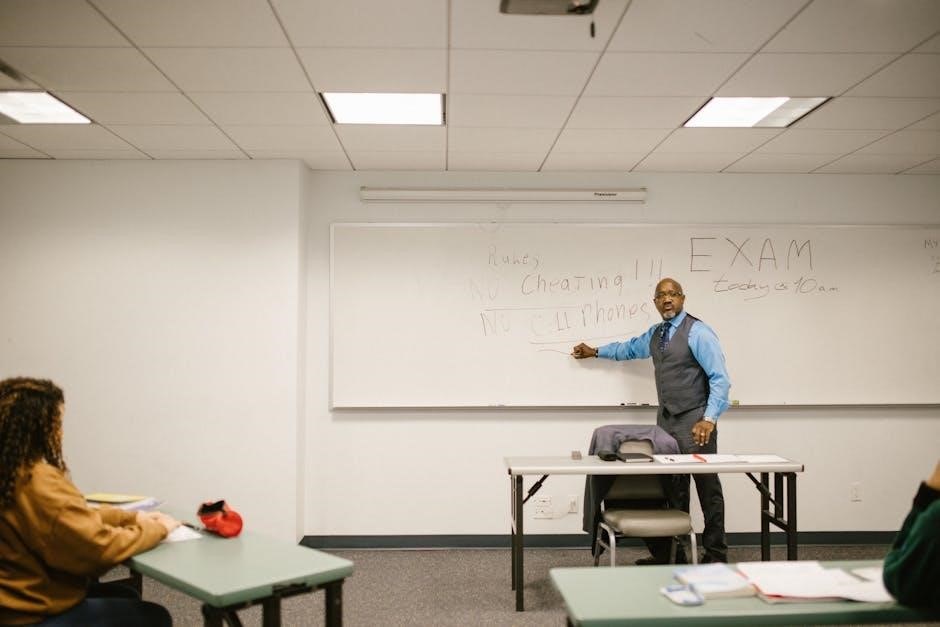
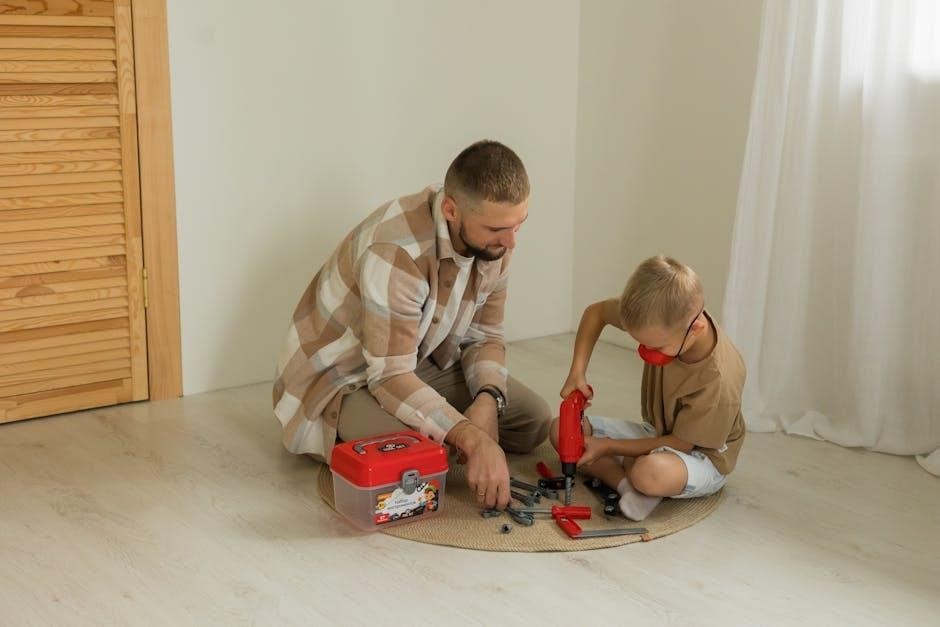
Icebreakers in Educational Settings
Icebreakers are activities that facilitate interaction and engagement among students and educators, helping to create a comfortable learning environment and foster collaboration in classrooms and group settings.
Icebreaker Activities for Students
Icebreaker activities for students are engaging exercises designed to foster connections and collaboration in educational settings. Examples include Human Bingo, where students find peers with specific traits, and Two Truths and a Lie, encouraging sharing. Classroom scavenger hunts and group mixers also promote interaction. These activities help students feel comfortable, break down barriers, and build a sense of community. They are particularly effective at the start of a new term or when introducing group projects. By incorporating fun and creative elements, icebreakers make learning environments more inclusive and dynamic, setting the stage for successful academic and social experiences. They are versatile and can be adapted to suit various age groups and classroom sizes.
Using Icebreakers to Enhance Learning
Icebreakers play a vital role in enhancing learning by creating a comfortable and interactive environment for students. These activities encourage active participation, collaboration, and communication, which are essential for academic success. By breaking down social barriers, icebreakers help students feel more connected, leading to increased engagement and focus. They also foster creativity and critical thinking, as many icebreaker games involve problem-solving or brainstorming. For example, activities like “Think-Pair-Share” or collaborative puzzles can introduce new concepts in a fun and accessible way. Regular use of icebreakers not only improves retention of material but also builds a sense of community, making learning more enjoyable and effective for all students. Consistent integration of icebreakers can significantly enhance the overall educational experience.
Case Studies: Successful Icebreaker Implementations in Classrooms
Several schools have reported success with icebreaker activities in their classrooms. For instance, an elementary school implemented a collaborative puzzle activity, which improved teamwork and communication among students. In a high school setting, a “Two Truths and a Lie” game helped students bond and share personal interests, leading to increased class participation. A university incorporated “Human Bingo” to connect students from diverse backgrounds, fostering inclusivity and collaboration. These case studies highlight how icebreakers can create a supportive learning environment, enhance student engagement, and improve academic outcomes. By integrating icebreakers into their curricula, educators have observed improved student interactions and a more positive classroom atmosphere overall.
Icebreakers in Corporate Environments
Icebreakers in corporate environments enhance team cohesion and communication, fostering collaboration and breaking down workplace barriers. Activities like team-building games and random pairing bots boost employee engagement and productivity.
Team Building Activities for Employees
Team building activities for employees are crucial for fostering collaboration and improving workplace dynamics. These exercises help break down barriers and enhance communication among team members. Examples include scavenger hunts, puzzle challenges, and collaborative games like “Two Truths and a Lie.” Such activities encourage problem-solving, creativity, and mutual understanding.
- Scavenger hunts promote teamwork and time management.
- Puzzles enhance problem-solving skills.
- Interactive games like “Six Word Memoirs” foster personal connections.
These activities are particularly effective in corporate environments, as they create a shared experience and help employees feel more connected, leading to a more productive and harmonious work environment. They are simple yet impactful ways to strengthen team bonds.
Icebreaker Games for Remote Teams
Icebreaker games for remote teams are essential for fostering connection and collaboration in virtual settings. These activities help bridge geographical gaps and create a sense of unity. Examples include virtual scavenger hunts, online trivia, and interactive games like “Guess Who?” or “Pictionary.” Tools like Kahoot, Mentimeter, and Padlet can enhance engagement.
- Virtual scavenger hunts encourage teamwork and creativity.
- Online trivia games promote healthy competition.
- Interactive polls and quizzes spark conversations.
These activities are designed to be inclusive and fun, ensuring all participants feel involved. They are particularly effective for remote teams, as they help build rapport and improve communication in a digital environment. Regular virtual icebreakers can significantly boost team morale and productivity.
Improving Communication with Icebreakers
Icebreakers play a crucial role in enhancing communication within groups by creating a relaxed environment for interaction. They encourage participants to share thoughts, listen actively, and connect with others. Activities like “Two Truths and a Lie” or “Human Bingo” foster open dialogue, helping individuals feel comfortable expressing themselves. These exercises break down barriers and promote inclusivity, ensuring everyone’s voice is heard. Tools like Mentimeter and Padlet further facilitate interaction by allowing real-time feedback and collaboration. Regular icebreakers not only improve verbal communication but also strengthen nonverbal cues, such as body language and tone, which are essential for effective teamwork. By fostering connections, icebreakers lay the groundwork for clearer, more productive communication in both in-person and virtual settings.
Virtual Icebreakers
Virtual icebreakers leverage online platforms like Kahoot, Mentimeter, and Padlet to engage remote teams through interactive quizzes, collaborative puzzles, and real-time discussions, fostering connections and camaraderie digitally.
Online Platforms for Virtual Icebreakers
Various online platforms facilitate virtual icebreakers, enhancing remote team engagement. Kahoot and Mentimeter enable interactive quizzes and polls, fostering real-time participation and collaboration. Padlet allows for shared brainstorming and idea generation, while Microsoft Teams and Zoom offer features like breakout rooms for smaller group interactions. These tools help create a dynamic and inclusive environment, ensuring all participants can contribute. They are particularly effective for remote teams, as they bridge geographical gaps and encourage meaningful connections. By leveraging these platforms, hosts can design engaging icebreakers that promote camaraderie and set a positive tone for virtual meetings or events.
Interactive Tools for Online Engagement
Interactive tools like Kahoot, Mentimeter, and Padlet are essential for fostering engagement during virtual icebreakers. Kahoot allows hosts to create quizzes and polls, encouraging real-time participation and friendly competition. Mentimeter enables live feedback and collaborative brainstorming through customizable surveys. Padlet offers a virtual canvas for sharing ideas and multimedia, promoting creativity and collaboration. These tools not only break the ice but also create a sense of connection among participants. They are particularly effective in remote settings, where face-to-face interactions are limited. By leveraging these platforms, facilitators can design dynamic and inclusive activities that cater to diverse preferences and learning styles, ensuring everyone feels involved and valued. Their versatility makes them ideal for both small and large groups, enhancing the overall icebreaking experience.
Virtual Team-Building Activities
Virtual team-building activities are designed to foster collaboration and connection among remote teams. Examples include virtual scavenger hunts, online escape rooms, and collaborative puzzles. These activities encourage teamwork, problem-solving, and communication. Platforms like virtual whiteboards and video conferencing tools enhance interaction. Many activities, such as virtual cooking classes or trivia games, promote bonding and shared experiences. Regular virtual team-building helps remote employees feel connected and engaged. These activities also help build trust and improve overall team dynamics, making them essential for maintaining a cohesive and productive remote workforce. By incorporating fun and challenging tasks, virtual team-building activities create a sense of unity and purpose, even in a distributed work environment.
Popular Icebreaker Games
Popular icebreaker games include “Two Truths and a Lie,” “Human Bingo,” and “Scavenger Hunts.” These activities foster connections, encourage participation, and create engaging experiences for everyone involved.
Two Truths and a Lie
“Two Truths and a Lie” is a popular icebreaker game where participants share two true statements and one false statement about themselves. The group then guesses which one is the lie. This activity encourages creativity, laughter, and quick thinking while helping people learn interesting facts about each other. It’s simple to execute and works well in both in-person and virtual settings. The game fosters engagement and breaks down barriers, making it ideal for team-building sessions, classrooms, or social gatherings. Its versatility allows it to be adapted for different age groups and contexts, ensuring everyone feels comfortable participating. By sharing personal anecdotes, individuals build connections and establish rapport in a fun and interactive way.
Human Bingo
Human Bingo is a dynamic icebreaker activity where participants receive a bingo card with diverse traits, hobbies, or characteristics in each square. The goal is to find someone who fits each description and get them to sign the corresponding square. This game encourages mingling, interaction, and laughter, making it an excellent way to break the ice in group settings. It’s widely used in classrooms, team-building events, and social gatherings. The activity promotes active communication and helps participants discover shared interests or unique qualities among each other. To make it more engaging, organizers can customize the traits based on the group’s context, such as professional skills for corporate events or fun facts for casual meetups. A time limit adds urgency, ensuring everyone participates and connects quickly.
Scavenger Hunts and Puzzle Activities
Scavenger hunts and puzzle activities are engaging icebreakers that foster teamwork and problem-solving skills. These activities involve participants working together to complete challenges or solve puzzles, often with a time limit. Scavenger hunts can be physical, such as finding specific objects, or virtual, using online tools. Puzzles, like jigsaw puzzles or riddles, encourage collaboration and creative thinking. Both activities promote bonding and camaraderie, making them ideal for diverse group settings. They are versatile, suitable for small or large groups, and can be tailored to fit specific themes or goals. By requiring active participation, scavenger hunts and puzzles help break down barriers and create a shared sense of accomplishment, enhancing group dynamics and engagement.
Icebreaker Activities for Specific Groups
Icebreakers are tailored to suit diverse groups, fostering connection and collaboration among daycare teachers, remote teams, and large groups through activities designed to meet their unique needs.
Icebreakers for Day Care Teachers
Icebreakers for daycare teachers are designed to foster collaboration and camaraderie among staff. Activities like “Two Truths and a Lie” or “Human Bingo” encourage teachers to share fun facts about themselves, creating a relaxed atmosphere. Group mixers, such as “The Name Game” or “Classroom Scavenger Hunts,” help build connections and improve teamwork. These exercises are particularly useful during staff meetings or professional development sessions. By engaging in these activities, teachers can develop stronger working relationships, enhance communication, and create a supportive environment for both themselves and the children in their care. Icebreakers also help new staff integrate quickly, ensuring a cohesive and effective team dynamic.
Icebreakers for remote teams are essential for fostering connection and collaboration in virtual environments. Activities like virtual scavenger hunts, online trivia, and collaborative puzzles help team members bond. Tools such as Kahoot and Mentimeter enable interactive engagement, while platforms like Microsoft Teams facilitate icebreaker bots that pair coworkers for casual meetings. Virtual mixers, where participants discuss fun questions, also encourage camaraderie. These activities are particularly effective for remote teams to overcome communication barriers and build trust. Regular virtual icebreakers can enhance team dynamics, ensuring that all members feel connected and valued, even when working from different locations. Icebreakers for large groups are designed to engage many participants simultaneously, fostering connections and breaking the ice effectively. Activities like scavenger hunts, mixers, and interactive games such as “Two Truths and a Lie” or “Human Bingo” are ideal for large audiences. These exercises encourage participants to move around, interact, and share information in a fun and relaxed manner. For example, “Human Bingo” involves creating bingo cards with traits or questions, and participants must find someone who fits each description. Such activities are structured to ensure everyone can participate without feeling overwhelmed. They are particularly useful in conferences, workshops, or classrooms with many attendees, helping to create a welcoming atmosphere and promote collaboration from the start. Facilitating icebreakers involves setting a positive tone, encouraging participation, and using interactive tools like Kahoot or Mentimeter to ensure engaging and smooth group interactions from the start. Preparing for an icebreaker session involves defining clear objectives, selecting appropriate activities, and considering the audience’s preferences and comfort levels. Start by outlining the session’s purpose, whether it’s to foster connections, boost energy, or encourage collaboration. Choose activities that align with these goals and ensure they are inclusive for all participants. Gather necessary materials, such as worksheets, timers, or online tools like Kahoot or Mentimeter, to facilitate smooth execution. Additionally, set a positive tone by introducing the session’s importance and encouraging openness. Finally, plan for contingencies to address any challenges that may arise during the activity. Proper preparation ensures a engaging and productive icebreaker experience. Encouraging participation in icebreaker sessions requires creating a safe and inclusive environment where everyone feels comfortable contributing. Start by explaining the activity’s purpose and how it will benefit the group. Use non-threatening icebreakers, such as sharing a simple fact or preference, to ease participants into the exercise. Positive reinforcement, like acknowledging contributions, can boost confidence. Encourage reluctant participants by pairing them with more outgoing individuals or using anonymous tools like Mentimeter for initial responses. Ensure that activities are time-bound and structured to prevent awkwardness. By fostering a supportive atmosphere and providing clear guidance, you can maximize engagement and ensure all voices are heard during the session. Handling challenges during icebreakers requires adaptability and sensitivity. Common issues include reluctance to participate, dominance by outspoken individuals, or discomfort with certain topics. To address these, stay flexible and ready to adjust the activity if needed. Encourage quieter participants by creating smaller groups or using one-on-one interactions. Set clear expectations and remind everyone of the activity’s purpose. If a participant seems uncomfortable, offer alternatives or allow them to pass without pressure. Time management is crucial; keep activities concise to maintain engagement. Be prepared with backup exercises in case the initial one isn’t working. By remaining calm and proactive, facilitators can navigate challenges smoothly, ensuring a positive experience for all involved while keeping the session productive and enjoyable. Evaluate engagement levels, observe communication improvements, and gather feedback to assess how well icebreakers foster connections and enhance group dynamics. Evaluating group engagement involves assessing participants’ participation and interaction levels during and after icebreaker activities. This can be done through observation, feedback surveys, or verbal check-ins. Pay attention to body language, such as eye contact and smiles, as indicators of comfort and connection. Verbal cues, like active listening and contributions to discussions, also signal engagement; Tools like Kahoot or Mentimeter can provide quantitative data on interaction levels. Additionally, facilitators can set clear goals for engagement and compare outcomes post-activity. Feedback mechanisms, such as anonymous surveys or group discussions, help gauge perceived effectiveness. Continuous improvement based on these evaluations ensures icebreakers remain impactful and relevant for fostering meaningful connections. Assessing team dynamics involves evaluating how individuals collaborate, communicate, and support one another during icebreaker activities. Observing how teams solve problems, share ideas, and interact can reveal strengths and areas for improvement. Tools like Kahoot and Mentimeter allow facilitators to track participation and engagement in real-time. Feedback from participants, through surveys or discussions, provides insights into perceived teamwork effectiveness. Body language and verbal cues, such as active listening and willingness to contribute, are also key indicators. By analyzing these elements, facilitators can identify patterns, such as dominant or reserved roles, and adjust future activities to foster balanced collaboration. Regular assessments ensure that icebreakers not only build connections but also enhance overall team cohesion and productivity. Feedback mechanisms are essential for understanding the impact of icebreaker activities and identifying areas for improvement. Surveys, focus groups, and one-on-one discussions are common methods to gather participant insights. Anonymous feedback tools, like Mentimeter or Google Forms, encourage honest responses about what worked well and what didn’t. Facilitators can also observe body language and engagement levels during activities to gauge effectiveness. Feedback should be specific, focusing on collaboration, communication, and comfort levels. By analyzing this data, organizers can refine future icebreakers to better meet the needs of participants. Regular feedback loops ensure continuous improvement, fostering more meaningful connections and productive interactions in group settings. Icebreakers are powerful tools for fostering connections and enhancing group dynamics. They encourage engagement, reduce awkwardness, and create a comfortable environment for meaningful interactions and collaboration. Icebreakers are invaluable for fostering connections and enhancing communication in diverse settings. They create a relaxed atmosphere, encouraging participants to engage openly and build rapport. Whether in classrooms, corporate meetings, or virtual platforms, icebreakers adapt seamlessly to group sizes and contexts. Their ability to reduce barriers and promote collaboration makes them essential tools for educators, facilitators, and team leaders. As remote work grows, virtual icebreakers are becoming increasingly important for maintaining team cohesion. By incorporating creative and interactive activities, icebreakers ensure meaningful interactions and lasting impressions, making them a cornerstone of effective group dynamics in both traditional and modern environments. Future icebreaker trends emphasize technology integration, fostering inclusivity, and leveraging virtual platforms. Gamification and interactive tools, like Kahoot and Mentimeter, will dominate, enhancing engagement. AI-driven icebreakers will offer personalized experiences, tailoring activities to group dynamics. Virtual and hybrid formats will continue to rise, ensuring remote teams stay connected. Focus will also shift to cultural sensitivity, ensuring activities respect diverse backgrounds. These evolving trends aim to make icebreakers more effective, adaptable, and enjoyable, preparing them for modern collaboration needs while maintaining their core purpose of building meaningful connections.Icebreakers for Remote Teams
Icebreakers for Large Groups
How to Facilitate Icebreakers
Preparing for an Icebreaker Session
Encouraging Participation
Handling Challenges During Icebreakers
Measuring the Effectiveness of Icebreakers
Evaluating Group Engagement
Assessing Team Dynamics
Feedback Mechanisms
Final Thoughts on Icebreakers
Future Trends in Icebreaker Activities