
Unpacking and Initial Setup
1.1. Carefully Unpack the Clock
Take your cuckoo clock out of the box gently‚ ensuring all packaging materials are removed. Inspect for any damage or defects before proceeding.
1.2. Prepare for First Use
Place the clock on a stable surface‚ away from direct sunlight. Handle the clock with care to avoid damaging the hands or decorations. Ensure all parts are secure before operating.
Gently remove the clock from its packaging‚ ensuring no parts are damaged. Inspect for any defects or damage before proceeding. Handle the clock with care to avoid scratching or bending components. Place it on a stable surface‚ away from direct sunlight‚ to prepare for setup. Check all accessories‚ such as detachable decorations‚ are included and undamaged.
Place the clock on a stable surface‚ ensuring it is level and secure. Handle the clock gently to avoid damaging its mechanisms or decorations. Avoid exposing it to direct sunlight‚ which may cause fading or warping. Ensure all parts‚ such as hands and accessories‚ are properly aligned and secure before proceeding to insert batteries or set the time.

Inserting Batteries
Open the battery compartment and insert the required batteries‚ ensuring correct polarity. Replace or remove batteries annually to prevent leakage and ensure optimal performance.
2.1. Open the Battery Compartment
Locate the battery compartment‚ typically found on the back or bottom of the clock. Open it by sliding the latch or removing the screw. Gently pry the compartment open if necessary‚ ensuring not to force it. Handle with care to avoid damaging the mechanism or compartments. Place the clock on a stable surface during this process to maintain balance and prevent accidental movement.
2.2. Insert the Required Batteries
Insert the specified number and type of batteries (usually C-size or AA) into the compartment‚ ensuring the + and — terminals align correctly. Gently push each battery into place until it clicks. Avoid forcing batteries to prevent damage to the compartment or the clock’s internal mechanism. Once all batteries are securely inserted‚ close the compartment tightly to ensure proper operation. If your clock requires resetting‚ refer to the time-setting instructions.
2.3. Ensure Proper Polarity
Always align the battery’s positive (+) terminal with the marked positive terminal in the compartment and the negative (-) terminal with the negative mark. Correct polarity ensures proper functionality and prevents damage to the clock’s internal mechanisms. Misaligned polarity can cause the clock to malfunction or not work at all‚ so double-check the orientation before closing the compartment. This step is crucial for maintaining the clock’s longevity and performance.
Setting the Time and Date
Gently turn the minute hand clockwise to set the time. Synchronize with a trusted timekeeping device for accuracy. Adjust the hour hand carefully to match the correct time.
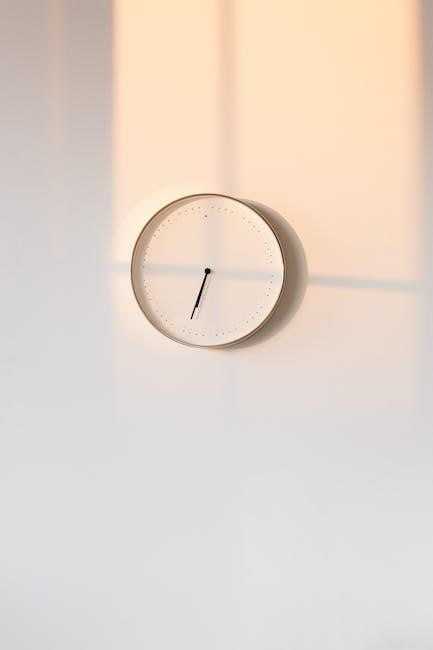
3.1. Turn the Hands Clockwise to 12 O’Clock
Gently rotate the minute and hour hands clockwise to align both at 12 o’clock. Ensure smooth movement to avoid damage. This step ensures proper synchronization before setting the correct time‚ as per the instructions for your battery-operated cuckoo clock.

3.2. Synchronize with a Trusted Timekeeping Device
After setting the hands to 12 o’clock‚ let the clock run for 24 hours to ensure accuracy. Compare the time with a trusted clock‚ watch‚ or digital device. This step ensures your cuckoo clock keeps precise time‚ aligning the cuckoo calls with the correct hours. Regular synchronization maintains reliability and performance over time.

Customizing Your Clock
Personalize your cuckoo clock by arranging detachable decorations around it. Adjust volume or sound settings to suit your preference‚ enhancing the overall aesthetic and functionality.
4.1. Arrange Detachable Decorations
Gently remove any detachable decorations from the packaging. Handle them with care to avoid damage. Arrange the decorations around the clock as desired to enhance its appearance. This step allows for personalization‚ making the clock unique to your space. Experiment with different arrangements to find the most visually appealing setup for your home décor.
4.2. Adjust Volume or Sound Settings
Locate the volume control‚ typically found on the back or side of the clock. Use the provided buttons or switches to adjust the sound level to your preference. For a quieter environment‚ enable the night mode or silent mode‚ which mutes the cuckoo calls during specific hours. Ensure the volume is set before inserting batteries to avoid resetting the sound preferences.

Troubleshooting Common Issues
If the clock stops working‚ check the batteries for proper installation and charge. Ensure the cuckoo calls match the time by adjusting the hour hand accurately.
5.1. Clock Stops Working
If your cuckoo clock stops working‚ first check the batteries for proper installation and charge. Ensure they are not expired or incorrectly polarized. If issues persist‚ inspect for internal mechanical problems or debris. Regular maintenance and annual battery replacement can prevent such occurrences. Refer to the instruction manual for detailed troubleshooting steps to restore functionality effectively.
5.2. Cuckoo Calls Do Not Match the Time
If the cuckoo calls do not align with the displayed time‚ gently adjust the hour hand to match the number of calls; Ensure the clock is synchronized with a trusted timekeeping device. Reset the time by removing the batteries‚ then reinserting them and setting the time again. This should realign the cuckoo calls with the correct hour‚ ensuring accurate performance.

Maintenance and Care
Regularly clean the clock surface with a soft cloth to maintain its appearance. Avoid touching the clock hands directly and replace batteries annually to prevent leakage and ensure optimal performance.
6.1. Cleaning the Clock Surface
Use a soft‚ dry cloth to gently wipe the clock’s exterior‚ avoiding the clock hands‚ bird‚ or mechanical components. For stubborn stains‚ lightly dampen the cloth with water‚ but ensure no moisture seeps inside. Avoid harsh chemicals or abrasive materials that could damage the finish. Regular cleaning prevents dust buildup and maintains the clock’s appearance. Clean monthly for optimal condition and functionality.
6.2. Regular Battery Replacement
Replace batteries every 12 months to prevent leakage and ensure optimal performance. Use high-quality batteries for reliable operation. Avoid mixing old and new batteries. Set a reminder for annual replacements to maintain accurate timekeeping and cuckoo function. Proper maintenance ensures longevity and smooth operation of your cuckoo clock.

Advanced Features
7;1. Night Mode or Silent Mode
Engage night mode to disable cuckoo calls between 10 PM and 5 AM. This feature ensures quiet operation during nighttime while maintaining accurate timekeeping. Activate via a designated button or switch‚ typically found on the back or side of the clock.
7.2. Music or Chime Options
Select from various melodies or chimes to personalize your clock’s sound. Use buttons or dials to choose preferred tunes or adjust volume levels for a customized experience.
Night mode disables the cuckoo calls between 10 PM and 5 AM‚ ensuring quiet operation. Activate this feature by pressing a designated button or switching a toggle‚ usually located on the clock’s back or side. Some models automatically engage silent mode during these hours‚ while others require manual adjustment. This feature is ideal for maintaining a peaceful environment during nighttime while keeping the clock functional for accurate timekeeping.
Many battery-operated cuckoo clocks feature music or chime options that play popular melodies. These sounds typically accompany the cuckoo calls on the hour or half-hour. Use the control buttons to select from various tunes or deactivate the music if desired. Ensure the volume is adjusted appropriately for your environment. Some models allow scheduling music playback during specific times of the day‚ enhancing the clock’s charm and functionality.

Warranty and Customer Support
Many battery-operated cuckoo clocks offer delightful music or chime features‚ adding charm to each hour. Use the dedicated buttons to choose from various melodies or adjust the volume. Some models allow you to disable the music or set it to play only during specific hours. Ensure the chimes align with your preferences for a personalized experience. Refer to the manual for detailed customization options.
8.1. Understanding the Warranty
Your battery-operated cuckoo clock is backed by a limited warranty‚ typically covering manufacturing defects for a specified period‚ often 1-2 years. This warranty ensures repairs or replacements for faulty components. Exclusions may apply‚ such as misuse‚ tampering‚ or normal wear and tear. Keep your proof of purchase and refer to the manual for detailed terms and conditions. Understanding the warranty ensures protection for your investment.
8.2. Contacting Customer Service
For inquiries‚ repairs‚ or assistance‚ contact customer service via email‚ phone‚ or the company’s website. Include your clock’s model number‚ order details‚ and a clear description of the issue. Response times may vary‚ but most issues are addressed promptly. Visit the official website for contact information and support options. Ensure to have your warranty information ready if needed for faster assistance.

Final Tips for Longevity
To ensure your cuckoo clock lasts for years‚ avoid extreme temperatures and humidity. Store it in a dry place when not in use and handle with care to prevent damage. Regular cleaning and proper battery maintenance will also extend its lifespan. Follow these tips to keep your clock functioning beautifully.
9.1. Avoid Battery Leakage
To prevent battery leakage‚ replace batteries annually or when the clock stops working. Remove old batteries promptly and dispose of them properly. Use high-quality batteries to minimize corrosion risk. Always follow polarity guidelines when installing new batteries to ensure proper function and avoid damage to the clock’s internal mechanisms.
9.2. Annual Maintenance Checks
Perform annual checks to ensure optimal performance. Clean the clock surface with a soft cloth and inspect the hands for alignment. Check battery terminals for corrosion and ensure secure connections. Lubricate moving parts if necessary and verify the time accuracy. Regular maintenance extends the clock’s lifespan and ensures reliable operation year-round.


About the author