Manual stretching is a therapeutic technique that enhances flexibility․ It reduces muscle tension‚ improves joint mobility‚ and prevents injuries‚ promoting overall physical health and well-being․
1․1 What is Manual Stretching?
Manual stretching is a therapeutic technique that involves the application of force to specific muscles and joints to improve flexibility and range of motion․ It is commonly used in physical therapy‚ fitness‚ and injury recovery to enhance mobility and reduce muscle tension․ This hands-on approach allows for targeted stretching‚ often performed by a therapist or trainer‚ to address tight muscles‚ improve posture‚ and promote relaxation․ Manual stretching can be tailored to individual needs‚ making it an effective tool for rehabilitation and overall wellness․ By focusing on specific areas‚ it helps relieve discomfort and restores proper movement patterns‚ benefiting both athletes and individuals with limited mobility․
1․2 Importance of Manual Stretching
Manual stretching is essential for maintaining muscle flexibility and joint mobility‚ which are crucial for overall physical health․ It helps reduce muscle tension‚ improve posture‚ and prevent injuries by addressing tight muscles and imbalances․ Regular manual stretching enhances blood circulation‚ promotes relaxation‚ and supports recovery after physical activity․ It is particularly beneficial for individuals engaged in repetitive tasks‚ manual labor‚ or sports‚ as it reduces the risk of strain and improves performance․ By incorporating manual stretching into a wellness routine‚ individuals can maintain optimal mobility‚ alleviate chronic pain‚ and enhance their quality of life․ Its targeted approach makes it a valuable tool for both therapeutic and preventive care․
Benefits of Manual Stretching
Manual stretching improves flexibility‚ prevents injuries‚ enhances posture‚ boosts athletic performance‚ and supports overall well-being‚ making it a valuable practice for both therapeutic and everyday use․
2․1 Increased Flexibility and Range of Motion
Manual stretching significantly enhances flexibility by lengthening muscles and tendons‚ improving joint mobility․ Regular practice allows for greater ease of movement‚ reducing stiffness and enabling better performance in daily activities and sports․ Over time‚ consistent stretching can increase the range of motion‚ making it easier to accomplish tasks that require bending‚ reaching‚ or twisting․ This improvement not only boosts physical comfort but also supports long-term joint health‚ reducing the risk of strain or injury․ By incorporating manual stretching into a routine‚ individuals can maintain or regain the flexibility needed for an active‚ healthy lifestyle‚ ensuring their bodies remain supple and agile․
2․2 Injury Prevention and Pain Reduction

Manual stretching is a powerful tool for preventing injuries and reducing pain․ By targeting tight muscles and tendons‚ it alleviates strain on joints‚ lowering the risk of overuse injuries․ Regular stretching improves circulation‚ promoting healing and reducing muscle soreness․ It also addresses muscle imbalances‚ which can lead to poor posture and pain․ Techniques like static and dynamic stretching help maintain healthy connective tissues‚ reducing stiffness and discomfort․ Additionally‚ manual stretching can break down scar tissue‚ improving mobility and reducing chronic pain․ Incorporating these practices into a daily routine can significantly enhance injury resilience and provide long-term relief from muscle-related pain‚ fostering an active and pain-free lifestyle․
2․3 Improved Posture and Muscle Balance
Manual stretching plays a crucial role in enhancing posture and restoring muscle balance․ By targeting tight and overused muscles‚ it helps correct imbalances that lead to poor alignment․ Regular stretching improves spinal flexibility‚ reducing slouching and promoting a more upright posture․ This‚ in turn‚ reduces strain on the lower back and neck․ Additionally‚ manual stretching encourages symmetry in muscle development‚ ensuring that opposing muscle groups work harmoniously․ Over time‚ this can lead to better overall alignment‚ reducing the risk of long-term postural issues․ Improved posture not only enhances physical appearance but also supports better breathing and reduces chronic pain‚ fostering a more balanced and stable physique․
2․4 Enhanced Athletic Performance
Manual stretching significantly enhances athletic performance by improving flexibility‚ power‚ and endurance․ It allows athletes to move more efficiently‚ reducing energy expenditure and increasing speed․ Regular stretching also prevents muscle imbalances‚ which can hinder performance and lead to injuries․ By targeting specific muscle groups‚ manual stretching enhances range of motion‚ enabling athletes to achieve optimal technique in their sports․ Additionally‚ it accelerates recovery by reducing muscle soreness and improving blood flow․ This makes it an essential tool for athletes aiming to boost their overall performance‚ ensuring they can train and compete at their best while minimizing the risk of injury and maintaining peak physical condition․
Techniques in Manual Stretching
Manual stretching employs various methods to improve flexibility and range of motion․ Techniques include static‚ dynamic‚ and manual therapy approaches‚ tailored to individual needs for optimal results․
3․1 Static Stretching
Static stretching involves holding a stretch for a prolonged period‚ typically 20-30 seconds‚ to lengthen muscles and improve flexibility․ It is a foundational technique in manual stretching‚ often used for rehabilitation and general flexibility․ This method targets specific muscle groups‚ providing a gentle‚ sustained stretch to relieve tension and enhance range of motion․ Proper breathing is essential during static stretches to maximize relaxation and effectiveness․ It is recommended to perform each stretch 2-4 times for optimal results․ Static stretching is particularly beneficial for individuals seeking to improve posture‚ reduce muscle stiffness‚ and recover from physical activity․ Consistency is key to achieving long-term flexibility gains․
3․2 Dynamic Stretching
Dynamic stretching combines movement with stretching‚ involving active‚ controlled motions that mimic specific exercises or sports․ Unlike static stretching‚ it is performed without holding a position‚ instead using continuous‚ flowing movements․ This technique is ideal for warm-ups and cool-downs‚ as it prepares muscles for activity and enhances flexibility․ Dynamic stretches‚ such as arm circles‚ leg swings‚ and torso twists‚ improve blood flow and reduce muscle stiffness․ They are particularly effective for athletes‚ as they can be tailored to specific sports‚ reducing the risk of injury and improving performance․ Regular practice of dynamic stretching contributes to better mobility and overall physical readiness for physical tasks and activities․
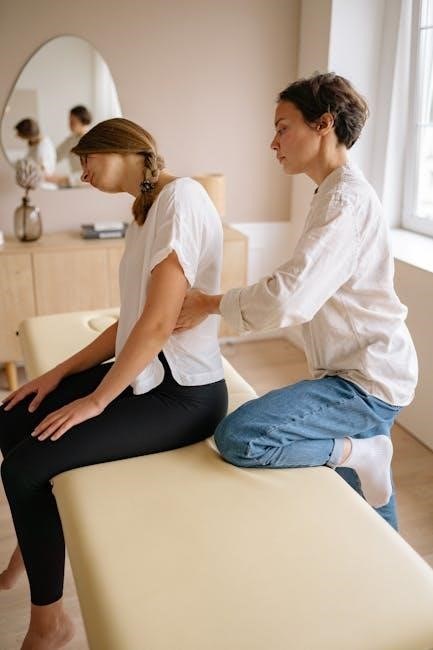
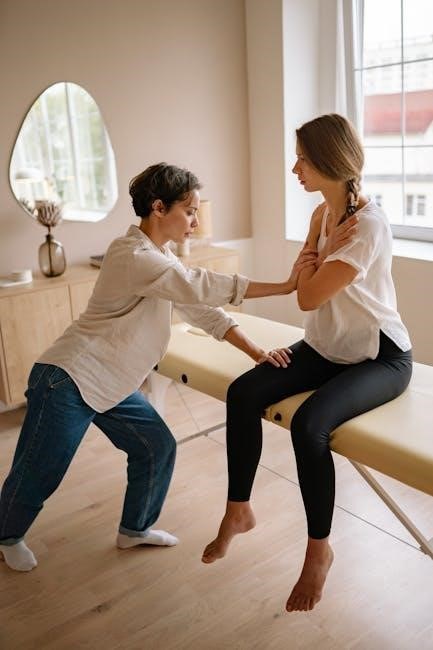
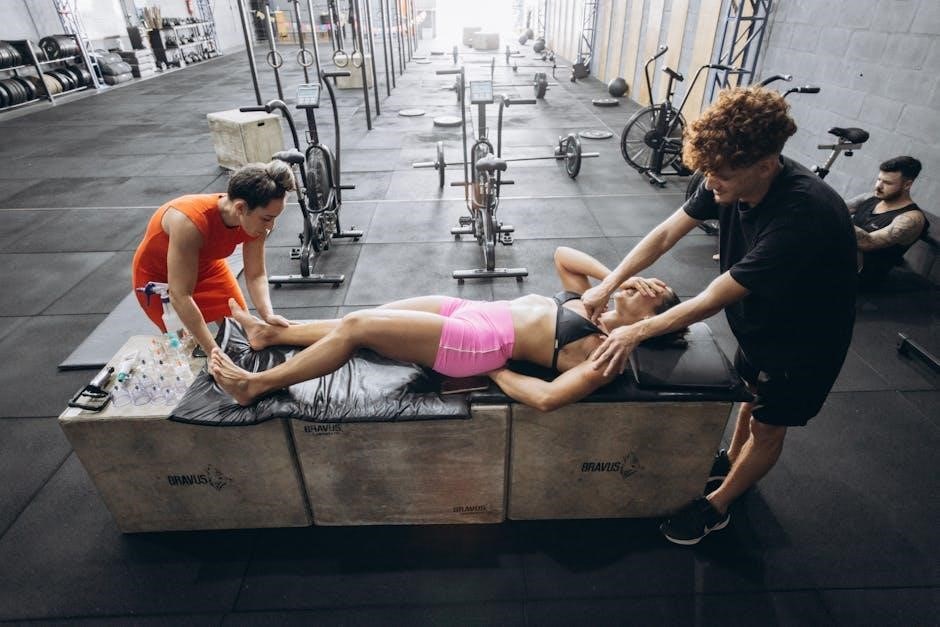
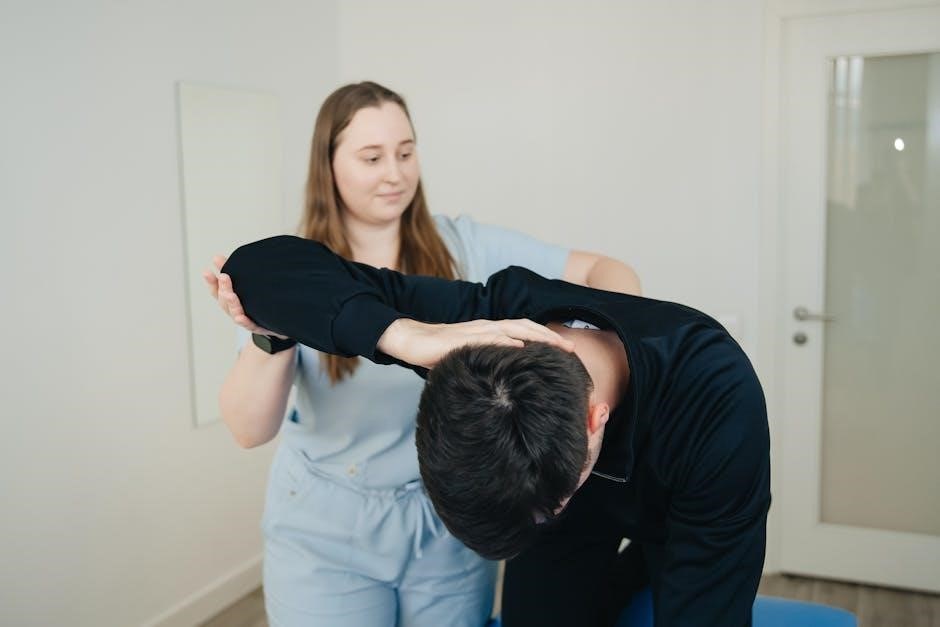
3․3 Manual Therapy Techniques
Manual therapy techniques involve hands-on methods to enhance flexibility‚ reduce stiffness‚ and restore optimal movement․ These techniques include soft tissue mobilization‚ joint mobilization‚ and targeted muscle stretching․ Professionals‚ such as physical therapists‚ use these methods to improve circulation‚ reduce muscle tension‚ and restore joint mobility․ Manual therapy is often combined with exercises to address imbalances and promote recovery․ By focusing on specific areas‚ these techniques can alleviate pain‚ improve posture‚ and enhance overall muscle function․ Regular application of manual therapy techniques supports long-term flexibility and reduces the risk of chronic discomfort‚ making them an essential component of a comprehensive stretching and wellness routine․

Effective Stretching Exercises
Effective stretching exercises improve flexibility‚ reduce muscle tension‚ and enhance mobility․ They target major muscle groups‚ promoting relaxation and preventing injuries‚ while improving overall physical well-being․
4․1 Upper Body Stretches
Upper body stretches target the neck‚ shoulders‚ chest‚ and back‚ addressing common areas of tension․ Simple exercises like shoulder rolls‚ chest opens‚ and neck stretches relieve stiffness․ For example‚ the standing forward bend eases neck and back strain‚ while arm circles improve shoulder mobility․ These stretches promote better posture and reduce the risk of injury‚ especially for those with desk jobs․ Regular practice enhances flexibility and comfort‚ making daily activities easier․ Incorporating upper body stretches into routines supports long-term muscle health and overall well-being․
4․2 Lower Body Stretches
Lower body stretches focus on the hips‚ legs‚ and calves‚ improving mobility and reducing stiffness․ Exercises like the standing hamstring stretch and seated leg stretch target tight muscles from sitting or repetitive tasks․ The lying quad stretch alleviates tension in the front of the thighs‚ while calf stretches enhance ankle flexibility․ These stretches are particularly beneficial for individuals with sedentary lifestyles or those engaged in manual labor‚ as they help prevent pain and improve posture․ Regular practice promotes better movement and reduces the risk of injuries‚ making daily activities easier and more comfortable․
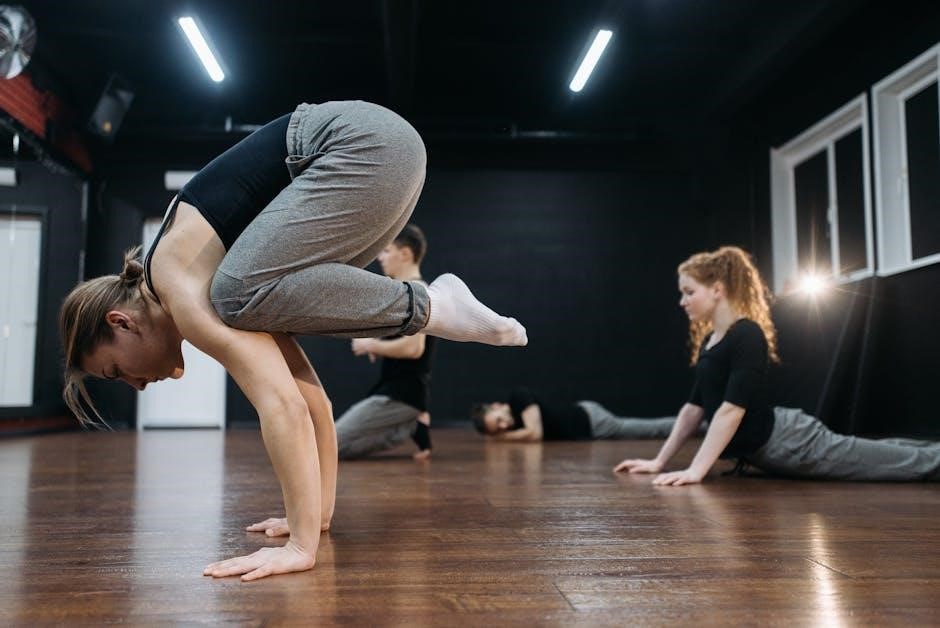
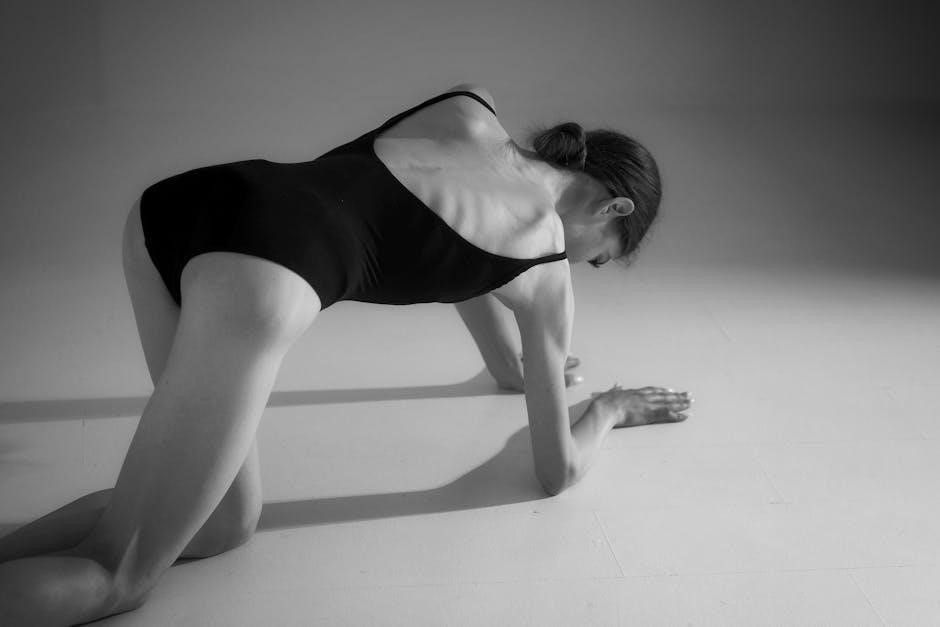
4․3 Full Body Stretches
Full body stretches engage multiple muscle groups simultaneously‚ promoting overall flexibility and relaxation․ Exercises like the cat-cow stretch and world’s greatest stretch combine movements that improve spinal mobility and reduce tension in the neck‚ shoulders‚ and hips․ These stretches often incorporate flexion‚ extension‚ and twisting motions‚ making them highly effective for enhancing range of motion․ Using props like straps or foam rollers can deepen stretches and assist in targeting hard-to-reach areas․ Regular full body stretching routines not only improve posture and reduce muscle stiffness but also prepare the body for physical activity and aid in recovery․ They are ideal for individuals seeking a comprehensive stretching practice that addresses the entire body․ Proper form and breathing techniques are essential for maximum benefits․
Proper Form and Safety
Proper form and safety are crucial in stretching exercises․ Gentle‚ controlled movements prevent injury․ Avoid bouncing‚ breathe naturally‚ and stop if pain occurs‚ ensuring a safe experience․

5․1 General Tips for Safe Stretching
- Warm up before stretching to prepare muscles and joints․
- Hold stretches for 20-30 seconds to maximize flexibility gains․
- Avoid bouncing or forcing beyond a comfortable range․
- Stop if pain occurs‚ as mild discomfort is normal but pain isn’t․
- Focus on major muscle groups like hamstrings‚ quads‚ and hips․
- Breathe naturally and relax into the stretch for best results․
- Don’t overstretch‚ as excessive flexibility can lead to instability․
Proper form ensures safety and effectiveness‚ making stretching beneficial for long-term health․
5․2 Common Mistakes to Avoid
Avoiding common mistakes ensures safe and effective stretching․ Many individuals bounce during stretches‚ which can cause muscle tears․ Others hold their breath‚ leading to tension․ Overstretching is another error‚ potentially causing instability․ Neglecting to warm up before stretching increases injury risk․ Some people stretch too aggressively‚ ignoring pain signals․ Skipping cooldown stretches after workouts can lead to muscle imbalances․ Additionally‚ stretching injured areas without professional guidance may worsen conditions․ Being mindful of these mistakes promotes a safer and more beneficial stretching routine‚ enhancing flexibility and overall well-being․ Proper technique and awareness are key to avoiding these pitfalls and achieving lasting results․