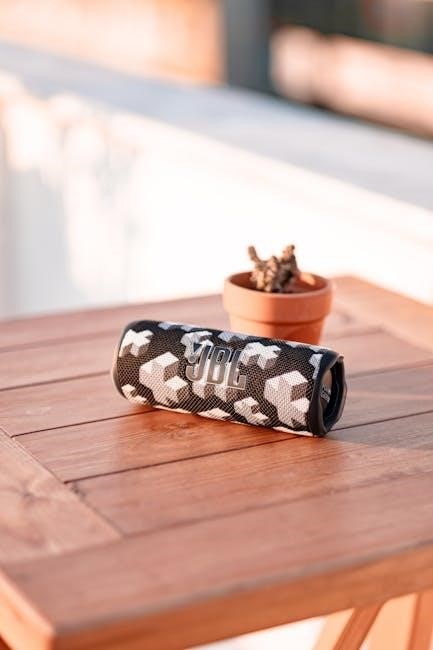
Category Archive Manuals

Bydante

manual de manejo de missouri en español

The Missouri Driver’s Manual in Spanish is a vital resource for Spanish-speaking drivers, providing essential information on traffic laws, road signs, and safe driving practices in Missouri.

Overview of the Manual

The Missouri Driver’s Manual in Spanish is a comprehensive guide designed to help Spanish-speaking drivers understand the state’s traffic laws, road signs, and safe driving practices. Available in PDF and audio formats, it covers essential topics such as rules of the road, traffic signals, and licensing requirements. The manual is free to download and serves as a crucial resource for both new and experienced drivers, ensuring they are well-prepared for the driver’s exam and equipped to drive safely in Missouri.

Importance for Spanish-Speaking Drivers

The Missouri Driver’s Manual in Spanish is crucial for Spanish-speaking drivers, offering clear and accessible information on traffic laws, road signs, and safe driving techniques. By providing content in their native language, it ensures understanding and compliance with state regulations, reducing barriers to obtaining a driver’s license. This resource is vital for new residents and non-English speakers, promoting road safety and equality in accessing driving privileges in Missouri.

Key Sections of the Missouri Driver’s Manual

The manual includes essential sections on traffic signs, rules of the road, and safe driving practices, ensuring Spanish-speaking drivers understand Missouri’s driving regulations and safety guidelines.

Traffic Signs and Signals

The Missouri Driver’s Manual in Spanish provides a comprehensive overview of traffic signs and signals, ensuring drivers understand their meanings and importance. It covers various types of signs, including warning, regulatory, and construction signs, as well as traffic signals and pedestrian signals. Clear visual descriptions help drivers recognize and interpret signs quickly. Understanding these signs is crucial for safe driving and adhering to Missouri’s traffic laws; The manual emphasizes the importance of obeying signals to ensure roadway safety for all users.

Rules of the Road

The Missouri Driver’s Manual in Spanish outlines the essential rules of the road to ensure safe and lawful driving. It covers topics such as right-of-way laws, speed limits, and proper procedures at intersections. The manual also emphasizes the importance of adhering to traffic laws, including those related to seat belt use and driving under the influence. By understanding these rules, drivers can reduce the risk of accidents and contribute to a safer roadway environment for everyone in Missouri.

Safe Driving Practices

The Missouri Driver’s Manual in Spanish emphasizes safe driving practices to reduce accidents and promote responsible driving. It covers topics such as defensive driving techniques, maintaining a safe following distance, and handling adverse weather conditions. The manual also highlights the importance of using headlights appropriately, avoiding distractions while driving, and being aware of pedestrian and bicycle traffic. By following these guidelines, drivers can significantly lower the risk of accidents and contribute to a safer roadway environment in Missouri.

Obtaining the Manual

The Missouri Driver’s Manual in Spanish can be downloaded as a PDF or accessed in audio format from the Missouri Department of Revenue’s official website or YouTube channel.

Downloading the PDF Version

The Missouri Driver’s Manual in Spanish is available for free download as a PDF from the Missouri Department of Revenue’s official website. This version is convenient for offline study and includes all essential chapters, such as the table of contents, driver license information, and traffic rules. The PDF format ensures easy navigation and accessibility on any device. It is identical to the printed version, providing accurate and official information to prepare for the driver’s exam. Additionally, the manual covers key topics like road signs, driving laws, and safe practices, making it a comprehensive resource for Spanish-speaking drivers. The PDF can be downloaded directly from the Missouri DOR website or through trusted online platforms, ensuring quick and easy access. This feature is particularly useful for those who prefer self-paced learning or need to study without internet connectivity. The manual is also split into chapters, allowing users to focus on specific areas, such as traffic signals or license requirements, before taking the exam. Furthermore, the PDF version is regularly updated to reflect the latest driving laws and regulations in Missouri, ensuring that all information is current and relevant. By downloading the PDF, drivers can efficiently prepare for their exams and gain a thorough understanding of safe driving practices in Missouri. The availability of the manual in Spanish further ensures inclusivity, making it accessible to a broader audience. Overall, the PDF version of the Missouri Driver’s Manual in Spanish is a valuable tool for anyone seeking to obtain a driver’s license in the state. It is also complemented by an audio version available on the Missouri Department of Revenue’s YouTube channel, catering to different learning preferences. The combination of these resources provides a well-rounded approach to exam preparation and driving education. The manual’s clarity and organization make it an indispensable guide for both new and experienced drivers. By leveraging these resources, drivers can confidently navigate Missouri’s roads and adhere to all applicable traffic laws. The PDF version is a testament to Missouri’s commitment to providing equal access to driving education for all residents, regardless of their primary language. It serves as a critical step toward ensuring road safety and promoting responsible driving practices across the state.

Accessing the Audio Version

The Missouri Driver’s Manual in Spanish is also available as an audio version, accessible through the Missouri Department of Revenue’s official YouTube channel. This resource is designed to assist Spanish-speaking drivers in studying for the driver’s exam. The audio version covers the same essential topics as the written manual, including traffic signs, road rules, and safe driving practices. It is a convenient option for individuals who prefer auditory learning or need additional support. The audio guide is free and easily accessible, making it a valuable tool for exam preparation. It complements the PDF version and ensures that all drivers have the resources needed to succeed. The audio version is particularly helpful for those who may find reading the manual challenging or prefer to study on the go. It is regularly updated to reflect the latest driving laws and regulations, ensuring accuracy and relevance. By utilizing the audio version, drivers can gain a deeper understanding of the material and feel more confident when taking the exam. This resource underscores Missouri’s commitment to providing accessible and inclusive driver education for all residents. The audio version is a practical and effective way to prepare for the driver’s exam, offering flexibility and ease of use; It is an excellent supplement to the written manual, catering to different learning styles and preferences.

Preparing for the Driver’s Exam

The Missouri Driver’s Manual in Spanish is your primary study resource. Use practice tests, study materials, and review exam formats to ensure readiness for the driver’s exam.

Practice Tests and Study Materials

The Missouri Driver’s Manual in Spanish offers a variety of study tools, including 50 practice questions and interactive guides. These resources help drivers understand traffic laws, signs, and safe driving practices. The manual is complemented by online practice tests and audio versions available on YouTube. Additionally, structured PDF chapters and community support make studying easier. Use these materials to prepare effectively for the written and driving exams, ensuring a thorough understanding of Missouri’s driving regulations.

Understanding the Exam Format

The Missouri Driver’s Manual in Spanish helps drivers understand the exam format, which includes a written test and a driving skills test. The written exam covers traffic signs, road rules, and safe driving practices. It consists of 10 questions and requires a passing score of at least 80%. Applicants must also complete a vision test. The manual provides a clear outline of what to expect, ensuring drivers are well-prepared for both the written and practical exams.

Types of Driver’s Licenses in Missouri

Missouri offers three main driver’s licenses: Regular, Commercial (CDL), and Motorcycle, each tailored to different driving needs and requirements.

Regular Driver’s License

A Regular Driver’s License in Missouri allows individuals to operate non-commercial vehicles. It is available to residents aged 16 and older, with requirements including proof of identity, residency, and legal presence. Applicants must pass vision, written, and driving tests. The license is renewable every six years. Additional fees and documentation apply for underage drivers. This license is essential for everyday driving needs in Missouri.

Commercial Driver’s License (CDL)

A Commercial Driver’s License (CDL) is required for operating commercial vehicles in Missouri. It is divided into classes (A, B, C) based on vehicle weight and type. Applicants must meet specific eligibility criteria, including age, residency, and medical standards. Additional endorsements are needed for specialized cargo, such as hazardous materials or passengers. The CDL process involves written exams, skills tests, and background checks. It is essential for professional drivers to ensure public safety and comply with federal regulations. The manual provides detailed guidance for obtaining and maintaining a CDL.

Motorcycle License

A Motorcycle License in Missouri requires specific training and testing. The manual details requirements for obtaining a Class M license, including vision tests, written exams, and road skills assessments. It covers motorcycle-specific safety tips, such as handling hazards and maintaining safe distances. The Motorcycle Operator Manual is available in Spanish, ensuring accessibility for all riders. It emphasizes the importance of proper gear and defensive driving techniques to reduce accident risks. This section is tailored for motorcyclists seeking to legally and safely operate their vehicles in Missouri.

Legal Requirements and Updates

The Spanish Missouri Driver’s Manual highlights legal requirements, including proof of identity, residency, and legal presence. Recent updates ensure compliance with current state driving laws and regulations.

Documentation Needed for Application

Applicants must provide proof of identity, residency, and legal presence in the U.S. Documents such as a valid passport, birth certificate, Social Security card, and utility bills are required. These documents must be original or certified copies and up-to-date to ensure compliance with state regulations. Additional requirements may apply for non-citizens, such as a valid visa or green card. Ensuring all documents are in order is crucial for a smooth application process.

Recent Updates to the Manual

The Missouri Driver’s Manual in Spanish has been updated to reflect current traffic laws and regulations. Key changes include revised sections on legal presence requirements and underage possession of substances; The 2025 edition is now available in both PDF and audio formats, accessible on the Missouri Department of Revenue’s website and YouTube channel. These updates ensure Spanish-speaking drivers receive accurate and comprehensive information to prepare for their exams and drive safely in Missouri.

Additional Resources

The Missouri DOR offers online tools, PDF guides, and an audio version of the manual; Additional support is available through community resources and state assistance programs to aid Spanish-speaking drivers.

Online Tools and Guides

The Missouri DOR provides online tools and guides to help Spanish-speaking drivers prepare for their exams. These include practice tests, interactive guides, and AI assistant support for clarifying complex terms. The manual is available on the Missouri DOR website and YouTube channel, offering audio versions and chapter-by-chapter resources. These tools ensure drivers can study effectively and understand traffic laws, signs, and safe driving practices in a convenient and accessible format.

Community and State Support

The Missouri DOR collaborates with community organizations to support Spanish-speaking drivers, ensuring access to the manual and resources. Local libraries and community centers often provide free access to the Spanish driver’s manual and practice tests. Additionally, state-funded programs offer free training materials and workshops to help drivers understand traffic laws and prepare for exams. This community-focused approach ensures equal opportunities for all residents to obtain a driver’s license and drive safely in Missouri.

The Missouri Driver’s Manual in Spanish is a comprehensive guide that equips drivers with essential knowledge for safe and confident driving. Study diligently, practice regularly, and utilize available resources to ensure success on your driving journey in Missouri.

Final Tips for Success

Mastering the Missouri Driver’s Manual in Spanish requires consistent study and practice. Utilize online resources, such as practice tests, to reinforce your understanding of traffic laws and signs. Listen to the audio version for additional support. Focus on key areas like road safety and legal requirements. Stay calm during the exam, and don’t hesitate to seek clarification if needed. Regular review and practical application of the manual’s content will significantly improve your chances of success.

Bydante

minolta x 700 manual

The Minolta X-700 manual is essential for understanding and optimizing the use of this iconic SLR camera. It provides detailed guidance on both basic and advanced features, ensuring photographers can unlock its full potential; The manual covers everything from aperture priority mode to manual exposure control, offering comprehensive insights for enthusiasts and professionals alike. Regular maintenance tips and troubleshooting solutions are also included to prolong the camera’s longevity and performance. Whether you’re a novice or an experienced photographer, this manual serves as an indispensable resource for mastering the Minolta X-700.

Overview of the Minolta X-700 Camera

The Minolta X-700 is an iconic SLR camera renowned for its advanced features and user-friendly design. As part of the Minolta Program System, it offers aperture priority and programmed auto-exposure modes, making it versatile for both casual and professional photography. Compatible with a wide range of lenses and accessories, the X-700 remains a favorite among photographers due to its reliability and creative control options.

Importance of the Manual for Optimal Use

The Minolta X-700 manual is crucial for unlocking the camera’s full potential. It provides detailed insights into advanced features like aperture priority and manual modes, ensuring precise control. Maintenance tips and troubleshooting guides help extend the camera’s lifespan. Whether you’re a novice or an expert, the manual is an essential tool to enhance your photography experience and master the X-700’s capabilities effectively.

Minolta X-700 Service Manual

The Minolta X-700 Service Manual offers comprehensive guidance for maintenance and repair. It includes detailed technical specifications, circuit diagrams, and step-by-step instructions for troubleshooting and servicing the camera.

Features and Specifications Detailed

The Minolta X-700 manual highlights its advanced features, including aperture priority mode, manual exposure control, and programmed auto-exposure. It details the camera’s robust build, MD lens mount compatibility, and integration with the Minolta Program System. Specifications cover shutter speeds, metering systems, and flash compatibility, ensuring photographers understand the camera’s capabilities and how to utilize them effectively for diverse shooting scenarios.

Technical Specifications and Diagrams

The Minolta X-700 manual provides detailed technical specifications, including shutter speeds of 1/1000 to 1 second, ISO range of 12-3200, and metering systems. Diagrams illustrate the camera’s internal components, such as the shutter mechanism and aperture control. Schematics for circuit boards and lens mounts are included, offering a comprehensive understanding of the camera’s engineering and functionality for repair and maintenance purposes.

Download Options and Availability

The Minolta X-700 manual is widely available for download in PDF format from various sources. Websites like mikebutkus.org and elektrotanya.com offer high-quality scans of the original manual, including service and repair guides. Additionally, platforms like Rapidshare and Lensinc.net provide downloadable versions, ensuring easy access for users seeking detailed instructions and technical diagrams. Files are typically free and range in size from 5 MB to 30 MB, catering to different needs.

Minolta X-700 Repair Manual

The Minolta X-700 repair manual provides detailed instructions for resolving common issues, including circuit diagrams and step-by-step guides. It covers technical specifications, maintenance tips, and safety precautions, ensuring users can perform repairs confidently. The manual is available online as a PDF, offering comprehensive support for photographers seeking to restore their camera to optimal functionality and extend its lifespan effectively.

Common Issues and Solutions

Common issues with the Minolta X-700 include faulty shutters, inaccurate metering, and viewfinder fogging. Solutions involve cleaning the shutter curtains, adjusting the light meter, and replacing faulty seals. The repair manual provides step-by-step guides for these fixes, ensuring users can address problems effectively. Regular maintenance, such as cleaning and lubricating moving parts, helps prevent these issues and extends the camera’s lifespan.

Step-by-Step Repair Instructions

The Minolta X-700 repair manual provides clear, step-by-step guidance for resolving common issues. Start by identifying the problem through diagnostic tests. Gather necessary tools, such as screwdrivers and replacement parts. Follow the manual’s instructions to disassemble, repair, or replace faulty components. Ensure proper alignment and reassembly, then test functionality to confirm repairs. Always refer to the manual for specific procedures and safety precautions.

Tools and Resources Needed

The Minolta X-700 repair requires specific tools, such as precision screwdrivers, torque wrenches, and electrical test equipment. Ensure you have replacement parts, like capacitors or circuit boards, as outlined in the service manual. Download the PDF manual for detailed diagrams and instructions. Use anti-static precautions to protect sensitive components during repairs. Refer to the manual’s guidelines for proper tool usage and safety measures.

Minolta X-700 Owner’s Manual

The Minolta X-700 Owner’s Manual is a comprehensive guide designed for both novice and experienced photographers. It covers basic operations, advanced features, and expert techniques to enhance your photography skills and maximize the camera’s potential. The manual ensures users understand every function, from aperture settings to flash synchronization, helping them achieve professional-quality results effortlessly.

Basic Camera Operations

The Minolta X-700 manual provides clear instructions for basic camera operations, including film loading, battery installation, and mode selection. It guides users through setting aperture, shutter speed, and ISO, ensuring a smooth start for photographers. The manual also explains the camera’s core functions, such as focusing, metering, and flash synchronization, helping users master fundamental photography techniques with ease and confidence.

Advanced Features and Modes

The Minolta X-700 manual details advanced features like aperture priority mode, manual exposure control, and programmed auto-exposure. It explains how to use metered manual mode for precise control and creative effects. The manual also covers flash synchronization, multiple exposure techniques, and depth-of-field preview, empowering photographers to explore advanced creative possibilities with confidence and precision.

Tips for Better Photography

Mastering the Minolta X-700 involves understanding its advanced modes and applying practical techniques. Use aperture priority for precise depth of field control and experiment with manual exposure for creative effects. Properly synchronize flash units for balanced lighting and explore multiple exposures for artistic results. Regularly clean the lens and sensor, and familiarize yourself with the camera’s metering system for optimal results in various lighting conditions.

Minolta X-700 Circuit Diagrams

The Minolta X-700 circuit diagrams provide a detailed electrical layout, enabling users to identify components and understand their functions. These diagrams are essential for repairs and modifications, ensuring safe and accurate troubleshooting of the camera’s internal systems.

Understanding the Electrical Layout

The Minolta X-700’s circuit diagrams reveal its intricate electrical architecture, showcasing how components like sensors, motors, and switches interconnect. These diagrams are crucial for diagnosing issues, enabling precise location of faults and guiding repairs. By understanding the layout, users can safely navigate the camera’s internal systems, ensuring modifications and troubleshooting are performed effectively without risking damage to critical components.

Component Identification and Function

The Minolta X-700’s circuit diagrams detail essential components such as sensors, motors, and switches, each serving specific roles in camera operation. The shutter mechanism, aperture control, and metering system are highlighted, enabling precise adjustments. Understanding these components is vital for repairs and customization, as outlined in the service manual, which provides a clear guide to their functions and interconnections.

Safety Precautions for Handling

When working with the Minolta X-700, ensure proper handling to avoid damage or injury. Disconnect the battery before servicing to prevent electrical shocks. Use insulated tools for internal repairs to protect components from static discharge. Avoid touching sensitive electronics or circuit boards to maintain functionality. Follow all safety guidelines in the service manual to ensure safe and effective maintenance of your camera.

Minolta X-700 Camera Modes

The Minolta X-700 offers versatile modes, including Aperture Priority, Manual, and Programmed Auto-Exposure. These modes provide precise control over exposure settings, catering to both novice and professional photographers.

Aperture Priority Mode

In Aperture Priority Mode, the Minolta X-700 allows users to set the aperture, while the camera automatically adjusts the shutter speed for proper exposure. This mode is ideal for controlling depth of field, enabling creative focus effects. Photographers can easily experiment with lighting conditions while maintaining precise control over their compositions. The manual provides clear instructions for optimizing this feature.

Manual Mode and Exposure Control

Manual Mode on the Minolta X-700 offers full-metered exposure control, allowing photographers to manually set both aperture and shutter speed for precise creative control. This mode is ideal for achieving specific effects, such as intentional overexposure or underexposure. The manual provides detailed guidance on using the built-in metering system to ensure accurate exposures, making it a powerful tool for advanced photographers seeking full control over their images.

Programmed Auto-Exposure Mode

The Minolta X-700’s Programmed Auto-Exposure Mode simplifies photography by automatically setting both aperture and shutter speed for optimal exposure. This mode is ideal for beginners and professionals alike, offering ease of use while maintaining high-quality results. The manual provides clear instructions on how to utilize this feature effectively, ensuring seamless photography without manual adjustments, allowing users to focus on composition and creativity.

Accessories and Compatible Equipment

The Minolta X-700 supports a wide range of accessories, including lenses with the SR mount, flash units like the Auto Electroflash 280PX, and other compatible devices for enhanced functionality.

Lenses and Mounts

The Minolta X-700 uses the SR mount, compatible with a wide range of MD and MC lenses. Popular options include the MD 50mm f/1.7, MD 28mm f/2.8, and MD 70-210mm f/3.5. These lenses offer versatility for various photography needs, from portraits to landscapes. The SR mount ensures optimal performance and compatibility, making it easy to expand your creative possibilities with high-quality optics.

Flash Units and Accessories

The Minolta X-700 supports various flash units, including the Auto Electroflash 280PX, offering reliable illumination. Its hot shoe and TTL flash metering ensure precise exposure control. Additional accessories like remote cords and external flash units enhance functionality, providing versatility for both casual and professional photography needs, and ensuring optimal performance in diverse lighting conditions.

Other Compatible Devices

The Minolta X-700 is compatible with a range of accessories, including remote cords, motor drives, and external flash units. These devices enhance functionality, offering flexibility for various photography needs. Compatibility ensures seamless integration with the camera, providing photographers with additional tools to capture high-quality images in diverse settings and lighting conditions, while maintaining optimal performance and versatility;

Troubleshooting and Maintenance

This section covers troubleshooting common issues and maintenance tips for the Minolta X-700, ensuring optimal performance and longevity. Regular maintenance and prompt issue resolution are vital for preserving camera functionality and extending its lifespan.

Common Problems and Solutions

Common issues with the Minolta X-700 include shutter sticking, light leaks, and faulty metering. Solutions involve cleaning the shutter curtains, replacing worn seals, and adjusting or replacing the light meter. Proper maintenance, such as regular cleaning and lubrication of moving parts, helps prevent these problems. Refer to the manual for step-by-step repair guidance and ensure optimal camera performance.

Maintenance Tips for Longevity

Regularly clean the camera’s exterior and viewfinder to prevent dust buildup. Lubricate moving parts like the film advance and shutter mechanism to ensure smooth operation. Store the camera in a dry, cool place to avoid moisture damage. Check and replace worn light seals to prevent light leaks. Refer to the manual for detailed maintenance schedules and procedures to extend the camera’s lifespan and performance.

When to Seek Professional Help

If your Minolta X-700 experiences complex issues like faulty electronics, internal mechanical failures, or severe damage, consult a professional. DIY repairs for intricate problems can lead to further damage or safety risks. Professionals have the expertise, tools, and experience to handle such repairs effectively, ensuring your camera’s longevity and optimal performance without compromising its value.

The Minolta X-700 manual is a comprehensive guide for photographers, offering detailed insights into camera operations, maintenance, and troubleshooting. For further reading, visit Mike Butkus’ website or online archives for downloadable PDFs and additional resources.

The Minolta X-700 manual provides a detailed guide to camera operations, maintenance, and troubleshooting. It covers basic and advanced features, including aperture priority and manual modes. The manual also offers maintenance tips and solutions for common issues. Additional resources, such as downloadable PDFs from Mike Butkus’ website, are recommended for further reference. This guide is invaluable for both novice and experienced photographers.

Recommended Resources and Links

For comprehensive guidance, visit mikebutkus.org for high-quality Minolta X-700 manual scans. ElektroTanya offers detailed circuit diagrams and repair guides. Rapidshare provides additional service manuals, while LensInc.net includes supplementary materials. These resources ensure optimal understanding and maintenance of your camera, catering to both enthusiasts and professionals seeking in-depth knowledge.

Bydante

yamaha tsr-7850 manual

The Yamaha TSR-7850 manual is your comprehensive guide to understanding and utilizing the AV receiver’s features, ensuring proper setup, and troubleshooting common issues effectively.

1.1 Overview of the Yamaha TSR-7850 AV Receiver

The Yamaha TSR-7850 is a high-performance AV receiver designed for home entertainment, offering immersive sound and advanced connectivity. It supports 7.1 channels, Dolby Atmos, and DTS:X, ensuring a cinematic audio experience. With MusicCast multi-room capabilities, it seamlessly integrates with other Yamaha devices for whole-home audio. The receiver features HDMI ARC, 4K HDR support, and a user-friendly interface. Its compact design and robust functionality make it ideal for modern home theaters. The included remote and Yamaha AV Controller app provide convenient control, enhancing your listening experience.

1.2 Importance of the Manual for Proper Usage

The Yamaha TSR-7850 manual is essential for maximizing the receiver’s potential and ensuring optimal performance. It provides detailed instructions for setup, operation, and troubleshooting, helping users understand advanced features like Dolby Atmos and MusicCast. Proper configuration of inputs, outputs, and settings requires guidance from the manual to avoid errors. Additionally, it offers maintenance tips and firmware update procedures to keep the device functioning at its best. Referencing the manual ensures users can resolve common issues and fully enjoy their home entertainment experience with minimal hassle.

Key Features of the Yamaha TSR-7850

The Yamaha TSR-7850 offers Dolby Atmos, DTS:X, and MusicCast multi-room audio, with Wi-Fi and Bluetooth connectivity, 4K HDMI support, and a user-friendly app for seamless control.

2.1 Output Power and Channel Specifications

The Yamaha TSR-7850 is a 7.2-channel AV receiver, delivering 95W per channel at 8Ω. It supports dual subwoofer outputs for enhanced bass performance and features 4K/60Hz HDMI pass-through with HDR10, Dolby Vision, and HLG compatibility. This ensures high-quality audio and video output, making it suitable for immersive home theater experiences. The receiver also supports advanced audio formats like Dolby Atmos and DTS:X, providing a rich and dynamic soundstage for movies and music.

2.2 Support for Dolby Atmos and DTS:X

The Yamaha TSR-7850 offers robust support for Dolby Atmos and DTS:X, enabling immersive 3D audio experiences. These formats allow sound to be precisely placed in 3D space, enhancing movie and gaming experiences. The receiver’s advanced audio processing ensures accurate rendering of these formats, providing a lifelike soundstage. With height channel support, it delivers a cinematic atmosphere, making it ideal for home theaters seeking premium audio quality and spatial depth.

2.3 MusicCast Multi-Room Audio Capabilities

The Yamaha TSR-7850 integrates seamlessly with MusicCast, enabling multi-room audio distribution. This feature allows users to stream music wirelessly across compatible devices, creating a synchronized audio experience throughout the home. Through the Yamaha AV Controller App, users can control playback, select sources, and adjust settings effortlessly. MusicCast supports various audio formats and services, ensuring high-quality sound reproduction. It also works with voice assistants like Alexa, enhancing convenience. This capability makes the TSR-7850 a versatile hub for whole-home entertainment and personalized listening experiences.

Setting Up the Yamaha TSR-7850

Setting up the Yamaha TSR-7850 is straightforward, involving initial installation, connecting devices, and configuring inputs for optimal performance. The manual guides you through each step effortlessly.

3.1 Initial Installation and Preparation

The Yamaha TSR-7850 manual begins with initial installation steps, ensuring proper placement and connection. Unbox carefully, position the receiver on a stable surface, and connect the power cable; Read the supplied Quick Start Guide for initial setup instructions. Familiarize yourself with the unit’s ports and controls before powering on. Ensure all accessories, like the remote, are ready. This preparation ensures a smooth setup process, allowing you to enjoy enhanced audio and video experiences right away.

3.2 Connecting Devices and Configuring Inputs

Connect your devices to the Yamaha TSR-7850 using HDMI, optical, or analog inputs. Identify the correct ports for your equipment and secure connections firmly. Use the on-screen menu to configure input settings, assigning the correct input type to each device. Rename inputs for easier identification. For HDMI connections, ensure the correct ARC (Audio Return Channel) settings are enabled for TV audio. Refer to the manual for specific port functions and configuration steps to ensure optimal performance and seamless integration of all connected devices.

Advanced Configuration and Customization

Explore advanced settings like speaker impedance adjustments and utilizing the advanced setup menu for tailored audio experiences, enhancing performance to match your home theater preferences precisely.

4.1 Adjusting Speaker Impedance Settings

Adjusting speaker impedance settings on the Yamaha TSR-7850 ensures optimal audio performance. Access the advanced setup menu to configure impedance settings, matching your speaker system for accurate sound reproduction. Proper calibration prevents damage and enhances clarity. Refer to the manual for detailed steps to navigate the menu and select the correct impedance for your speakers. This customization ensures balanced output and maintains the longevity of your audio system. Always follow the guidelines provided in the manual for precise adjustments.

4.2 Utilizing the Advanced Setup Menu

The Yamaha TSR-7850’s Advanced Setup Menu allows for detailed customization of audio and video settings. Accessible via the remote control, this menu enables adjustments to audio parameters, HDMI settings, and zone configurations. Users can fine-tune settings such as speaker impedance, sound modes, and network preferences. The menu also provides options for firmware updates and system diagnostics. By following the manual’s guidelines, users can optimize their home theater experience. Proper navigation of this menu ensures seamless integration of all connected devices and enhances overall performance. Refer to the manual for step-by-step instructions.

Troubleshooting Common Issues

This section helps diagnose and resolve common problems, such as no sound output or HDMI connectivity issues, ensuring optimal performance and addressing potential errors effectively.

5.1 Diagnosing No Sound Output

Start by ensuring all cables are securely connected to the correct ports. Verify the input selection matches the connected device. Check the speaker settings in the menu to confirm they are configured properly. Ensure the volume is not muted or set too low. If using HDMI, check the ARC (Audio Return Channel) settings on both the receiver and the TV. Resetting the receiver to factory settings may resolve the issue. Consult the manual for detailed reset instructions if needed.

5.2 Resolving HDMI ARC Connectivity Problems

Ensure HDMI ARC is enabled on both the Yamaha TSR-7850 and your TV. Restart both devices to establish a fresh connection. Verify that the HDMI cable is securely connected to the ARC-compatible ports. If issues persist, update the receiver’s firmware to the latest version. Resetting the receiver to factory settings may also resolve the problem, but be aware this will erase custom configurations. Consult the manual for detailed instructions on resetting and reconfiguring HDMI settings.

Firmware Updates and Maintenance

Regularly check for firmware updates to ensure optimal performance. Updates enhance features and fix issues. Follow the manual’s instructions to install the latest version successfully.

6.1 Checking for Firmware Updates

To ensure your Yamaha TSR-7850 operates at its best, regularly check for firmware updates. Use the Yamaha AV Controller app or navigate through the receiver’s menu system to the ADVANCED SETUP menu. Select Firmware Update to verify if a new version is available. A stable internet connection is required for the process. Updating firmware improves performance, adds features, and resolves potential issues. Always follow the on-screen instructions carefully to avoid interruptions during the update process.

6.2 Installing the Latest Firmware Version

Installing the latest firmware on your Yamaha TSR-7850 enhances performance and adds new features. Use the Yamaha AV Controller app or the receiver’s ADVANCED SETUP menu to initiate the update. Ensure a stable internet connection and follow on-screen instructions carefully. Do not interrupt the update process, as it may cause system instability. Once complete, restart the receiver to apply the changes. Regular updates ensure optimal functionality and compatibility with the latest technologies.

The Yamaha TSR-7850 manual provides essential guidance for optimizing your AV receiver experience. By following the instructions, you can unlock its full potential, ensuring seamless performance and enhanced audio quality for years to come.

7.1 Summary of Key Points

The Yamaha TSR-7850 manual serves as a detailed guide for setting up and optimizing your AV receiver. It covers essential features like Dolby Atmos, DTS:X, and MusicCast multi-room audio. The manual provides step-by-step instructions for installation, configuration, and troubleshooting common issues. Regular firmware updates and proper maintenance are emphasized to ensure peak performance. By following the manual, users can unlock the full potential of their system, enhancing their home entertainment experience with high-quality sound and seamless connectivity.

7.2 Final Tips for Optimal Performance

For optimal performance, ensure regular firmware updates and proper speaker impedance settings. Use the Yamaha AV Controller App for convenient control. Refer to the manual for advanced configurations and troubleshooting. Maintain a stable power supply and clean connections to avoid audio issues. Experiment with sound modes to enhance your listening experience. Always follow the manual’s guidelines for setup and maintenance to maximize the TSR-7850’s capabilities and enjoy high-quality audio consistently.

Bydante

midmark m11 service manual pdf

The Midmark M11 Service Manual is a comprehensive guide for maintaining and repairing the M11 Ultraclave sterilizer, essential for dental and medical professionals.

It ensures safe and efficient operation, covering installation, daily use, troubleshooting, and compliance with industry standards, making it a vital resource for M11 users.

1.1 Overview of the Midmark M11 Sterilizer

The Midmark M11 Ultraclave is a self-contained steam sterilizer designed for medical and dental offices, clinics, and laboratories. It offers efficient sterilization of instruments, ensuring infection control and patient safety. Built with durable construction, it provides reliable performance and is user-friendly, making it a essential tool for healthcare facilities requiring consistent and high-quality sterilization processes.

1.2 Importance of the Service Manual for Maintenance and Repair

The Midmark M11 Service Manual is crucial for ensuring proper maintenance and repair of the Ultraclave sterilizer. It provides detailed instructions, troubleshooting guides, and safety protocols to prevent equipment breakdowns. Adhering to the manual ensures optimal performance, compliance with industry standards, and extends the lifespan of the sterilizer, making it indispensable for both users and authorized service technicians.

Key Features and Components of the Midmark M11

The Midmark M11 Ultraclave is a self-contained steam sterilizer designed for efficient medical and dental sterilization. Its key features include a compact design, quick cycle times, and advanced control systems. Essential components like the steam generator, chambers, and digital interface ensure reliable performance, while compatible accessories enhance functionality and maintenance ease.

2;1 Design and Functionality of the M11 Ultraclave

The M11 Ultraclave features a compact, self-contained design with a durable stainless steel chamber, ensuring efficient steam sterilization for medical and dental applications. Its advanced control system provides precise temperature and pressure monitoring, while the intuitive interface simplifies operation. The sterilizer is built for reliability, with a focus on reducing cycle times and optimizing performance, making it a practical solution for healthcare facilities.

2.2 Essential Parts and Accessories

Key components of the M11 Ultraclave include the steam generator, pressure vessel, and control panel. Accessories like Speed-Clean solution, distilled water reservoirs, and replacement gaskets are crucial for optimal performance. Using genuine Midmark parts ensures compliance and extends the lifespan of the sterilizer, maintaining safety and efficiency in healthcare settings.

Installation and Setup Guidelines

Proper installation ensures optimal performance and safety. Follow the manual’s step-by-step instructions, including site preparation, unpacking, and connections. Ensure compliance with Midmark’s shipping symbols and handling guidelines.

3.1 Pre-Installation Requirements

Before installing the M11 Ultraclave, ensure the site meets all specified requirements. Verify the location is level, has proper drainage, and access to a water supply. Check electrical and dimensional specifications to ensure compatibility. Ensure the area is clear of obstacles and follows Midmark’s shipping and handling guidelines for safe unpacking and placement.

3.2 Step-by-Step Installation Process

Begin by carefully unpacking the M11 Ultraclave, ensuring all components are undamaged. Place the unit in the pre-prepared location, aligning it with the room’s layout. Connect the water supply and electrical connections as specified. Follow the manual’s instructions for proper drainage setup. Once installed, perform a test cycle to ensure functionality. Refer to the manual for detailed diagrams and specific steps to complete the installation successfully.

Operation and Daily Use of the M11 Sterilizer

The M11 Ultraclave features a user-friendly interface for seamless operation. Daily tasks include loading items, selecting cycles, and monitoring progress through the control panel’s clear indicators.

4.1 User-Friendly Interface and Controls

The M11 Ultraclave features an intuitive interface designed for easy navigation. Controls are clearly labeled, allowing users to effortlessly manage sterilization cycles and monitor progress. The interface ensures seamless operation, reducing the learning curve for new users.

With a focus on simplicity, the M11’s controls provide quick access to essential functions, making daily tasks efficient and straightforward for dental and medical professionals.

4.2 Daily Operational Procedures

Daily operations involve checking water levels, ensuring the chamber is loaded correctly, and verifying cycle settings. Users should run test cycles to confirm proper function before sterilizing instruments.

Regular monitoring of the sterilizer’s performance ensures optimal results. Adhering to the manual’s guidelines helps maintain efficiency and safety, making the M11 a reliable choice for daily sterilization needs in healthcare settings.

Maintenance and Servicing Schedule

Regular maintenance ensures optimal performance and longevity of the M11 sterilizer. Weekly tasks include draining water and refilling with distilled water.

Monthly maintenance involves running Speed-Clean solution, while annual inspections by authorized technicians are recommended to maintain compliance and functionality.

5.1 Weekly Maintenance Tasks

Weekly maintenance for the Midmark M11 involves draining and refilling distilled water to prevent mineral buildup. Additionally, inspecting the drain filter and ensuring proper function is crucial. These simple tasks help maintain efficiency and prevent potential issues, ensuring the sterilizer operates effectively and safely for consistent results.

5.2 Monthly Maintenance Requirements

Monthly maintenance for the Midmark M11 includes running a Speed-Clean solution through the sterilizer to remove residue. Additionally, inspecting for leaks, checking door seals, and ensuring all components function properly is essential. These tasks ensure optimal performance and longevity, adhering to Midmark’s recommendations for consistent and reliable sterilization results.

5.3 Annual Inspection Recommendations

An annual inspection by a Midmark Authorized Service Provider is recommended to ensure the M11 Ultraclave operates safely and efficiently. This inspection covers detailed checks of electrical connections, internal components, and steam generation systems.

Technicians verify proper function, address potential issues, and ensure compliance with safety standards. Regular inspections prevent unexpected downtime and maintain optimal sterilization performance, aligning with Midmark’s guidelines for longevity and reliability.

Troubleshooting Common Issues

The Midmark M11 Service Manual provides detailed troubleshooting guides to diagnose and resolve common issues, ensuring efficient maintenance and optimal performance of the sterilizer.

6.1 Identifying and Diagnosing Problems

This section of the Midmark M11 Service Manual guides users through identifying common issues and diagnosing malfunctions. It provides detailed error codes, symptoms, and step-by-step diagnostic procedures. Troubleshooting charts help pinpoint problems like faulty sensors, inadequate water quality, or software glitches. Regular maintenance checks and visual inspections are emphasized to prevent downtime and ensure reliable sterilization performance.

  • Use error codes to identify specific issues.
  • Perform visual inspections of components.
  • Consult troubleshooting charts for solutions.
  • Address common faults like sensor failures or water quality problems.

6.2 Solutions for Frequently Encountered Faults

This section provides clear solutions for common issues with the Midmark M11, such as error codes, faulty sensors, or inadequate water quality. Detailed instructions guide users on replacing parts, resetting systems, and running diagnostic cycles. Solutions emphasize using genuine Midmark parts and following safety protocols to restore optimal performance and ensure reliable sterilization outcomes.

  • Refer to the troubleshooting guide for specific fixes.
  • Replace faulty components with Midmark-approved parts.
  • Run cleaning cycles to resolve operational issues.

Safety Precautions and Warnings

The Midmark M11 Service Manual emphasizes safety first, ensuring the sterilizer is maintained with utmost care. Adhere to guidelines to prevent accidents and ensure safe operation. Always use Midmark authorized technicians and genuine parts for repairs for optimal performance.

7.1 General Safety Guidelines

Always follow proper safety protocols when operating the Midmark M11. Ensure correct installation, use distilled water, and avoid unauthorized repairs. Regular maintenance prevents malfunctions, while adhering to industry standards ensures compliance and safety.

7.2 Specific Safety Warnings for the M11

Never modify or bypass safety features of the M11. Avoid using non-Midmark parts, as they can compromise safety and performance. High-temperature steam poses burn risks, so handle with care. Always follow Midmark’s guidelines for installation and maintenance to ensure safe operation and compliance with industry standards. Unauthorized adjustments can lead to hazards and void warranties.

Compliance and Regulatory Information

The Midmark M11 adheres to industry standards and certifications, ensuring safe and reliable performance in medical and dental settings. Compliance with regulatory requirements is guaranteed.

Warranty and service compliance are maintained through authorized technicians and genuine Midmark parts, ensuring adherence to safety and operational standards outlined in the service manual.

8.1 Industry Standards and Certifications

The Midmark M11 complies with FDA, ISO, and other regulatory standards, ensuring safe and reliable performance in medical settings. Its design meets stringent safety protocols and environmental regulations.

Certifications guarantee adherence to industry benchmarks, providing users with confidence in the sterilizer’s efficiency and compliance, while maintaining operational excellence and reliability.

8.2 Warranty and Service Compliance

The Midmark M11 is backed by a comprehensive warranty covering parts and labor, ensuring customer protection. Warranty service must be obtained through Midmark or authorized dealers, adhering to specific guidelines outlined in the manual. Compliance with these terms ensures seamless support and maintains the sterilizer’s performance and longevity, while upholding service standards.

Parts and Accessories for the M11

The M11 requires genuine Midmark parts and recommended accessories for optimal performance and compliance with safety standards, ensuring reliability and efficiency in sterilization processes.

9.1 Genuine Midmark Replacement Parts

Genuine Midmark replacement parts are essential for maintaining the M11’s performance and reliability. Using authorized components ensures compliance with safety standards and prevents potential malfunctions. Always prioritize Midmark parts for optimal functionality and longevity of your sterilizer.

9.2 Recommended Accessories for Optimal Performance

For optimal performance, consider recommended accessories like the Speed-Clean solution, designed to maintain efficiency and prevent issues. Regular use of such accessories ensures the M11 operates smoothly and extends its lifespan. Always refer to the manual for a list of compatible accessories tailored to enhance functionality and maintain reliability.

Accessing the Midmark M11 Service Manual

The Midmark M11 Service Manual is readily available online as a PDF. Visit midmark.com, Studylib, or the Internet Archive to download. Contact Midmark’s Technical Service Department for assistance.

10.1 Sources for Downloading the PDF Manual

The Midmark M11 Service Manual PDF can be downloaded from Midmark’s official website, Studylib, or the Internet Archive. Visit midmark.com, studylib.net, or archive.org to access the document. Ensure authenticity by downloading from trusted sources to avoid incorrect or outdated information. Verify the manual’s version and compatibility before use for optimal results.

10.2 Contact Information for Technical Support

For technical support, contact Midmark’s Technical Service Department via phone or email. Visit midmark.com for direct contact options; Fax non-warranty parts orders using the provided form in the manual. Ensure compliance by contacting authorized dealers for warranty service. Midmark’s dedicated team provides reliable assistance for all M11-related inquiries and maintenance needs, ensuring optimal performance and user satisfaction.

Bydante

vector charger manual

Welcome to the Vector Charger Manual. This guide provides essential information for safe and effective use of your Vector battery charger.
Read carefully to ensure optimal performance and longevity of your device.

1.1 Overview of the Vector Charger

The Vector Charger is a smart, automatic battery charger designed for 12V lead-acid batteries. It features multiple charge rates, battery reconditioning, and alternator voltage checks. Its intelligent design ensures safe and efficient charging, preventing overcharging and extending battery life. Ideal for automotive use, it combines advanced technology with user-friendly operation.

1.2 Importance of Reading the Manual

Reading the manual is crucial for understanding safety guidelines, optimal charger performance, and troubleshooting. It ensures proper usage, helping you avoid potential hazards and prolong battery life. The manual provides essential information for first-time users and experienced individuals, covering key features and operational best practices.

1.3 Safety Precautions

Always follow safety guidelines to prevent accidents. Avoid overcharging, ensure proper ventilation, and wear protective gear when handling batteries. Keep the charger away from flammable materials and store it in a cool, dry place. Adhere to the manual’s instructions to minimize risks and ensure safe, efficient charging operations.

Features of the Vector Charger

The Vector Charger offers smart automatic charging, multiple charge rates, and a battery reconditioning function. It also includes an alternator voltage check, ensuring optimal performance and extending battery life. These advanced features make it a versatile and reliable charging solution for various battery types.

2.1 Smart Automatic Charging Technology

The Vector Charger features advanced smart automatic charging technology, which adjusts the charging current based on the battery’s type and charge level. This intelligent system ensures efficient, safe, and optimized charging, preventing overcharging and extending battery life. It automatically detects and switches between charging modes, making it a convenient and reliable solution for various battery types.

2.2 Multiple Charge Rates and Modes

The Vector Charger offers multiple charge rates, including 2A, 10A, and 25A, allowing you to customize charging based on battery type and size. It also features various modes, such as rapid charge, maintenance, and reconditioning, ensuring versatile and efficient charging for different applications and user preferences.

2.3 Battery Reconditioning Function

The Vector Charger features a built-in battery reconditioning function designed to extend battery life by restoring lost capacity. This mode gently rejuvenates deeply discharged or old batteries, helping to recover their performance. Suitable for lead-acid batteries, it ensures optimal maintenance and enhances overall battery health, making it a valuable tool for long-term battery care.

2.4 Alternator Voltage Check

The Vector Charger includes an alternator voltage check feature, enabling users to monitor and diagnose alternator performance. This function helps ensure the alternator is charging the battery correctly, preventing overcharging or undercharging. It provides valuable insights for maintaining a healthy electrical system and optimizing battery performance, making it a crucial tool for vehicle maintenance and troubleshooting.

Installation and Setup

Unpack and inventory all components carefully. Place the charger on a flat, stable surface in a well-ventilated area. Follow the manual for safe and proper setup.

3.1 Unpacking and Inventory

Unpack the Vector Charger carefully, ensuring all components are included. Inspect for damage and verify the package contains the charger, power cord, connecting cables, and user manual. Handle the device with care to avoid damage. Ensure all items are accounted for before proceeding to installation.

3.2 Connecting the Charger to the Battery

Ensure the charger is turned off before connecting. Attach the positive (red) clamp to the battery’s positive terminal and the negative (black) clamp to the negative terminal or a grounded metal surface. Avoid reversing the connections. Check for any damage to cables or clamps. Ensure a secure connection to prevent sparks and ensure safe charging.

3.3 Setting Up the Charger for First Use

Before first use, ensure the charger is turned off and all connections are secure. Check the battery terminals for cleanliness and damage. Select the appropriate charge rate for your battery type using the control panel. Avoid overcharging by monitoring the process. Ensure the charger is placed on a stable, flat surface away from flammable materials.

Operating the Vector Charger

Understand the charger’s controls and select the appropriate mode for your battery type. Monitor the charging process to ensure safe and efficient operation. Always follow safety guidelines.

4.1 Understanding the Charger’s Controls

Familiarize yourself with the charger’s interface, including the mode selection button, LCD display, and LED indicators. The mode button allows switching between charge rates, while the LCD shows real-time charging status. LED indicators signal charging progress and completion. Always consult the manual for detailed control functionality to ensure optimal use.

4.2 Selecting the Correct Charge Mode

Selecting the right charge mode ensures optimal charging for your battery type. Use the 2A mode for maintenance charging, 10A for standard charging, and 25A for deep-discharge recovery. Choose modes based on battery capacity and type. Refer to the manual for specific recommendations to avoid overcharging and ensure safe, efficient charging operations.

4.3 Monitoring the Charging Process

Monitor the charging process using the LCD display, which shows real-time updates on charge progress, voltage, and current. Check the LED indicators for charging status—green indicates full charge. Ensure safety by letting the charger automatically shut off when complete to prevent overcharging and battery damage, crucial for maintaining battery health.

Maintenance and Troubleshooting

Regularly inspect and clean the charger’s components. Check for wear and tear. Perform routine maintenance to ensure optimal performance and prevent overcharging. Refer to the manual for troubleshooting tips and solutions.

5.1 Regular Maintenance Tips

Inspect the charger and cable for wear or damage. Clean the charger and battery terminals with a soft cloth. Ensure proper ventilation during use. Regularly update the charger’s firmware if applicable. Store the charger in a dry, cool place when not in use. Always refer to the manual for specific maintenance procedures.

5.2 Common Issues and Solutions

Common issues include error codes, overcharging, or charger malfunctions. For error codes, refer to the troubleshooting guide in the manual. If overcharging occurs, stop the process immediately. For charger malfunctions, check connections, ensure proper battery attachment, and restart the charger. Clean terminals regularly to maintain optimal performance and avoid potential issues.

5.3 Resetting the Charger

To reset the Vector Charger, disconnect it from both the power source and the battery. Wait 30 seconds to allow the system to clear. Reconnect the charger to the power source and ensure all cables are securely attached. If issues persist, refer to the troubleshooting guide or contact customer support for assistance.

Safety Guidelines and Warnings

Follow all safety guidelines to ensure safe operation. Wear protective gear, work in a well-ventilated area, and avoid overcharging. Always refer to the manual for specific instructions to minimize risks and ensure longevity of your Vector charger.

6.1 Handling Lead-Acid Batteries Safely

Always wear protective gloves and goggles when handling lead-acid batteries to avoid acid spills. Work in a well-ventilated area and avoid overcharging, as hydrogen gas may accumulate. Ensure the battery is securely placed and avoid short circuits. Proper handling prevents accidents and ensures safe charging with your Vector charger. Follow all precautions carefully.

6.2 Avoiding Overcharging

Avoid overcharging by monitoring the charging process and using the Vector charger’s automatic shut-off feature. Overcharging can damage the battery and reduce its lifespan. Always follow the recommended charge rates and modes for your specific battery type. The charger’s smart technology helps prevent overcharging, ensuring safe and efficient charging every time.

6.3 Proper Storage Conditions

Store the Vector charger in a cool, dry, and well-ventilated area away from direct sunlight and moisture. Avoid extreme temperatures and proximity to flammable materials. Keep the charger out of reach of children. Ensure the unit is clean and free from dust. Check for damage before storing or using the charger to maintain safety and optimal performance.

Warranty and Support Information

Your Vector Charger is backed by a comprehensive warranty. Contact customer support at 954-584-4448 or visit our website for assistance. Download resources and manuals online for troubleshooting and updates.

7.1 Warranty Terms and Conditions

Your Vector Charger is covered by a limited warranty for a period of one or two years, depending on the model. The warranty covers manufacturing defects and ensures repair or replacement of faulty components. Improper use, modifications, or negligence may void the warranty. For detailed terms, visit our official website or contact customer support.

7.2 Contacting Customer Support

For assistance, visit our official website or call toll-free at 866-584-5504. Email inquiries can be sent to support@vectorchargers.com. Our team is available Monday–Friday, 9 AM–5 PM EST. Include your product model and a detailed description of your issue for prompt service.

7.3 Available Resources and Downloads

Access user manuals, PDF guides, and firmware updates on our official website or platforms like ManualsLib. Download resources for models like VEC1095A or VEC1089ABD. Visit Vector Support for troubleshooting guides, warranty details, and instructional videos to enhance your charger’s performance and longevity.

Frequently Asked Questions

This section addresses common inquiries about charge rates, compatibility, and safety features. Find answers to frequently asked questions about your Vector Charger.

  • What charge rates are available?
  • Which battery types are supported?
  • How do I ensure safe charging?

8.1 General Usage Questions

Find answers to common questions about daily use of the Vector Charger. Learn about charge initiation, indicator meanings, and how to select the right mode for your battery type. Understand how to monitor charging progress and address basic operational queries for optimal performance.

  • How do I start the charging process?
  • What do the indicator lights signify?
  • Can I charge different battery types?

8.2 Technical Specifications

Explore the technical details of the Vector Charger, including input voltage, output voltage, and charge rates. Learn about compatibility with various battery types and advanced features like smart charging and reconditioning modes. Understand the charger’s safety features and regulatory compliance for reliable performance.

Key Features:
– Input: 120V AC, 60Hz
– Output: 12V DC
– Charge Rates: 2A, 10A, 25A
– Compatibility: 12V lead-acid batteries
– Safety: Overcharge protection, thermal monitoring
– Certifications: Meets UL and CE standards

8.3 Compatibility with Different Battery Types

The Vector Charger is designed to work with standard, deep-cycle, and AGM batteries. It supports 12V lead-acid batteries, ensuring optimal charging performance. For compatibility with other battery types, consult the manual or contact customer support. Always use the charger with recommended battery types to avoid damage and ensure safety.

  • Compatible with 12V lead-acid batteries
  • Supports standard, deep-cycle, and AGM batteries
  • Not suitable for lithium or other non-lead-acid batteries

9.1 Final Tips for Optimal Use

Regularly inspect cables and connections for damage. Avoid overcharging to prolong battery life. Store the charger in a cool, dry place. Always follow safety guidelines for handling lead-acid batteries. For troubleshooting, refer to the manual or contact customer support. Visit the official Vector website for updates and additional resources.

9.2 Benefits of Using the Vector Charger

The Vector Charger offers extended battery life, efficient charging, and smart technology. It ensures safety with overcharge protection and durable construction. Ideal for various battery types, it provides reliable performance and easy operation. Regular use enhances battery health, making it a cost-effective and essential solution for vehicle maintenance and longevity.

About the Manufacturer

Vector is a leading provider of innovative battery charging solutions, committed to quality, safety, and customer satisfaction. Their products are designed for reliability and performance.

10.1 Company Overview

Vector is a renowned manufacturer specializing in advanced battery charging solutions. With a strong commitment to innovation and quality, Vector delivers reliable products designed for optimal performance and user safety. Their dedication to customer satisfaction and continuous improvement has solidified their reputation as a trusted leader in the automotive and battery charging industries.

10.2 Commitment to Quality and Innovation

Vector prioritizes quality and innovation, ensuring cutting-edge technology in every product. Rigorous testing and a focus on user-centric design drive their advancements. By integrating smart charging solutions and safety features, Vector leads the industry, delivering reliable and efficient battery chargers that meet diverse customer needs and exceed expectations.

Bydante

frigidaire oven user manual

Welcome to your Frigidaire Oven User Manual! This guide provides essential information to help you understand, operate, and maintain your oven for optimal performance and safety.

1.1 Purpose of the Manual

This manual is designed to guide you in safely operating and maintaining your Frigidaire oven. It provides detailed instructions for installation, usage, and troubleshooting, ensuring you get the most out of your appliance. The manual also includes essential safety precautions and maintenance tips to prolong the oven’s lifespan and performance. Refer to it for clear, step-by-step guidance tailored to your needs.

1.2 Key Features of the Frigidaire Oven

The Frigidaire Oven is equipped with advanced features for seamless cooking. It includes a user-friendly control panel, multiple cooking modes, a precise timer, and energy-efficient technology. The oven also offers specialized functions like Air Fry for healthier cooking options. These features ensure consistent results, easy operation, and sustainable energy use, making it a versatile and modern kitchen appliance.

Safety Precautions

Always follow safety guidelines to ensure safe operation. Keep children away, avoid sharp objects near the cooktop, and never leave the appliance unattended during use. Read the manual carefully and adhere to all instructions for optimal safety and functionality.

2.1 General Safety Tips

For safe operation, always supervise children near the oven, avoid using sharp objects on the cooktop, and never leave the appliance unattended during use. Ensure proper ventilation, wear oven mitts when handling hot surfaces, and keep flammable materials away. Regularly inspect the oven for damage and follow all precautions outlined in this manual to ensure safe and efficient operation.

2.2 Specific Safety Instructions for Oven Usage

Always keep children away when the oven is in use, as accessible parts become hot. Do not leave the appliance unattended during grilling or cooking. Avoid using sharp objects that could scratch the cooktop glass. Never use the oven for unauthorized purposes, such as heating rooms. Ensure proper installation by a qualified technician and avoid using damaged appliances to prevent accidents.

Installation Instructions

Proper installation is crucial. Only a qualified technician should install the oven, ensuring all packaging is removed and the appliance is undamaged before use.

3.1 Location and Positioning Requirements

Ensure the oven is installed in a well-ventilated area, away from flammable materials like curtains or towels. Maintain a minimum clearance of 4 inches from adjacent surfaces and 12 inches above the cooktop. The appliance must be placed on a stable, heat-resistant surface to prevent any damage or safety hazards. Always follow local building codes and regulations.

3.2 Step-by-Step Installation Guide

Begin by carefully unpacking and inspecting the oven for damage. Ensure the installation area is level and meets all specified clearances. Connect the electrical and gas lines according to the manufacturer’s instructions. Install the anti-tip bracket to prevent accidental tipping. Secure the oven in place and test all functions to ensure proper operation. Always refer to local regulations and safety guidelines.

Operating the Oven

Understand the control panel functions, select cooking modes, and adjust settings for optimal results. Use the timer and clock features effectively to manage your cooking schedule.

4.1 Understanding the Control Panel

Familiarize yourself with the control panel’s layout and functions. Locate the temperature controls, timer, and mode selectors. Understand the display indicators and button functions to ensure precise operation. Refer to the manual for specific button roles and operation guidance to achieve desired cooking results efficiently. Proper use enhances cooking performance and safety.

4.2 Cooking Modes and Settings

The Frigidaire oven offers multiple cooking modes, including Bake, Roast, Broil, and Air Fry, each designed for specific cooking needs. Use the control panel to select modes and adjust settings like temperature and time. Air Fry mode allows crispy results with less oil, while Bake ensures even heating. Refer to the manual for detailed settings and optimal performance.

4.3 Using the Timer and Clock Functions

The Frigidaire oven features a user-friendly timer and clock for precise cooking control. Set the timer to monitor cooking time, ensuring dishes are ready when you need them. Adjust the clock to keep track of your schedule. Use these functions to enhance your cooking experience and ensure perfectly timed meals. Always refer to the manual for detailed operation instructions.

Maintenance and Care

Regular cleaning and proper care ensure your Frigidaire oven performs optimally. Wipe spills immediately to prevent residue buildup. Use recommended cleaners for the exterior and interior surfaces. Replace worn-out parts promptly to maintain efficiency and safety. Follow the manual’s guidelines for deep cleaning cycles and routine checks.

5.1 Cleaning the Oven Interior and Exterior

Regular cleaning is essential for maintaining your Frigidaire oven’s performance. Wipe the exterior with a damp cloth and mild detergent. For the interior, use the oven’s self-cleaning cycle or a gentle cleaner. Avoid harsh chemicals or abrasive scrubbers. Clean racks and shelves separately in warm soapy water. Always allow the oven to cool before cleaning to prevent burns. Refer to the manual for specific cleaning cycles.

5.2 Replacing Oven Parts and Accessories

Replace oven parts and accessories only with Frigidaire-approved components to ensure safety and maintain warranty validity. Turn off power before handling electrical components. For racks, shelves, or light bulbs, refer to the manual for specific instructions. Use gloves when handling sharp edges. Avoid using unauthorized parts, as they may damage the oven. Contact Frigidaire customer support for genuine replacements and guidance.

Troubleshooting Common Issues

This section helps identify and resolve common oven issues, ensuring optimal performance. From error codes to operational problems, find practical solutions here for your Frigidaire oven.

6.1 Identifying and Resolving Common Problems

This section provides detailed guidance on identifying common issues with your Frigidaire oven, such as uneven heating or error codes, and offers practical solutions to resolve them effectively. By following these steps, you can troubleshoot and fix problems quickly, ensuring your oven operates smoothly and efficiently. Regular maintenance is key to preventing these issues.

6.2 Understanding Error Codes and Solutions

This section explains how to interpret error codes displayed on your Frigidaire oven, such as “E1” or “E2,” and provides step-by-step solutions to resolve them. Common issues include faulty sensors or temperature mismatches. By understanding these codes, you can quickly diagnose and fix problems, ensuring your oven operates efficiently. Always consult the manual for a full list of codes and solutions.

Advanced Cooking Techniques

Discover advanced methods to enhance your cooking experience, including optimizing baking results and utilizing special features like Air Fry for crispy, healthier dishes.

7.1 Optimizing Baking and Roasting Results

For perfect baking and roasting, ensure proper preheating and use the correct bakeware. Maintain accurate temperatures and avoid overcrowding pans. Place food centrally for even cooking. Use convection mode to enhance browning and crispiness. Regularly rotate dishes for consistent results. Follow these tips to achieve professional-quality outcomes with your Frigidaire oven.

7.2 Using Special Features like Air Fry

The Air Fry feature allows for crispy cooking with minimal oil. Place food in a single layer on the oven rack for even air circulation. Preheat the oven to 400°F (200°C). Set the timer and temperature via the control panel. Use this feature for healthier frying options without compromising flavor. Achieve restaurant-quality results effortlessly.

Warranty and Customer Support

Frigidaire offers a comprehensive warranty program, covering parts and labor for a specified period. Contact customer support at 1-800-944-9044 for assistance or visit the official website.

8.1 Warranty Information and Coverage

The Frigidaire oven warranty typically covers parts and labor for up to one year from purchase. Extended warranties may be available for additional coverage. Contact Frigidaire’s customer service to review specific terms and conditions. Proper registration and maintenance are required to ensure warranty validity.

8.2 Contacting Frigidaire Customer Service

For assistance, contact Frigidaire Customer Service at 1-800-944-9044 or visit their official website. The support center operates Monday to Friday, 8:30 AM to 8 PM EST. Registered users can access exclusive resources and troubleshooting guides. Visit www.frigidaire.com/support for online chat, FAQs, and service scheduling options. Ensure to have your appliance model number ready for efficient support.

Environmental and Energy Considerations

This section focuses on eco-friendly practices, energy efficiency, and proper disposal methods. Follow guidelines for recycling packaging and safely disposing of old appliances. Visit www.frigidaire.com for more details on sustainable usage and reducing energy consumption.

9.1 Energy Efficiency Tips

To maximize energy efficiency, use your Frigidaire oven’s features wisely. Preheat only when necessary and opt for convection cooking to reduce time. Keep the oven door closed during operation and avoid opening it frequently. Regularly clean the oven to ensure optimal performance. Using a timer helps prevent overcooking, saving energy. Always refer to the user manual for specific settings.

9.2 Proper Disposal of Packaging and Old Appliances

Ensure environmentally responsible disposal of packaging and old appliances. Recycle cardboard, plastic, and metal materials whenever possible. For old appliances, check local regulations or recycling centers that accept large household items. Properly dispose of hazardous materials like batteries or electronic components. Always follow community guidelines to minimize environmental impact and promote sustainable practices.

Final Tips for Maximum Performance

Regularly check and clean your oven to maintain efficiency. Use recommended cookware and follow guidelines for optimal results. Ensure proper ventilation and adherence to manufacturer recommendations for longevity.

10.1 Regular Maintenance for Longevity

To ensure your Frigidaire oven lasts, clean the interior and exterior regularly. Remove food residue to prevent damage. Check and replace worn-out parts promptly. Descale water tanks if applicable. Always follow the recommended maintenance schedule in your manual. This helps maintain performance, prevent malfunctions, and extend the lifespan of your appliance. Proper care ensures consistent results.

10.2 Staying Updated with Manufacturer Guidelines

Regularly check Frigidaire’s official website for updates, recalls, or new guidelines. Register your appliance to receive notifications and access the latest manuals. Follow recommended maintenance schedules and safety alerts to ensure optimal performance. Staying informed helps you leverage new features, improve safety, and maintain your oven’s efficiency. Visit Frigidaire’s support page for the most accurate and up-to-date information.